Salta al contenuto principale

Blackberry Torch 9810 Rear Facing Camera Replacement

Cosa ti serve

  1. Blackberry Torch 9810 Rear Facing Camera Replacement, Remove Cover: passo 1, immagine 1 di 2 Blackberry Torch 9810 Rear Facing Camera Replacement, Remove Cover: passo 1, immagine 2 di 2
    • Remove the back cover of the phone

  2. Blackberry Torch 9810 Rear Facing Camera Replacement, Remove Battery: passo 2, immagine 1 di 1
    • Remove the battery

    • Our phone did not come with a battery. This is where it would be located.

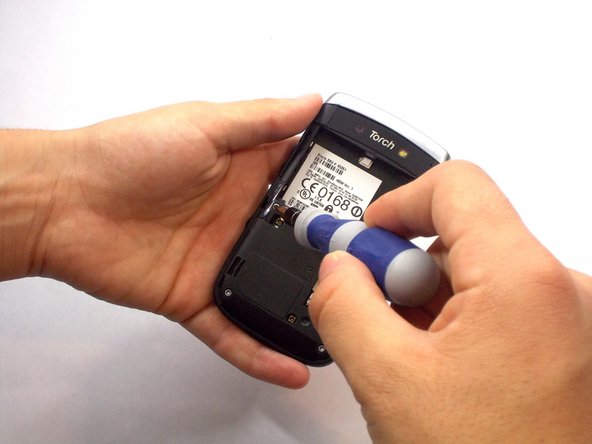
  3. Blackberry Torch 9810 Rear Facing Camera Replacement, Unscrew Screws: passo 3, immagine 1 di 2 Blackberry Torch 9810 Rear Facing Camera Replacement, Unscrew Screws: passo 3, immagine 2 di 2
    • Unscrew the four screws using the T6 screw driver

    • If you remove the screw in red, you void the warranty!

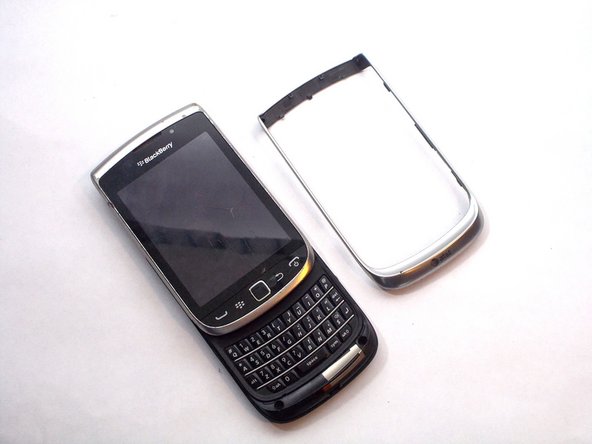
  4. Blackberry Torch 9810 Rear Facing Camera Replacement, Wiggle Wiggle: passo 4, immagine 1 di 2 Blackberry Torch 9810 Rear Facing Camera Replacement, Wiggle Wiggle: passo 4, immagine 2 di 2
    • Remove front silver trim by using plastic opening tools and wiggle it off.

    • (This is a little difficult to remove) Pull the bottom upward and pull the top downward.

  5. Blackberry Torch 9810 Rear Facing Camera Replacement, Smaller Screws That Must Go: passo 5, immagine 1 di 1
    • Once you remove the rim cover, you should find two more screws on the top. Unscrew them using the T6 screw driver.

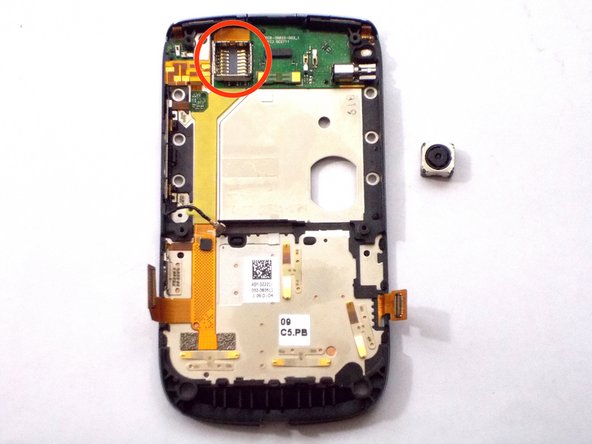
  6. Blackberry Torch 9810 Rear Facing Camera Replacement, Camera Sensor: passo 6, immagine 1 di 2 Blackberry Torch 9810 Rear Facing Camera Replacement, Camera Sensor: passo 6, immagine 2 di 2
    • Use the Phillip screw driver to wiggle the camera sensor out.

    • Carefully remove this

Conclusione

To reassemble your device, follow these instructions in reverse order.

Un'altra persona ha completato questa guida.

Team

0 Commenti

Aggiungi Commento

Visualizza Statistiche:

Ultime 24 Ore: 1

Ultimi 7 Giorni: 3

Ultimi 30 Giorni: 3

Tutti i Tempi: 1,099