Questa versione può contenere modifiche errate. Passa all'ultima istantanea verificata.
Cosa ti serve
-
Questo passaggio è privo di traduzione. Aiuta a tradurlo
-
Turn the phone upside down.
-
Push down on the black button on the back of the phone to slide the rear panel off.
-
The battery should be visible now.
-
-
Questo passaggio è privo di traduzione. Aiuta a tradurlo
-
Hold the BlackBerry in one hand face-up with the screen facing towards you.
-
-
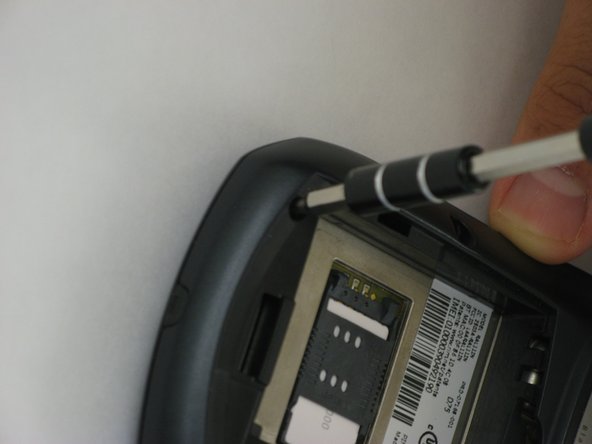
Questo passaggio è privo di traduzione. Aiuta a tradurlo
-
Use a T6 Torx screwdriver to remove the six screws located on the rear of the phone.
-
-
-
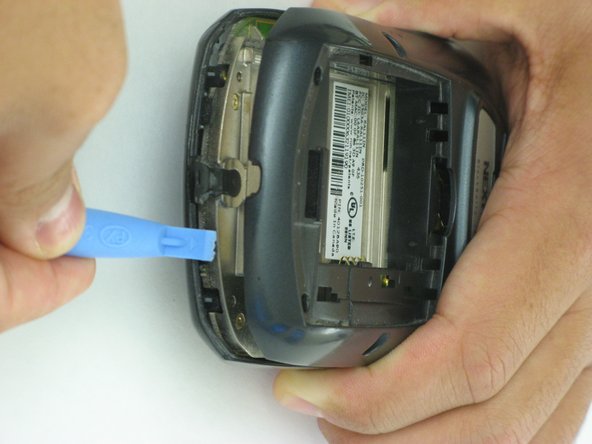
Questo passaggio è privo di traduzione. Aiuta a tradurlo
-
Use a pick or plastic iPod opening tool to push the clips, that are holding the rear casing. Apply a firm pressure at a forty-five degree angle to dislodge the clips.
-
-
Questo passaggio è privo di traduzione. Aiuta a tradurlo
-
Repeat the process of unlatching the clips for the top section of the Blackberry.
-
-
Questo passaggio è privo di traduzione. Aiuta a tradurlo
-
Separating the two halves allows you to access the speaker. Which is located in the front half of the case.
-
-
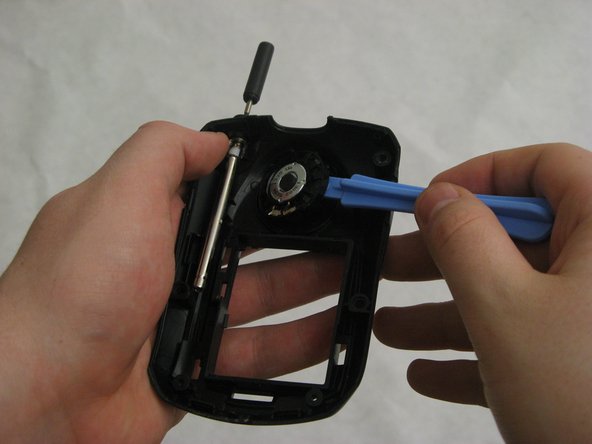
Questo passaggio è privo di traduzione. Aiuta a tradurlo
-
Insert a plastic opening tool between the speaker and the case. Then pry the speaker out.
-
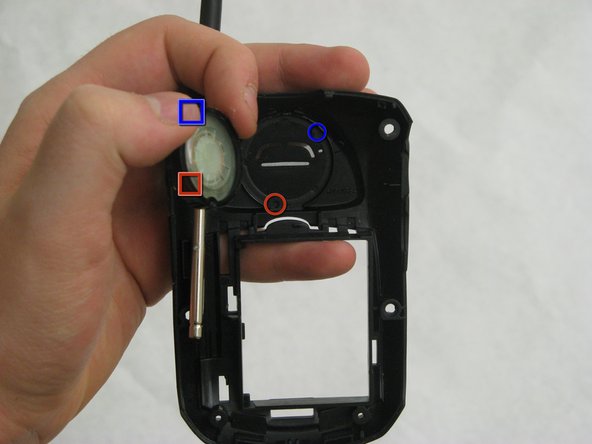
To reinsert the speaker, align the blue notch to the blue stud. Then the red notch to the red stud. As shown in the last picture.
-


Team

Cal Poly, Team 5-7, Forte Winter 2010 Membro di Cal Poly, Team 5-7, Forte Winter 2010
CPSU-FORTE-W10S5G7
5 Membri
9 Guide realizzate