Questa versione può contenere modifiche errate. Passa all'ultima istantanea verificata.
Cosa ti serve
-
Questo passaggio è privo di traduzione. Aiuta a tradurlo
-
Remove the battery cover by applying pressure and sliding down the silver square on the back of the phone.
-
-
Questo passaggio è privo di traduzione. Aiuta a tradurlo
-
Remove the battery by prying under it with your finger or the plastic opening tool.
-
Remove the four small 3/8" long screws using a 1/16" diameter torx screwdriver.
-
-
Questo passaggio è privo di traduzione. Aiuta a tradurlo
-
Use a nylon spudger to carefully remove the two side bars of plastic.
-
-
-
Questo passaggio è privo di traduzione. Aiuta a tradurlo
-
Use a nylon spudger to carefully pry the back casing off.
-
-
Questo passaggio è privo di traduzione. Aiuta a tradurlo
-
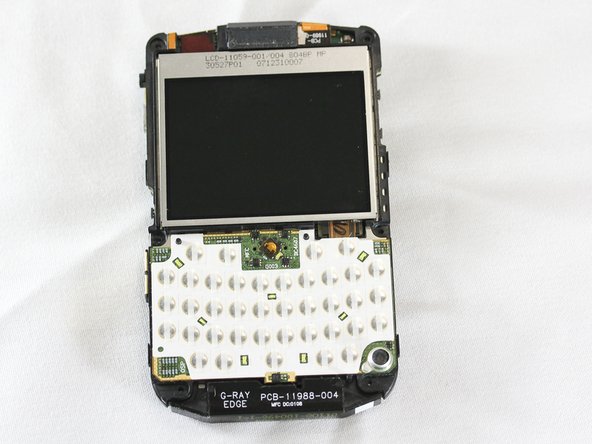
After disassembling the outer casing, the phone should be stripped as shown.
-
-
Questo passaggio è privo di traduzione. Aiuta a tradurlo
-
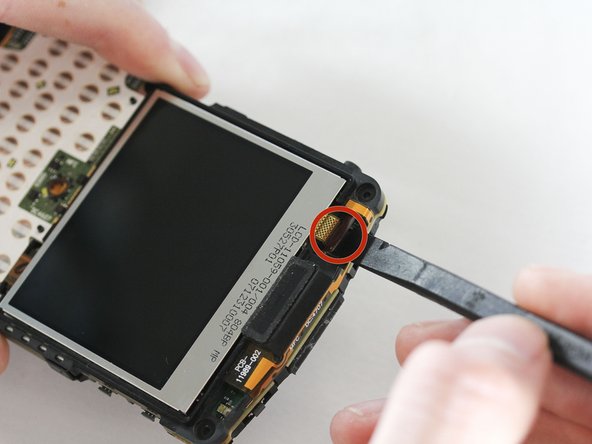
At the top of the phone, locate the gloss SATA cable strap connecting the LCD screen to the phone.
-
Using the prying tool, unattach this cable by levering under the connector.
-
-
Questo passaggio è privo di traduzione. Aiuta a tradurlo
-
Using the prying tool, lever up the old screen as shown.
-
-
Questo passaggio è privo di traduzione. Aiuta a tradurlo
-
Insert new LCD screen.
-
Attach cable to the connector located at the top of the phone.
-
Phone should look as it was prior to screen removal.
-


Team

Cal Poly, Team 13-64, Johann Spring 2013 Membro di Cal Poly, Team 13-64, Johann Spring 2013
CPSU-JOHANN-S13S13G64
4 Membri
7 Guide realizzate