Questa versione può contenere modifiche errate. Passa all'ultima istantanea verificata.
Cosa ti serve
-
Questo passaggio è privo di traduzione. Aiuta a tradurlo
-
Apply pressure to the lock button on the back of the device.
-
Slide the battery cover down towards the bottom of the device, revealing the battery compartment.
-
-
Questo passaggio è privo di traduzione. Aiuta a tradurlo
-
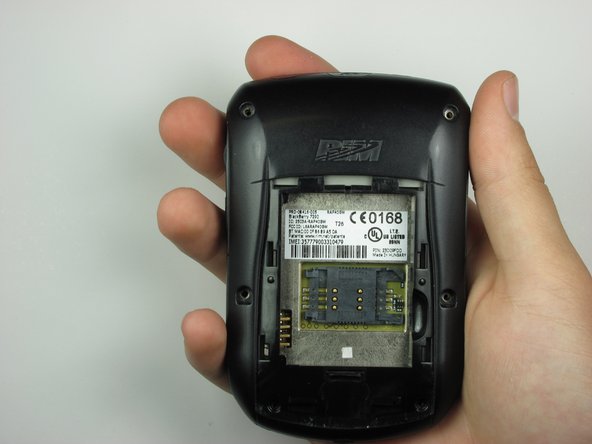
Locate groove along the right side of the battery compartment.
-
Remove battery by prying between the battery and the groove.
-
-
Questo passaggio è privo di traduzione. Aiuta a tradurlo
-
Slide the SIM card holder to the left to unlock the SIM card.
-
-
-
Questo passaggio è privo di traduzione. Aiuta a tradurlo
-
Lift the SIM card holder up.
-
Gently remove the SIM card from the SIM card holder by sliding the card along the railing.
-
-
Questo passaggio è privo di traduzione. Aiuta a tradurlo
-
Locate the four screws along the perimeter of the back casing.
-
Remove the four top screws using a T-6 torx screwdriver.
-
-
Questo passaggio è privo di traduzione. Aiuta a tradurlo
-
Locate two screws within the lower edge of the inner compartment.
-
Remove the two bottom screws using a T-6 torx screwdriver.
-
-
Questo passaggio è privo di traduzione. Aiuta a tradurlo
-
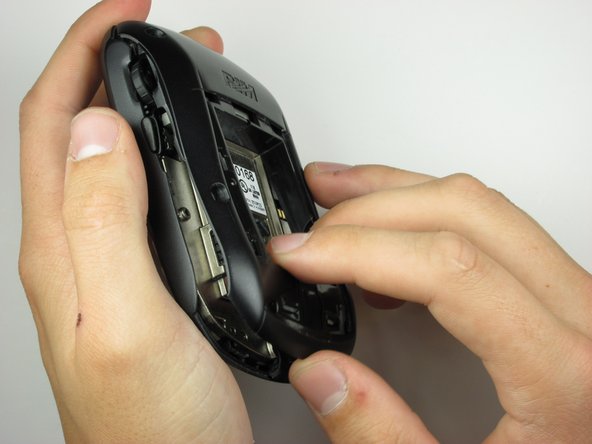
Use the plastic opening tool to apply pressure on the two clips that are located at the bottom of the phone.
-
-
Questo passaggio è privo di traduzione. Aiuta a tradurlo
-
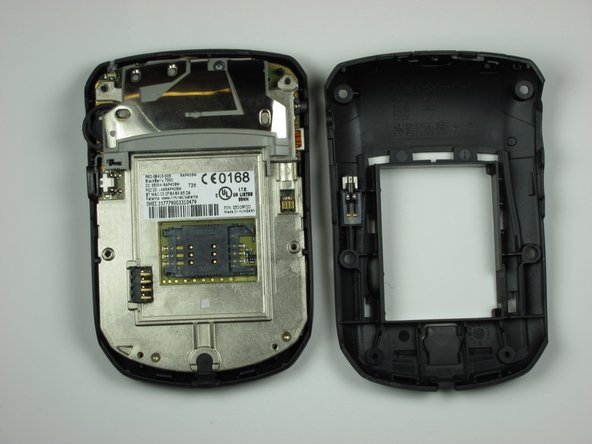
Remove the back casing from the phone by lifting the unhooked portion, then slide the casing towards the top of the device.
-
-
Questo passaggio è privo di traduzione. Aiuta a tradurlo
-
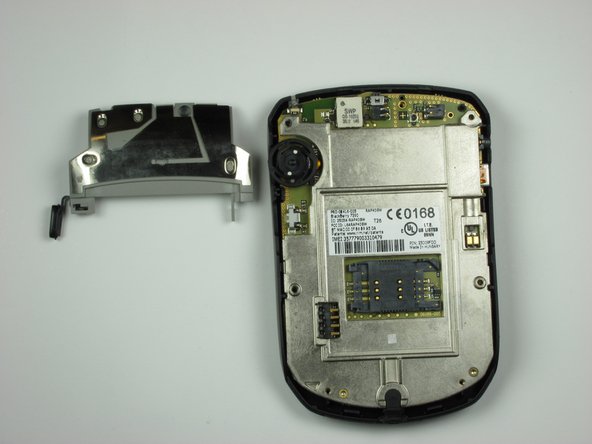
Locate on the backside of the phone, a screw towards the top of the device.
-
Using a T-6 screwdriver, remove the screw.
-
After the screw has been removed, carefully lift the side button brace to reveal the side button.
-


Team

Cal Poly, Team 19-6, Maness Fall 2009 Membro di Cal Poly, Team 19-6, Maness Fall 2009
CPSU-MANESS-F09S19G6
5 Membri
7 Guide realizzate