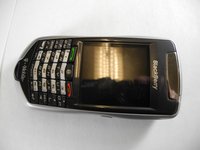
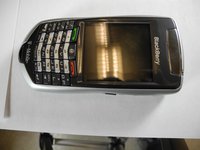
Salta al contenuto principale

BlackBerry 7105t LCD Replacement

Cosa ti serve

  1. BlackBerry 7105t LCD Replacement, Blackberry 7105t Disassembly: passo 1, immagine 1 di 1
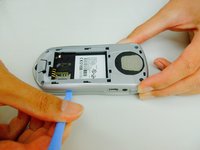
    • With the back of the device facing you, press down on the button while sliding the battery casing away from the speaker to remove it.

  2. BlackBerry 7105t LCD Replacement: passo 2, immagine 1 di 1
    • Use a plastic opening tool or fingernails to unclip the two hinges of the speaker covering and remove it.

  3. BlackBerry 7105t LCD Replacement: passo 3, immagine 1 di 1
    • Remove the battery by pushing against it from the right and then pulling towards you.

  4. BlackBerry 7105t LCD Replacement: passo 4, immagine 1 di 1
    • Remove the four screws indicated in the picture with a #T6 Torx Bit screwdriver and set them aside.

  5. BlackBerry 7105t LCD Replacement: passo 5, immagine 1 di 3 BlackBerry 7105t LCD Replacement: passo 5, immagine 2 di 3 BlackBerry 7105t LCD Replacement: passo 5, immagine 3 di 3
    • Use a plastic opening tool or your fingernails to remove the plastic backing.

    • Start with the seam indicated in the picture and slide the plastic opening tool until the case is seperated.

  6. BlackBerry 7105t LCD Replacement: passo 6, immagine 1 di 1
    • Unscrew the four screws indicated in the picture with #T6 Torx Bit screwdriver.

    • Place the four screws released from the phone in a plastic bag.

  7. BlackBerry 7105t LCD Replacement: passo 7, immagine 1 di 1
    • The black battery casing and logic board can now be separated for the following steps.

  8. BlackBerry 7105t LCD Replacement, Second Disassembly: passo 8, immagine 1 di 1
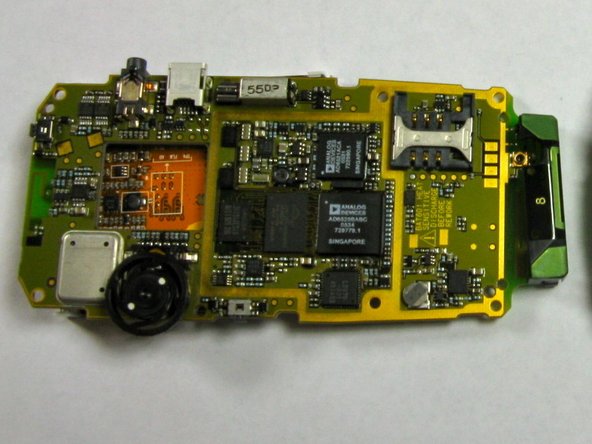
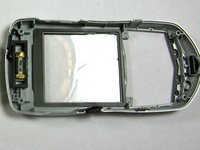
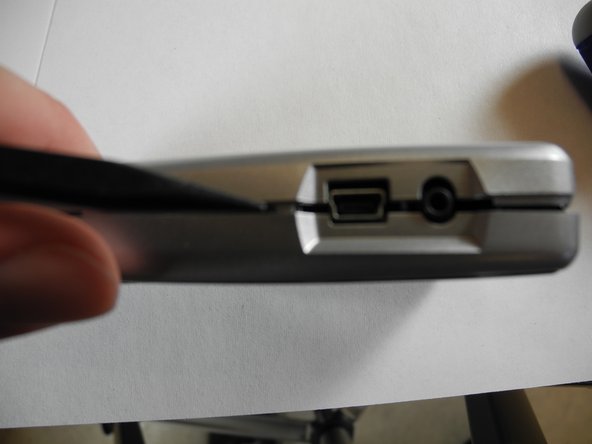
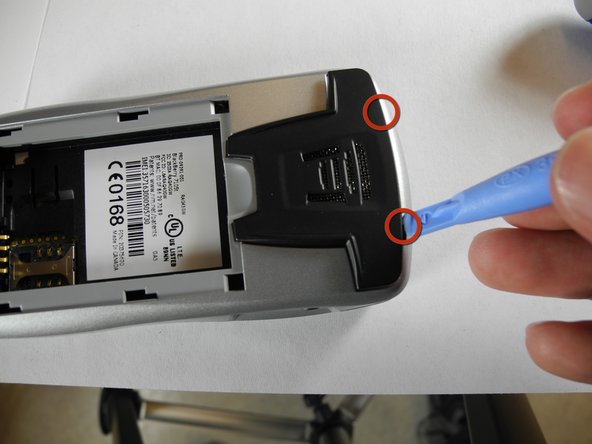
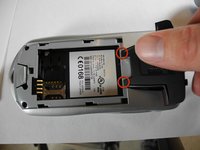
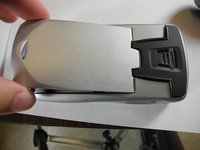
    • The silver piece is not attached to the logic board in any way, and can be taken off by lifting it up with plastic opening tools.

    • Warning: Some of the phones have an adhesive between the silver part and the battery housing, so it could stick to the black piece you just removed.

  9. BlackBerry 7105t LCD Replacement, LCD: passo 9, immagine 1 di 1
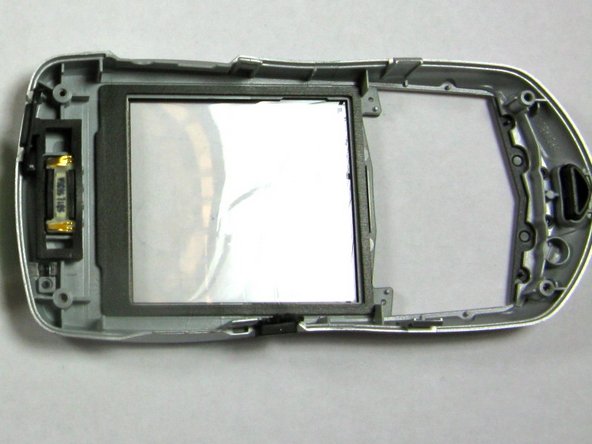
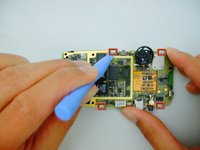
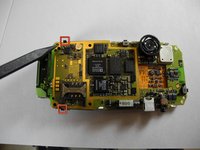
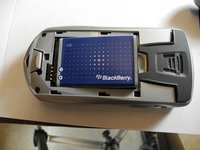
    • With the screen facing you, you will be able to see a small grey plastic clip.

    • Use a plastic opening tool to unfasten the clip as shown.

  10. BlackBerry 7105t LCD Replacement: passo 10, immagine 1 di 2 BlackBerry 7105t LCD Replacement: passo 10, immagine 2 di 2
    • Flip the logic board over to the other side.

    • Use a plastic opening tool unclip the top two clips shown in red, and then the bottom two clips. This releases the screen.

    • Flip logic board over and remove screen.

    • Make sure to hold the screen, it could fall after being unclipped.

  11. BlackBerry 7105t LCD Replacement: passo 11, immagine 1 di 1
    • NOTE: If you are not replacing the LCD screen, move on to the next step.

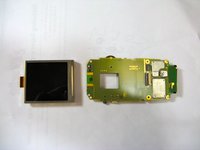
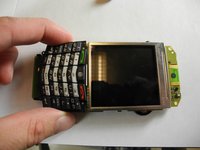
    • After removing the original screen, keep the logic board facing you the way it was.

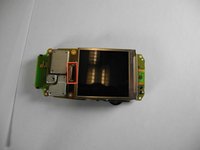
    • Take the new screen and slip the flexible piece of connecting circuitry under the grey plastic flap that you pried up in step 10.

    • Handle the screen carefully as it is fragile.

    • Push it gently but firmly until it does not move any further to the left, then close the grey flap.

    • After this, the screen can be pushed down and clicked back into place.

    • To reassemble the phone, reverse instructions.

  12. BlackBerry 7105t LCD Replacement, BlackBerry 7105t: passo 12, immagine 1 di 2 BlackBerry 7105t LCD Replacement, BlackBerry 7105t: passo 12, immagine 2 di 2
    • Handle the screen carefully as it is fragile.

    • Push the screen gently but firmly until the connecting cable does not move any further to the left, then close the grey flap.

    • Push the screen down until it clicks into place.

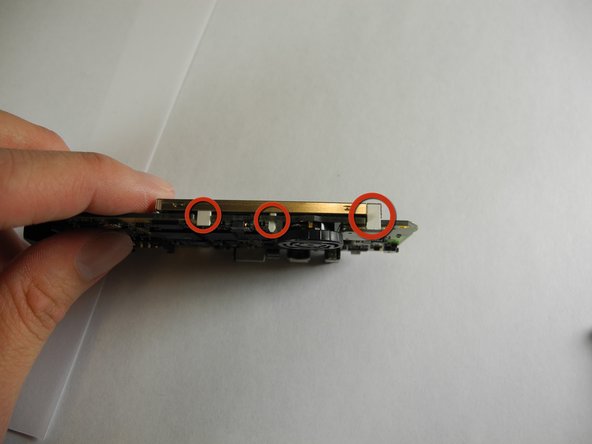
    • Be sure to check that the white clips are aligned on each side before continuing.

  13. BlackBerry 7105t LCD Replacement: passo 13, immagine 1 di 2 BlackBerry 7105t LCD Replacement: passo 13, immagine 2 di 2
    • Reattach Keyboard.

    • Flip phone over to the backside.

    • Make sure black clips on the back of the logic board click and are aligned.

  14. BlackBerry 7105t LCD Replacement: passo 14, immagine 1 di 1
    • Reattach black plate with the four screws

  15. BlackBerry 7105t LCD Replacement: passo 15, immagine 1 di 2 BlackBerry 7105t LCD Replacement: passo 15, immagine 2 di 2
    • Reattach the front and back covers starting with the front.

    • Make sure side clips are not overlapping on the outside.

  16. BlackBerry 7105t LCD Replacement: passo 16, immagine 1 di 1
    • Screw and tighten the four screws on the back side of the phone.

  17. BlackBerry 7105t LCD Replacement: passo 17, immagine 1 di 2 BlackBerry 7105t LCD Replacement: passo 17, immagine 2 di 2
    • Reattach speaker covering as shown.

    • Using the Ipod opening tool, press the two clips on the top side of the speaker covering until they slip into the notch.

    • Warning: The clips are fragile, do not apply excessive force.

  18. BlackBerry 7105t LCD Replacement: passo 18, immagine 1 di 3 BlackBerry 7105t LCD Replacement: passo 18, immagine 2 di 3 BlackBerry 7105t LCD Replacement: passo 18, immagine 3 di 3
    • Insert Battery

    • Replace cover

Linea Traguardo

JamOrd5

Membro da: 11/15/12

101 Reputazione

1 Guida realizzata

0 Commenti

Aggiungi Commento

Visualizza Statistiche:

Ultime 24 Ore: 0

Ultimi 7 Giorni: 0

Ultimi 30 Giorni: 1

Tutti i Tempi: 364