Salta al contenuto principale

Black and Decker PS1800 Transmission Replacement

Cosa ti serve

  1. Black and Decker PS1800 Transmission Replacement, Open the Outer Drill Case: passo 1, immagine 1 di 2 Black and Decker PS1800 Transmission Replacement, Open the Outer Drill Case: passo 1, immagine 2 di 2
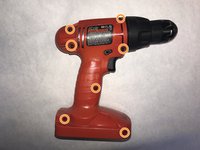
    • Lay the drill on its side, assuring that the screw holes are facing upwards.

    • Remove seven 12 mm screws using a Phillips #00 screwdriver.

  2. Black and Decker PS1800 Transmission Replacement: passo 2, immagine 1 di 1
    • Separate the outer drill case to expose the components and switch.

  3. Black and Decker PS1800 Transmission Replacement, Disconnect Motor: passo 3, immagine 1 di 3 Black and Decker PS1800 Transmission Replacement, Disconnect Motor: passo 3, immagine 2 di 3 Black and Decker PS1800 Transmission Replacement, Disconnect Motor: passo 3, immagine 3 di 3
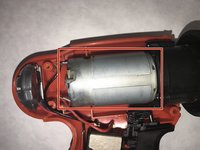
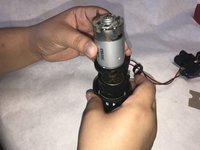
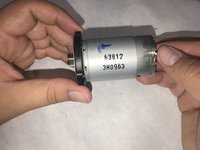
    • Locate the motor at the top left hand corner.

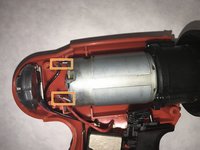
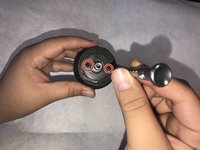
    • Carefully disconnect the red and black wires attached to the motor.

  4. Black and Decker PS1800 Transmission Replacement: passo 4, immagine 1 di 1
    • Unscrew the motor from the drill's transmission.

    • Detach the transmission carefully, ensuring that the gears remain intact.

  5. Black and Decker PS1800 Transmission Replacement: passo 5, immagine 1 di 2 Black and Decker PS1800 Transmission Replacement: passo 5, immagine 2 di 2
    • Remove the motor from the transmission assembly, as pictured.

  6. Black and Decker PS1800 Transmission Replacement, Transmission: passo 6, immagine 1 di 3 Black and Decker PS1800 Transmission Replacement, Transmission: passo 6, immagine 2 di 3 Black and Decker PS1800 Transmission Replacement, Transmission: passo 6, immagine 3 di 3
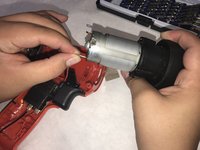
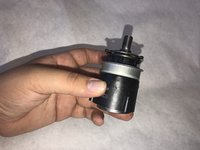
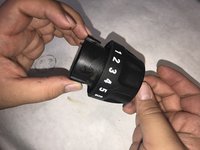
    • Unscrew the torque adjuster from the transmission by removing the screws highlighted in the lefthand picture.

  7. Black and Decker PS1800 Transmission Replacement: passo 7, immagine 1 di 1
    • Align the new transmission gears with the motor’s gears.

    • Reattach the transmission and motor by rescrewing the initial screws.

  8. Black and Decker PS1800 Transmission Replacement: passo 8, immagine 1 di 2 Black and Decker PS1800 Transmission Replacement: passo 8, immagine 2 di 2
    • Reconnect the torque adjuster to the transmission by following the procedure seen in step 6.

  9. Black and Decker PS1800 Transmission Replacement: passo 9, immagine 1 di 1
    • Reconnect black and red wires onto the motor and place the motor, transmission and torque adjuster back onto their initial location.

  10. Black and Decker PS1800 Transmission Replacement: passo 10, immagine 1 di 1
    • Reconnect the clamshell.

    • Press trigger to make sure the new transmission works.

    • Press and hold the clam-shell to assure it will not drop while testing.

Conclusione

To reassemble your device, follow these instructions in reverse order.

David Nawl

Membro da: 10/19/16

237 Reputazione

2 Guide realizzate

Team

IUPUI, Team 2-3, Baechle Fall 2016 Membro di IUPUI, Team 2-3, Baechle Fall 2016

IUPUI-BAECHLE-F16S2G3

5 Membri

6 Guide realizzate

0 Commenti

Aggiungi Commento

Visualizza Statistiche:

Ultime 24 Ore: 0

Ultimi 7 Giorni: 0

Ultimi 30 Giorni: 5

Tutti i Tempi: 1,430