Questa versione può contenere modifiche errate. Passa all'ultima istantanea verificata.
Cosa ti serve
-
Questo passaggio è privo di traduzione. Aiuta a tradurlo
-
Use the nylon spudger to remove the rubber ring from the filter attachment section.
-
-
Questo passaggio è privo di traduzione. Aiuta a tradurlo
-
Use the TR20 Torx Security bit driver to unscrew the five 18.75mm Phillips screws from the warning label side of the chassis.
-
-
Questo passaggio è privo di traduzione. Aiuta a tradurlo
-
Grab the plastic opening tool and place it on the separation line between both sides of the chassis.
-
Separate both sides and open the device.
-
-
Questo passaggio è privo di traduzione. Aiuta a tradurlo
-
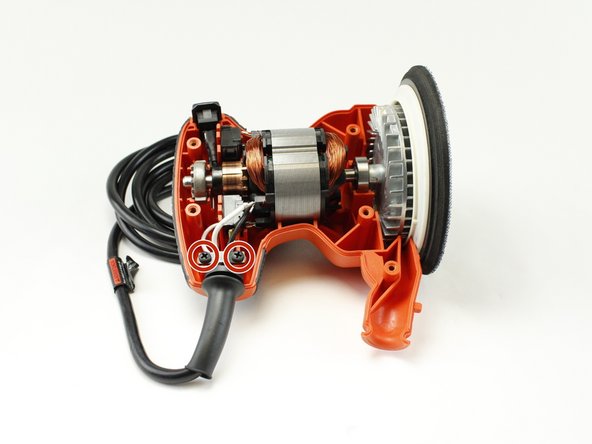
Hold the chassis and separate it from the device.
-
-
-
Questo passaggio è privo di traduzione. Aiuta a tradurlo
-
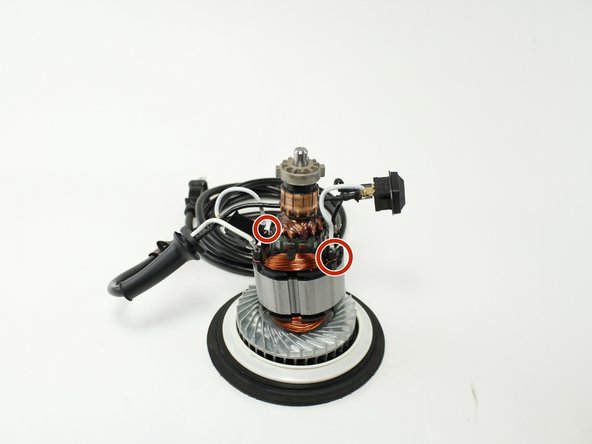
Use the bit driver with the JIS - J1 bit to remove the two 12.5 mm phillips screws holding the cord clamp to the chassis.
-
-
Questo passaggio è privo di traduzione. Aiuta a tradurlo
-
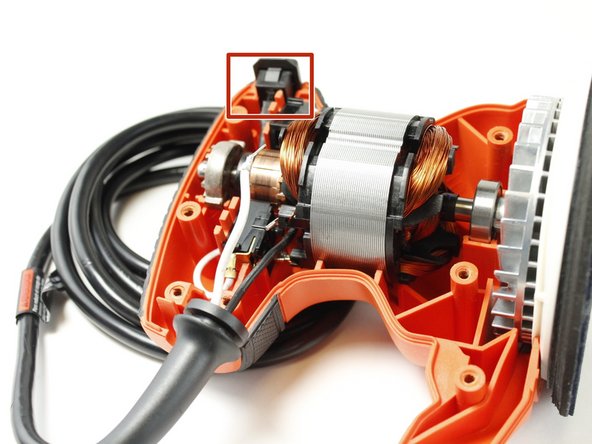
With yout hands, hold and separate the power button from the external case by pulling gently.
-
-
Questo passaggio è privo di traduzione. Aiuta a tradurlo
-
Identify the white cables connected to the holder brush and spring.
-
-
Questo passaggio è privo di traduzione. Aiuta a tradurlo
-
Hold the motor and gently pull to remove from chassis.
-
-
Questo passaggio è privo di traduzione. Aiuta a tradurlo
-
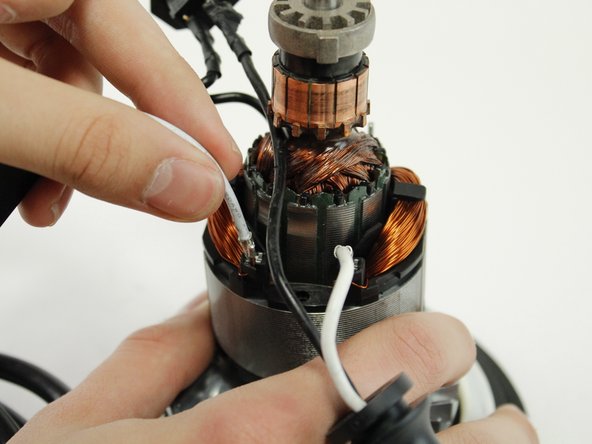
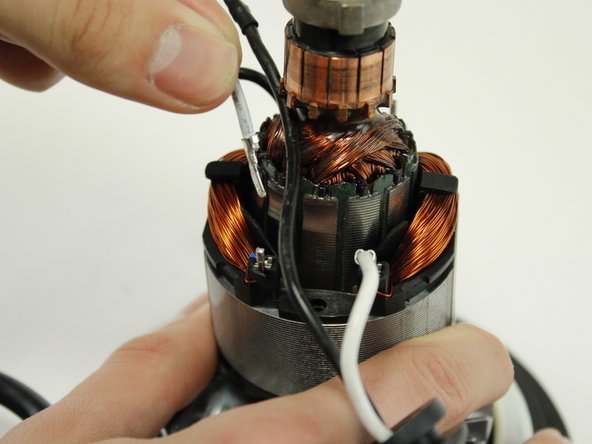
Remove the wire connected to the brush holder from the motor by pulling gently.
-
-
Questo passaggio è privo di traduzione. Aiuta a tradurlo
-
Remove the wire connected to the brush holder from the motor by pulling gently.
-


Annulla: non ho completato questa guida.
Un'altra persona ha completato questa guida.
Team

USF Tampa, Team 1-5, Sullivan Spring 2016 Membro di USF Tampa, Team 1-5, Sullivan Spring 2016
USFT-SULLIVAN-S16S1G5
4 Membri
6 Guide realizzate