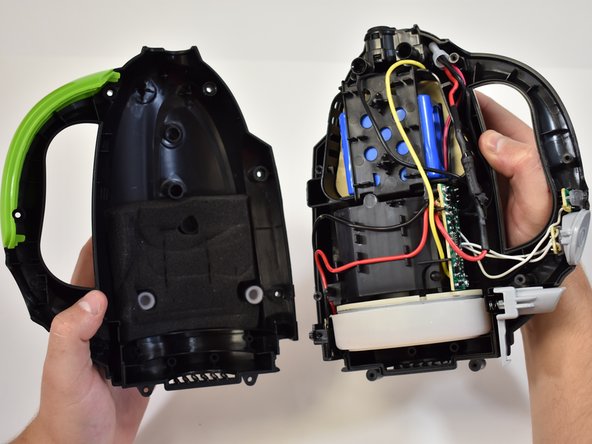
Salta al contenuto principale

Bissell Pet Hair Eraser Motherboard Replacement

Cosa ti serve

  1. Bissell Pet Hair Eraser Motherboard Replacement, Dirt Cup: passo 1, immagine 1 di 2 Bissell Pet Hair Eraser Motherboard Replacement, Dirt Cup: passo 1, immagine 2 di 2
    • Firmly grasp the handle and press the release button.

    • Gently pull the dirt cup down and away from the vacuum body.

  2. Bissell Pet Hair Eraser Motherboard Replacement, Power Button: passo 2, immagine 1 di 2 Bissell Pet Hair Eraser Motherboard Replacement, Power Button: passo 2, immagine 2 di 2
    • Remove the six 1.2 mm Philips #2 screws from the handle and base.

  3. Bissell Pet Hair Eraser Motherboard Replacement: passo 3, immagine 1 di 2 Bissell Pet Hair Eraser Motherboard Replacement: passo 3, immagine 2 di 2
    • Grasp each half of the body and gently pull apart.

    • The green handle, power button, charge light lens, and dirt cup release are not fastened in place.

    • Once the case is split apart these items may come dislodged.

  4. Bissell Pet Hair Eraser Motherboard Replacement: passo 4, immagine 1 di 3 Bissell Pet Hair Eraser Motherboard Replacement: passo 4, immagine 2 di 3 Bissell Pet Hair Eraser Motherboard Replacement: passo 4, immagine 3 di 3
    • The power button can be removed by gently lifting it off the circuitry.

  5. Bissell Pet Hair Eraser Motherboard Replacement, Motherboard: passo 5, immagine 1 di 2 Bissell Pet Hair Eraser Motherboard Replacement, Motherboard: passo 5, immagine 2 di 2
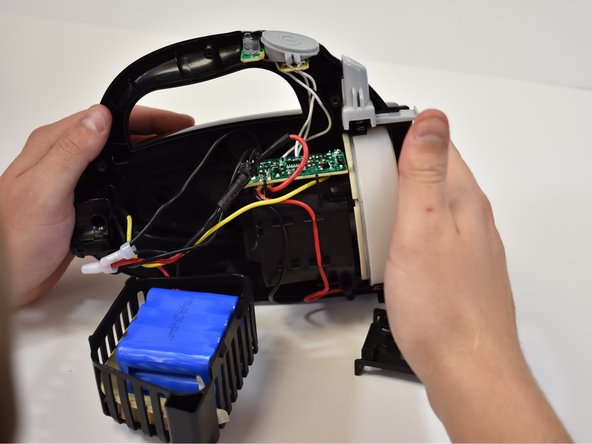
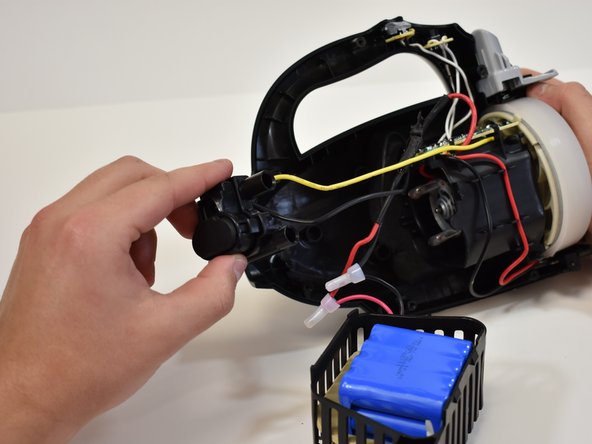
    • Remove the battery plastic hold down by lifting it off the tabs.

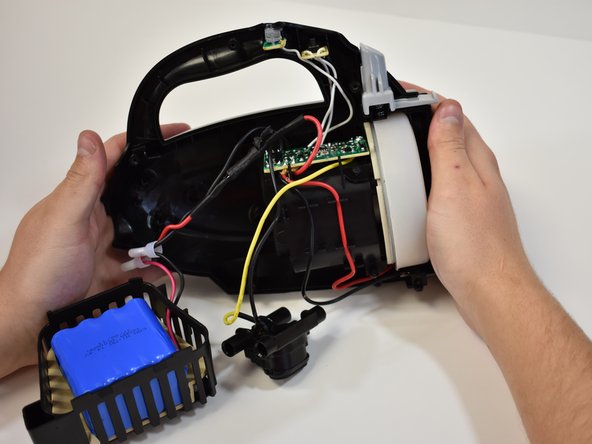
    • Remove the battery by lifting straight up.

    • Position the battery aside.

  6. Bissell Pet Hair Eraser Motherboard Replacement: passo 6, immagine 1 di 3 Bissell Pet Hair Eraser Motherboard Replacement: passo 6, immagine 2 di 3 Bissell Pet Hair Eraser Motherboard Replacement: passo 6, immagine 3 di 3
    • Grasp the charger port and remove it by lifting it straight out of the case.

    • Set the charger port next to the battery.

  7. Bissell Pet Hair Eraser Motherboard Replacement: passo 7, immagine 1 di 2 Bissell Pet Hair Eraser Motherboard Replacement: passo 7, immagine 2 di 2
    • Remove the power button and charge LED light by gently pulling straight out of the case.

    • The vacuum motor can be removed by pulling straight out of the case.

    • All internals are now removed.

    • Set the case halves aside.

  8. Bissell Pet Hair Eraser Motherboard Replacement: passo 8, immagine 1 di 1
    • Remove the two 1 mm Phillips #2 screws in the shown locations.

  9. Bissell Pet Hair Eraser Motherboard Replacement: passo 9, immagine 1 di 2 Bissell Pet Hair Eraser Motherboard Replacement: passo 9, immagine 2 di 2
    • Disconnect the power leads from the vacuum motor.

    • The red power lead goes on the terminal with the visible red dot.

Conclusione

To reassemble your device, follow these instructions in reverse order.

Un'altra persona ha completato questa guida.

0 Commenti

Aggiungi Commento

Visualizza Statistiche:

Ultime 24 Ore: 0

Ultimi 7 Giorni: 4

Ultimi 30 Giorni: 8

Tutti i Tempi: 356