Salta al contenuto principale

Bissell CrossWave Cordless Max 2554A Battery Assembly Replacement

Cosa ti serve

  1. Bissell CrossWave Cordless Max 2554A Battery Assembly Replacement, Battery Assembly: passo 1, immagine 1 di 2 Bissell CrossWave Cordless Max 2554A Battery Assembly Replacement, Battery Assembly: passo 1, immagine 2 di 2
    • Remove the four 16 mm Phillips #2 screws at the back of the vacuum and below the clean water tank.

  2. Bissell CrossWave Cordless Max 2554A Battery Assembly Replacement: passo 2, immagine 1 di 2 Bissell CrossWave Cordless Max 2554A Battery Assembly Replacement: passo 2, immagine 2 di 2
    • Pull the battery assembly away from the main body.

    • There are still wires connecting the battery assembly to the main body. Do not use force to completely separate the two objects.

  3. Bissell CrossWave Cordless Max 2554A Battery Assembly Replacement: passo 3, immagine 1 di 2 Bissell CrossWave Cordless Max 2554A Battery Assembly Replacement: passo 3, immagine 2 di 2
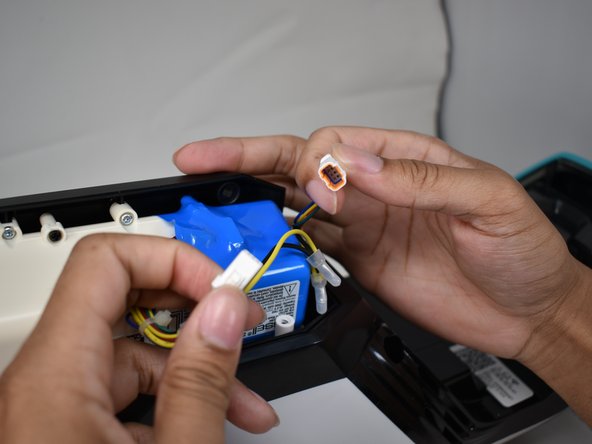
    • Detach the wires holding the battery assembly to the main body by pressing down on the clip holding the connector together.

Conclusione

To reassemble your device, follow these instructions in reverse order.

Kristen Gismondi

Membro da: 11/12/14

84.794 Reputazione

215 Guide realizzate

Team

iFixit Membro di iFixit

Staff

141 Membri

17.868 Guide realizzate

0 Commenti

Aggiungi Commento

Visualizza Statistiche:

Ultime 24 Ore: 0

Ultimi 7 Giorni: 4

Ultimi 30 Giorni: 21

Tutti i Tempi: 38