Introduzione
This guide will provide direction to replace the Beboncool Wireless Switch Pro Controller charging port. If the device is having trouble charging or keeping the charger in the adapter it may need replaced. This guide will assist in the disassembly of the controller to access the charging adapter for repair or replacement. This task is relatively safe, be cautious to not pull the wires too hard or puncture the battery while working in the area.
Cosa ti serve
-
-
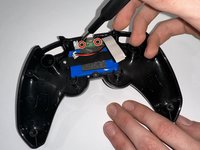
Use a Phillips #0 screwdriver to remove the seven 5 mm screws from the back of the controller.
-
-


To reassemble your device, follow these instructions in reverse order.
Team

Casper College, Team 1-3, Lareau Spring 2023 Membro di Casper College, Team 1-3, Lareau Spring 2023
CASC-LAREAU-S23S1G3
3 Membri
5 Guide realizzate