Salta al contenuto principale

Questa guida ha delle modifiche più recenti. Passa all'ultima versione non verificata.

Battery Replacement

Cosa ti serve

  1. Battery Replacement, Back Cover: passo 1, immagine 1 di 3 Battery Replacement, Back Cover: passo 1, immagine 2 di 3 Battery Replacement, Back Cover: passo 1, immagine 3 di 3
    • Insert the plastic opening tool into the middle of the bottom edge of the device. The tool should be inserted within the seam between the back and front covers.

    • Slide the opening tool to the right and slowly continue to separate the back cover from the device.

    • Avoid prying on the buttons, as they are easily damaged.

  2. Battery Replacement: passo 2, immagine 1 di 1
    • Pull the cover off of the device once about three quarters of the cover has been pried open using the plastic opening tool.

  3. Battery Replacement, Battery: passo 3, immagine 1 di 1
    • Remove masking tape from the battery.

  4. Battery Replacement: passo 4, immagine 1 di 3 Battery Replacement: passo 4, immagine 2 di 3 Battery Replacement: passo 4, immagine 3 di 3
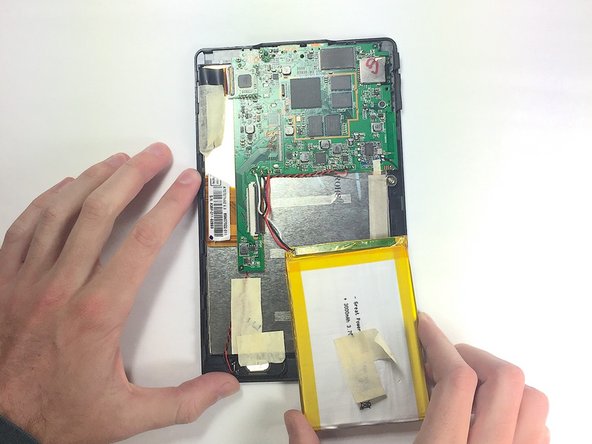
    • Pry the battery from the base using the nylon spudger and move it away from the motherboard.

    • Handle the battery with care to avoid damaging it.

  5. Battery Replacement: passo 5, immagine 1 di 3 Battery Replacement: passo 5, immagine 2 di 3 Battery Replacement: passo 5, immagine 3 di 3
Conclusione

To reassemble your device, follow these instructions in reverse order, being careful when re-soldering the contacts back into place.

Un'altra persona ha completato questa guida.

Team

Baylor, Team 4-1, Williams Fall 2016 Membro di Baylor, Team 4-1, Williams Fall 2016

BU-WILLIAMS-F16S4G1

4 Membri

14 Guide realizzate

0 Commenti

Aggiungi Commento

Visualizza Statistiche:

Ultime 24 Ore: 0

Ultimi 7 Giorni: 0

Ultimi 30 Giorni: 8

Tutti i Tempi: 698