Questa versione può contenere modifiche errate. Passa all'ultima istantanea verificata.
Cosa ti serve
-
Questo passaggio è privo di traduzione. Aiuta a tradurlo
-
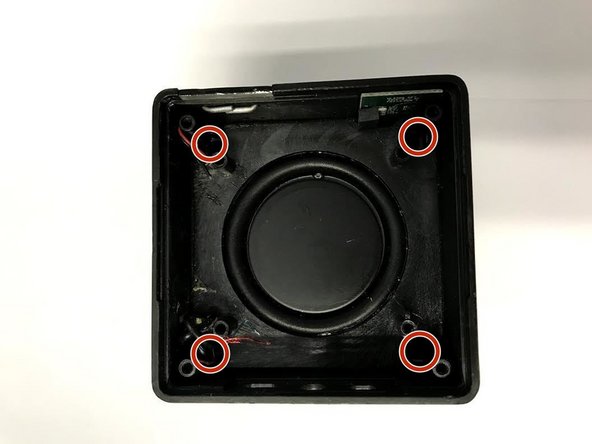
Pull back the rubber corners to uncover the bottom screws.
-
Continue this process for all four 10 mm screws.
-
-
Questo passaggio è privo di traduzione. Aiuta a tradurlo
-
Use the J0 screwdriver to remove all four 10mm screws from the bottom of the speaker.
-
-
Questo passaggio è privo di traduzione. Aiuta a tradurlo
-
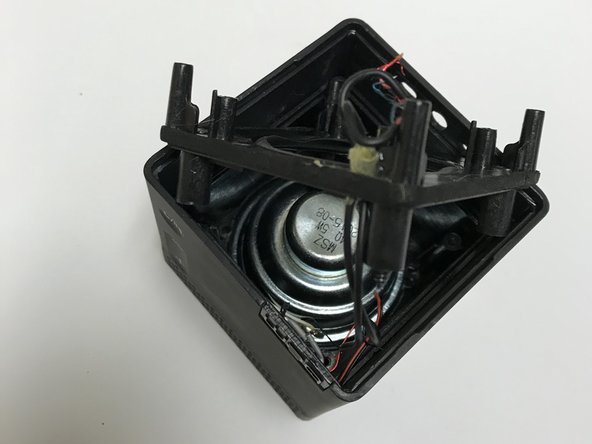
Remove the bottom cover of the speaker.
-
Remove all of the wires from the speakers internal chip, utilizing the tweezers.
-
-
Questo passaggio è privo di traduzione. Aiuta a tradurlo
-
Remove the speakers battery from its metal base, utilizing the plastic opening tool.
-
-
-
Questo passaggio è privo di traduzione. Aiuta a tradurlo
-
Remove the wires from the speakers battery using the tweezers or by gently removing them by lightly pinching.
-
-
Questo passaggio è privo di traduzione. Aiuta a tradurlo
-
Use the J0 screwdriver to remove all four 10mm screws from the motherboard.
-
-
Questo passaggio è privo di traduzione. Aiuta a tradurlo
-
Remove the red/black wires in addition to the blue/white wires using the tweezers.
-
-
Questo passaggio è privo di traduzione. Aiuta a tradurlo
-
Remove bus wire from the speaker's motherboard and lift the motherboard out of the speaker.
-
-
Questo passaggio è privo di traduzione. Aiuta a tradurlo
-
Remove any glue that is left over from previous parts that may be covering the screw holes or the speakers drive.
-
-
Questo passaggio è privo di traduzione. Aiuta a tradurlo
-
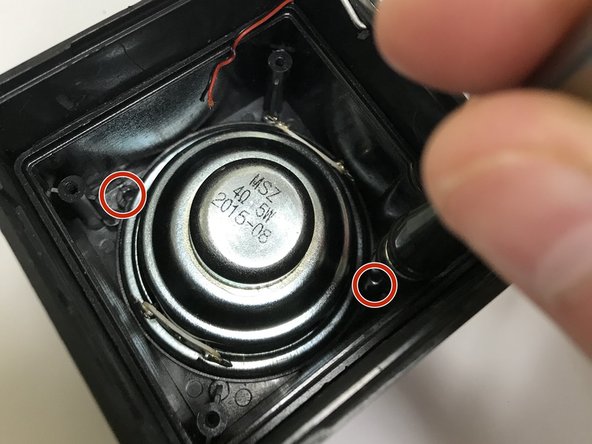
Remove the speaker's four 10 mm base screws.
-
-
Questo passaggio è privo di traduzione. Aiuta a tradurlo
-
Pry out the speaker's base using the metal Spuger. Use caution upon this step, it will require the use of force.
-
Remove the wire that will be placed in the speakers driver hole for access to the speaker.
-
-
Questo passaggio è privo di traduzione. Aiuta a tradurlo
-
Remove the speaker's two 10 mm screws that are located in its base then take the driver out of the speaker.
-


Team

Baylor, Team S1-G1, Johnson Spring 2018 Membro di Baylor, Team S1-G1, Johnson Spring 2018
BU-JOHNSON-S18S1G1
3 Membri
5 Guide realizzate