Salta al contenuto principale

Audiovox T752 Screen Replacement

Cosa ti serve

  1. Audiovox T752 Screen Replacement, Back Panel: passo 1, immagine 1 di 3 Audiovox T752 Screen Replacement, Back Panel: passo 1, immagine 2 di 3 Audiovox T752 Screen Replacement, Back Panel: passo 1, immagine 3 di 3
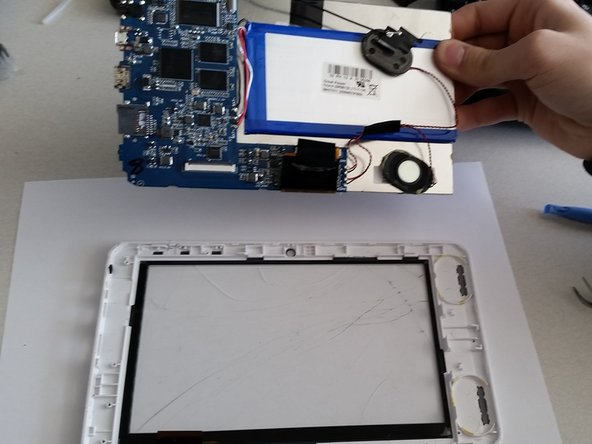
    • Find a good spot to fit the pry bar between the back cover and tablet. Slowly drag the pry bar along the sides of the cover.

    • NOTE: some force will need to be used to remove the cover. Avoid excessive force.

  2. Audiovox T752 Screen Replacement, Screen: passo 2, immagine 1 di 1
    • Remove the speakers.

  3. Audiovox T752 Screen Replacement: passo 3, immagine 1 di 1
    • Remove any adhesives (such as tape).

  4. Audiovox T752 Screen Replacement: passo 4, immagine 1 di 2 Audiovox T752 Screen Replacement: passo 4, immagine 2 di 2
    • Pry under the aluminum touch screen to remove the remaining components from the front housing.

Conclusione

To reassemble your device, follow these instructions in reverse order.

Altre 3 persone hanno completato questa guida.

Logan

Membro da: 01/28/15

391 Reputazione

3 Guide realizzate

Team

Penn State, Team 2-42, Kaschak Winter 2015 Membro di Penn State, Team 2-42, Kaschak Winter 2015

PSU-KASCHAK-W15S2G42

4 Membri

3 Guide realizzate

0 Commenti

Aggiungi Commento

Visualizza Statistiche:

Ultime 24 Ore: 0

Ultimi 7 Giorni: 2

Ultimi 30 Giorni: 4

Tutti i Tempi: 412