Questa versione può contenere modifiche errate. Passa all'ultima istantanea verificata.
Cosa ti serve
-
Questo passaggio è privo di traduzione. Aiuta a tradurlo
-
Locate the SIM card slot on the upper left side of your Asus Zenfone Max 3.
-
-
Questo passaggio è privo di traduzione. Aiuta a tradurlo
-
Use the iFixit 150mm Flex Extension with the Hex 0.7 bit or the SIM card eject tool.
-
Stick the tool into the hole on the SIM card slot and open the slot with it.
-
-
Questo passaggio è privo di traduzione. Aiuta a tradurlo
-
Pull out the old SIM card all the way so it is no longer in the phone.
-
-
Questo passaggio è privo di traduzione. Aiuta a tradurlo
-
Using an iFixit opening tool, gently wedge the tool between the phone and the back casing.
-
Move the opening tool up and down to pry the back off of the device.
-
-
-
Questo passaggio è privo di traduzione. Aiuta a tradurlo
-
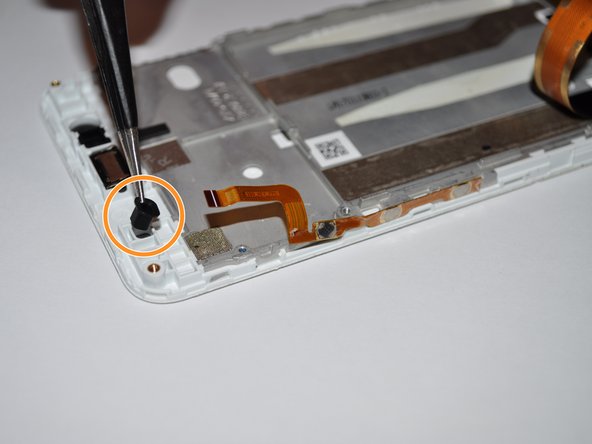
Gently disconnect the gold connection cable indicated by the red circle in the corresponding picture.
-
Pull back on the black adhesive tab that is adhered to the top of the battery. Tab removal is marked in the corresponding picture with a orange circle.
-
-
Questo passaggio è privo di traduzione. Aiuta a tradurlo
-
Next, remove the battery by gently pulling on the blue removal tab located at the bottom of the device battery.
-
Completely remove existing device battery.
-
-
Questo passaggio è privo di traduzione. Aiuta a tradurlo
-
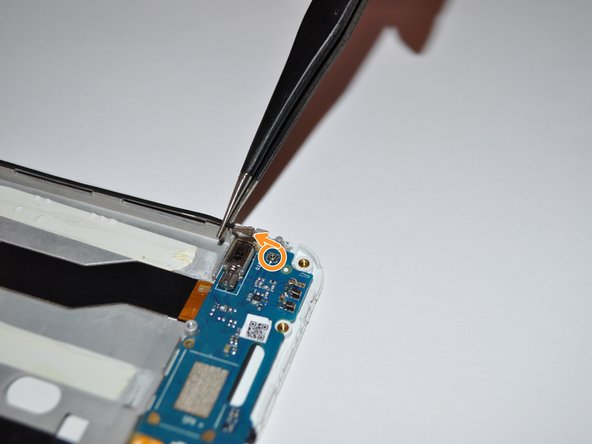
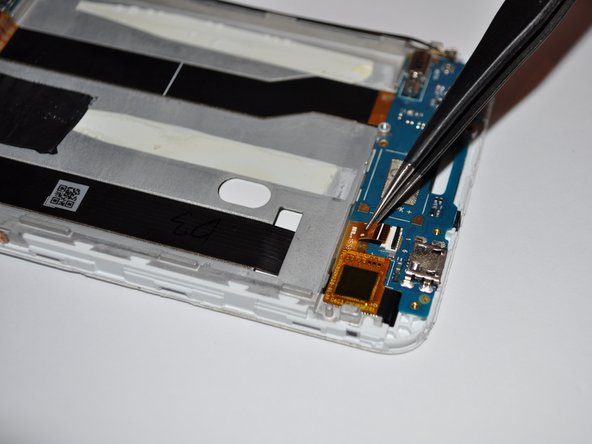
Remove the four 2.5mm Phillips #0 screws at the bottom near the speaker and take the small black plastic cover off.
-
Starting at the bottom, disconnect the antenna (long black wire).
-
Disconnect the orange cable.
-
-
Questo passaggio è privo di traduzione. Aiuta a tradurlo
-
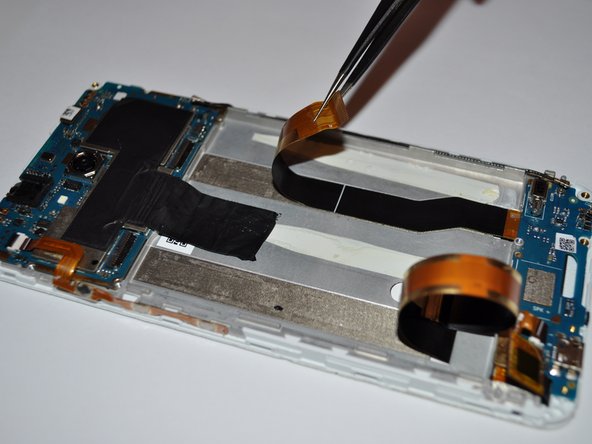
At the top of the phone, disconnect the black screen flex cable (the one that is rectangular) using a black nylon spudger. Peel it all the way back.
-
Using a black nylon spudger, disconnect the charging port flex cable (the other black cable) and microphone button. Peel it all the way back.
-
-
Questo passaggio è privo di traduzione. Aiuta a tradurlo
-
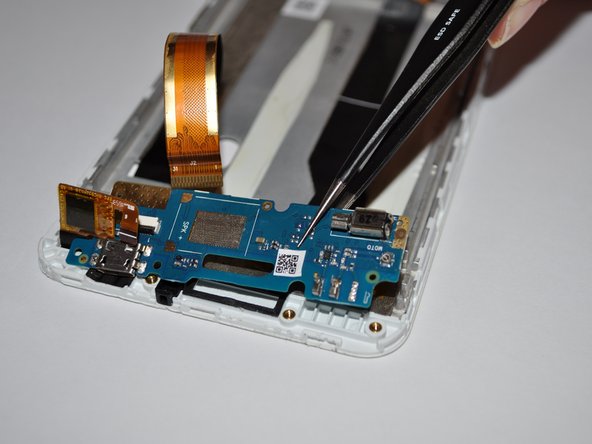
Remove the four 2.5mm Phillips #0 screws that hold the motherboard and remove the motherboard. Follow our motherboard replacement guide.
-
Remove the (blue) daughterboard. The charging port flex cable will come with it.
-
Move the rubber piece (denoted with orange circle) from the old port to your new LCD assembly.
-


Annulla: non ho completato questa guida.
Un'altra persona ha completato questa guida.
Team

University of Alabama, Team S1-G3, Bedsole Fall 2019 Membro di University of Alabama, Team S1-G3, Bedsole Fall 2019
UA-BEDSOLE-F19S1G3
4 Membri
10 Guide realizzate
Un commento
The indicated part is the battery. I guess that’s an error copied from the Battery Replacement guide. Any recomendations for getting the screen replacement?