Salta al contenuto principale

Questa guida ha delle modifiche più recenti. Passa all'ultima versione non verificata.

Asus Zenbook UX303L Trackpad Replacement

Cosa ti serve

  1. Asus Zenbook UX303L Trackpad Replacement, Trackpad: passo 1, immagine 1 di 1
    • Make sure the device is turned off and disconnected from the battery charger.

  2. Asus Zenbook UX303L Trackpad Replacement: passo 2, immagine 1 di 3 Asus Zenbook UX303L Trackpad Replacement: passo 2, immagine 2 di 3 Asus Zenbook UX303L Trackpad Replacement: passo 2, immagine 3 di 3
    • Remove all nine screws from the bottom of the device using a T5 screwdriver.

    • Carefully remove the bottom cover.

  3. Asus Zenbook UX303L Trackpad Replacement: passo 3, immagine 1 di 1
    • Remove five Phillips #1 screws from the battery pack.

  4. Asus Zenbook UX303L Trackpad Replacement: passo 4, immagine 1 di 3 Asus Zenbook UX303L Trackpad Replacement: passo 4, immagine 2 di 3 Asus Zenbook UX303L Trackpad Replacement: passo 4, immagine 3 di 3
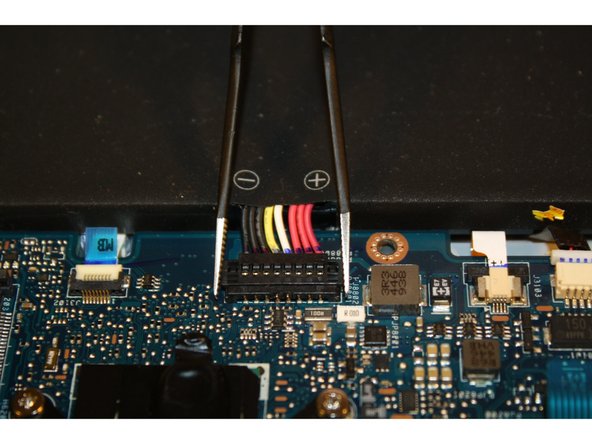
    • Unhook the red, black, and white coiled switch.

    • Detach the positive and negative red, black, yellow, and white switch from the motherboard.

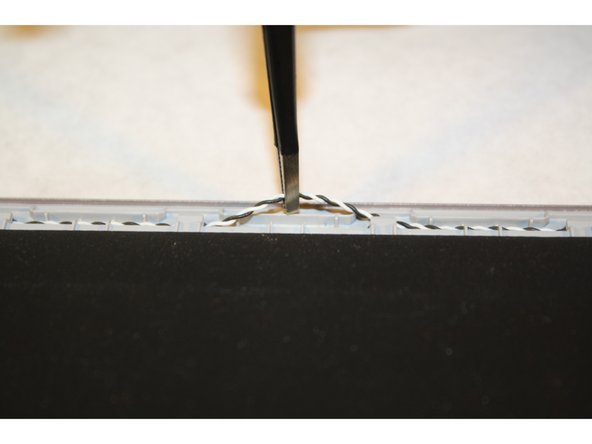
    • Unhook the black and white coiled wire from the top of the battery pack.

  5. Asus Zenbook UX303L Trackpad Replacement: passo 5, immagine 1 di 3 Asus Zenbook UX303L Trackpad Replacement: passo 5, immagine 2 di 3 Asus Zenbook UX303L Trackpad Replacement: passo 5, immagine 3 di 3
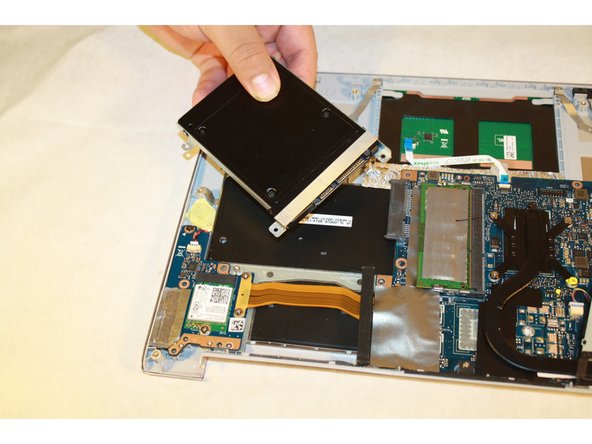
    • Remove the three screws connecting the SSD to the motherboard.

    • Gently lift and pull out the SSD.

  6. Asus Zenbook UX303L Trackpad Replacement: passo 6, immagine 1 di 3 Asus Zenbook UX303L Trackpad Replacement: passo 6, immagine 2 di 3 Asus Zenbook UX303L Trackpad Replacement: passo 6, immagine 3 di 3
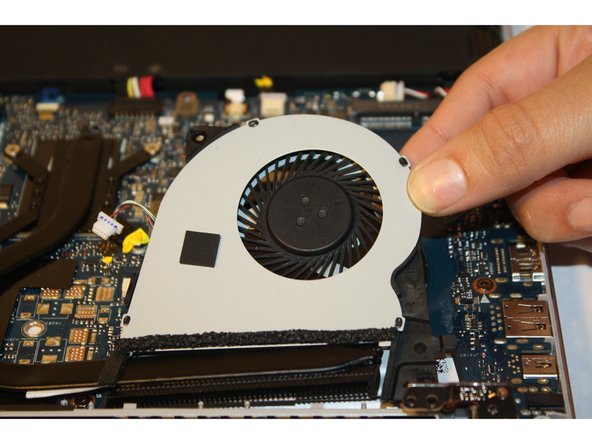
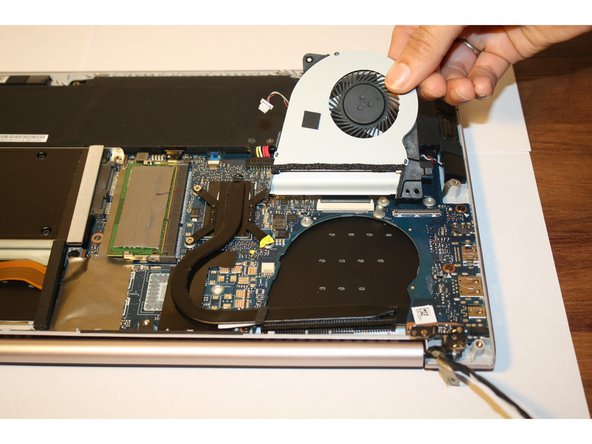
    • Remove the screw attaching the cooling fan to the motherboard.

    • Lift and remove the cooling fan.

  7. Asus Zenbook UX303L Trackpad Replacement: passo 7, immagine 1 di 2 Asus Zenbook UX303L Trackpad Replacement: passo 7, immagine 2 di 2
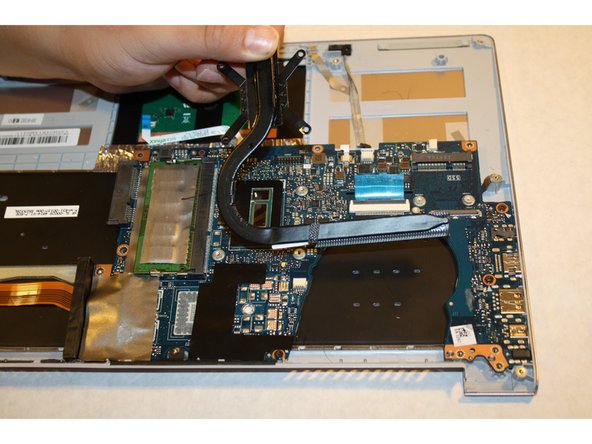
    • Remove the four Phillips #1 screws attached to the black covered copper bar next to the cooling fan.

    • Gently lift and remove the copper bar.

  8. Asus Zenbook UX303L Trackpad Replacement: passo 8, immagine 1 di 3 Asus Zenbook UX303L Trackpad Replacement: passo 8, immagine 2 di 3 Asus Zenbook UX303L Trackpad Replacement: passo 8, immagine 3 di 3
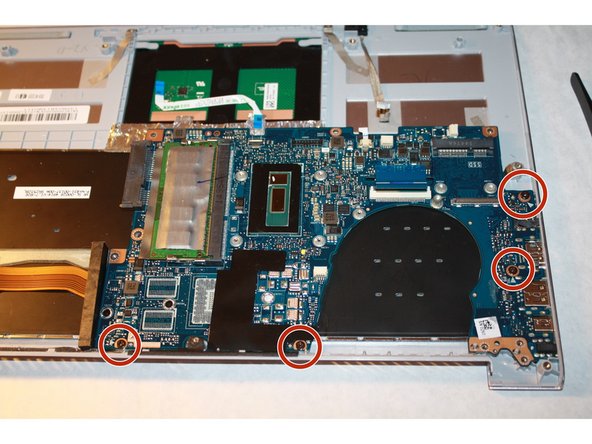
    • Remove the silver tape to reveal the fourth screw on the motherboard.

    • Detach the motherboard by removing the four Phillips #1 screws.

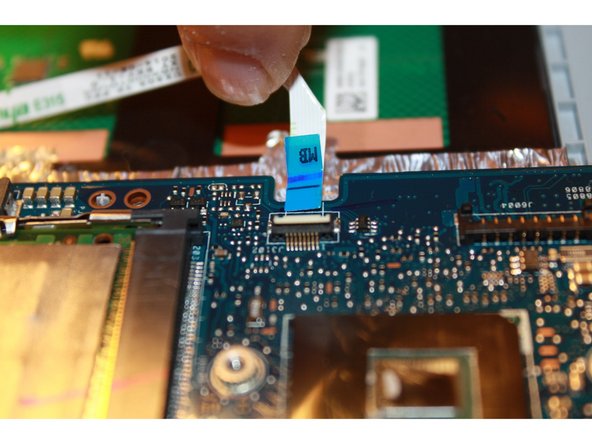
    • Detach the white wire connecting the motherboard by lifting the black flap and pulling it out.

  9. Asus Zenbook UX303L Trackpad Replacement: passo 9, immagine 1 di 1
    • By using ESD-safe tweezers, remove the gray colored wire.

    • Remove the white wire using tweezers.

    • Remove the blue colored wire by lifting the black flap and pulling the blue flap out.

  10. Asus Zenbook UX303L Trackpad Replacement: passo 10, immagine 1 di 3 Asus Zenbook UX303L Trackpad Replacement: passo 10, immagine 2 di 3 Asus Zenbook UX303L Trackpad Replacement: passo 10, immagine 3 di 3
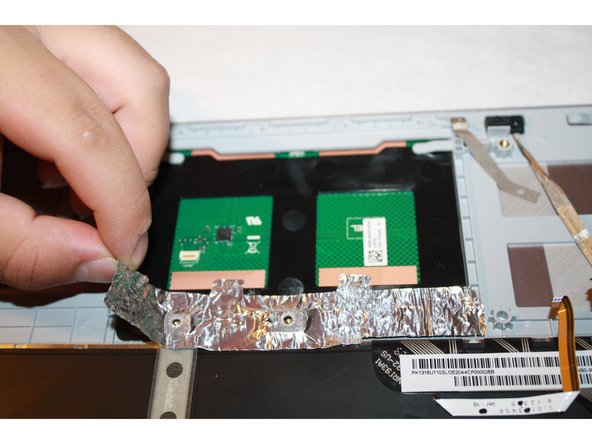
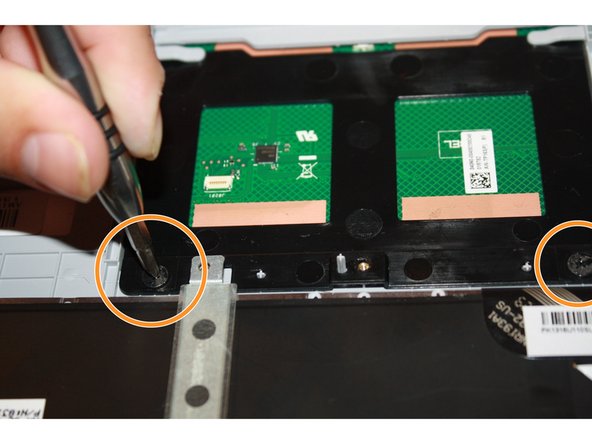
    • Remove the white wire with the blue ends by lifting the black flap with tweezers and gently pulling out.

    • Gently remove the silver tape using tweezers.

    • Remove the Phillips #1 screws.

  11. Asus Zenbook UX303L Trackpad Replacement: passo 11, immagine 1 di 2 Asus Zenbook UX303L Trackpad Replacement: passo 11, immagine 2 di 2
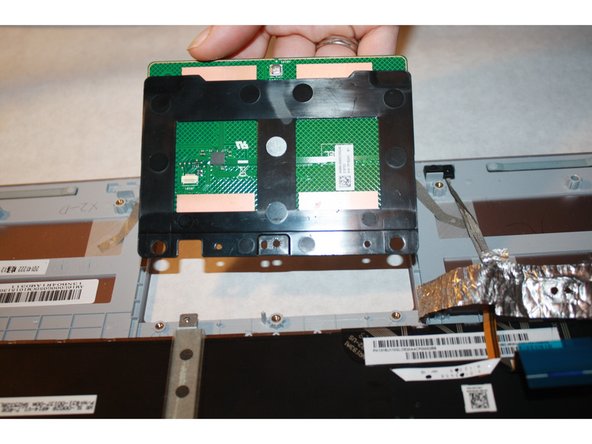
    • Place the plastic opening tools under the trackpad.

    • Gently pull out and remove the trackpad.

Conclusione

To reassemble your device, follow these instructions in reverse order.

Altre 3 persone hanno completato questa guida.

Un commento

This laptop comes with a very bad trackpad, it has very low resolution. Do you think it can be updated?

eduugr - Replica

Aggiungi Commento

Visualizza Statistiche:

Ultime 24 Ore: 2

Ultimi 7 Giorni: 4

Ultimi 30 Giorni: 19

Tutti i Tempi: 5,863