Introduzione
This guide will show you how to open up your Asus Zen AiO Pro Z240IC and how to replace the RAM inside.
Cosa ti serve
-
-
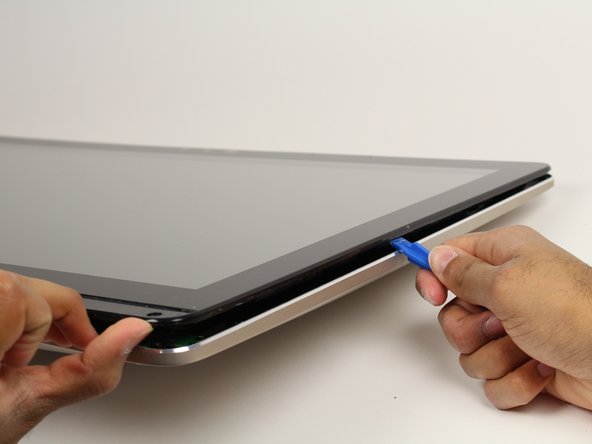
Use the plastic opening tool to pry off the black plastic strip at the bottom of the screen by wiggling the tool between the strip and the screen.
-
Run the opening tool slowly along the base of the screen, peeling the black strip back, until the opposite end of the screen is reached.
-
-
-
Place the computer on its back, facing up.
-
Wedge the plastic opening tool in between the screen and the bezel of the aluminum computer casing.
-
Move the tool along the entire edge of the screen with an up-and-down prying motion to loosen the screen from the casing. Do not lift the entire screen away from the computer yet.
-
-
-
-
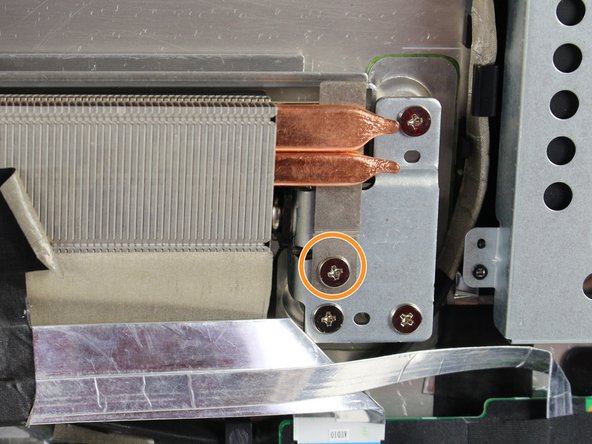
Use a Phillips #0 screwdriver to remove the three (3) 4.8 mm screws from the fan unit.
-
Remove the cable connecting the fan to the motherboard by pulling the cable out of its socket.
-
-
-
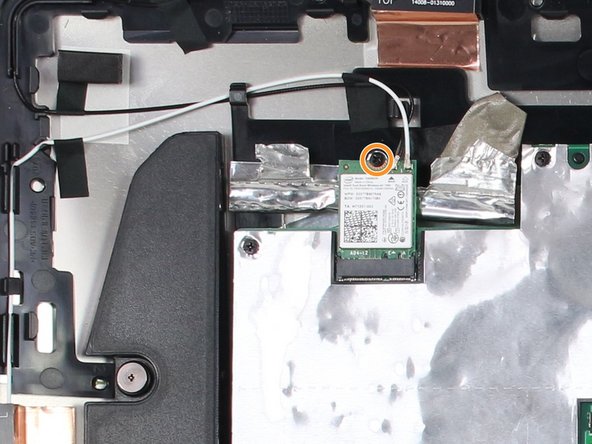
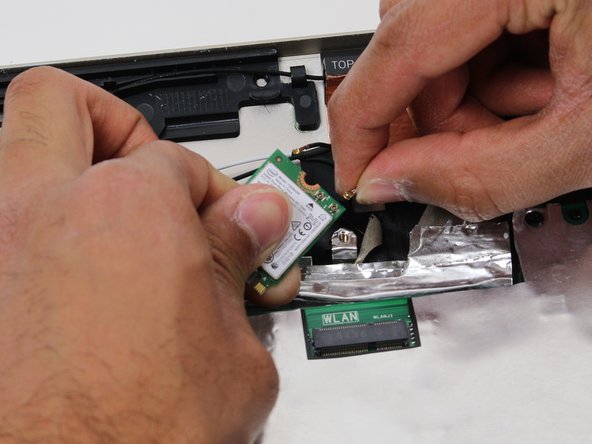
Locate the WLAN card in the upper left hand corner of the computer.
-
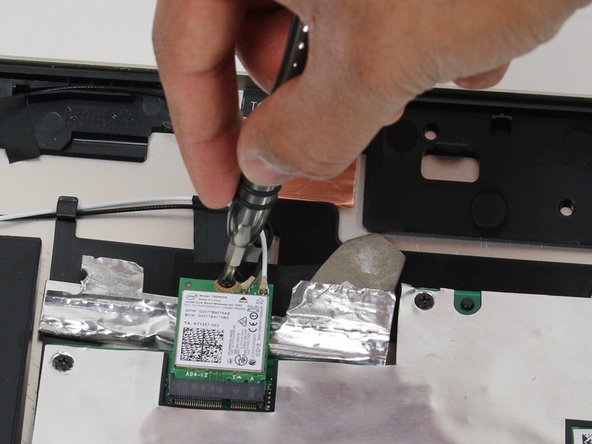
Use a Phillips #1 screwdriver to remove the 3.2 mm screw on the top of the WLAN card.
-
-
-
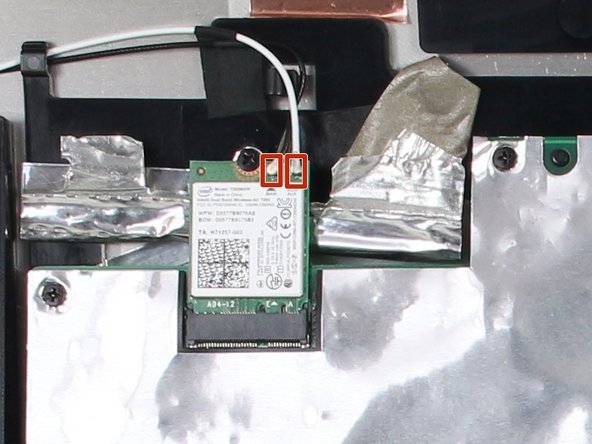
Remove the six (6) ribbon cables by lifting up on the plastic locking tabs and then slipping the cables out of their sockets.
-
Remove the other two (2) cables by pulling straight out on the white connectors.
-
-
-
Remove the metal shield covering the ram by pulling straight up on the shield itself.
-


To reassemble your device, follow these instructions in reverse order.
To reassemble your device, follow these instructions in reverse order.
Annulla: non ho completato questa guida.
Altre 8 persone hanno completato questa guida.
Team

Cal Poly, Team S4-G1, Livingston Fall 2017 Membro di Cal Poly, Team S4-G1, Livingston Fall 2017
CPSU-LIVINGSTON-F17S4G1
5 Membri
25 Guide realizzate
4 Commenti
This was a great guide. The only thing I would add is to push “out” on the ram clips instead of down to actually get it out. I spent an unreasonable amount of time trying to push down and realized after a while it just wasn’t going to loosen anything up that way! Just upgraded my ram so thanks.
Great job! Beside RAM, wich type of disk drive will be more performance on this ASUS model? Can a ssd M2 be set for the system and use the mechanic HD for storage? Thanks
Late reply, but theoretically you could, but you do need an appropriate screw or double sided tape to keep it in place and reinstall Windows onto the new drive to get everything set up correctly (that means back up your data!).
Also do pay attention to the type of SSD you are shopping for, as it looks like the connector looks like it is set up for proper blazing fast M.2 NVMe 2280 (22mm wide, 80mm long) SSD. There are some SSDs on the market that have two notches on them which may or may not work with this computer but will still fit.
je vient de terminer l"opérations avec succès . j'aie maintenant 32 gh ram et 1 to ssd de disque dur une vraie bombe