Salta al contenuto principale

Asus Z54C-JS31 Motherboard Replacement

Cosa ti serve

  1. Asus Z54C-JS31 Motherboard Replacement, Battery: passo 1, immagine 1 di 3 Asus Z54C-JS31 Motherboard Replacement, Battery: passo 1, immagine 2 di 3 Asus Z54C-JS31 Motherboard Replacement, Battery: passo 1, immagine 3 di 3
    • Turn the laptop upside down so that the underside is facing up and locate the two switches that are on each side of the battery.

    • Slide the switch on the top right corner to the right.

    • Slide and hold the switch on the top left corner to the left and carefully remove the battery.

  2. Asus Z54C-JS31 Motherboard Replacement, HDD/RAM Cover Panel: passo 2, immagine 1 di 2 Asus Z54C-JS31 Motherboard Replacement, HDD/RAM Cover Panel: passo 2, immagine 2 di 2
    • Use a Phillips #000 screwdriver to remove the two 9mm screws from the HDD/RAM cover panel.

  3. Asus Z54C-JS31 Motherboard Replacement: passo 3, immagine 1 di 2 Asus Z54C-JS31 Motherboard Replacement: passo 3, immagine 2 di 2
    • Slide the back panel off by placing a hand on each corner and pulling the panel towards you.

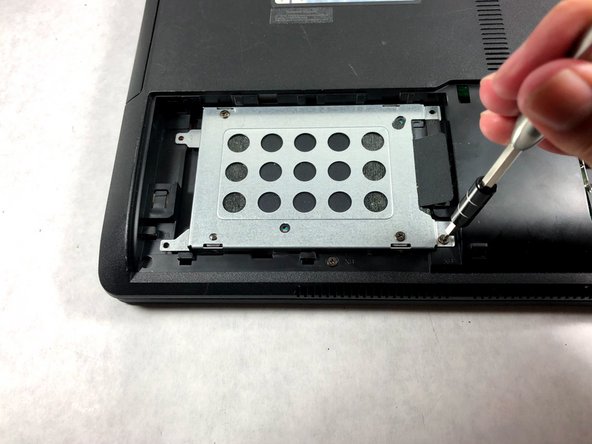
  4. Asus Z54C-JS31 Motherboard Replacement, Hard Drive: passo 4, immagine 1 di 2 Asus Z54C-JS31 Motherboard Replacement, Hard Drive: passo 4, immagine 2 di 2
    • Remove the four 9mm screws holding the hard drive in place.

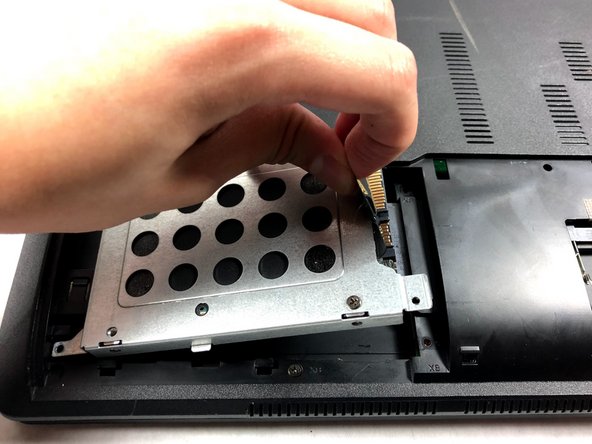
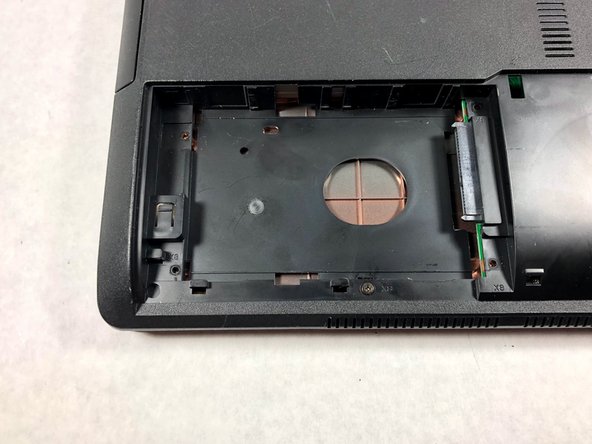
  5. Asus Z54C-JS31 Motherboard Replacement: passo 5, immagine 1 di 3 Asus Z54C-JS31 Motherboard Replacement: passo 5, immagine 2 di 3 Asus Z54C-JS31 Motherboard Replacement: passo 5, immagine 3 di 3
    • Slide the hard drive to the left to disconnect it.

    • Then pull on the black tab to lift the hard drive out of the laptop.

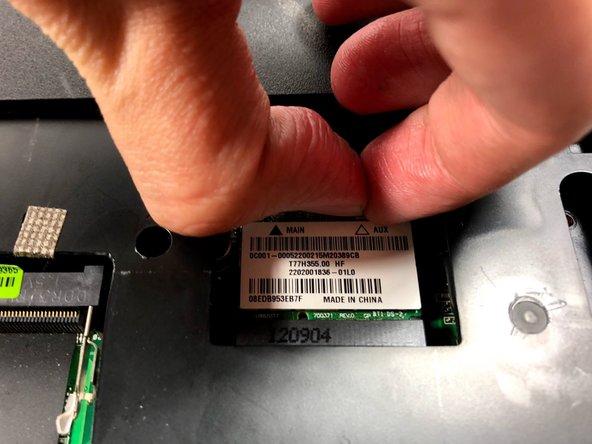
  6. Asus Z54C-JS31 Motherboard Replacement, WiFi Card: passo 6, immagine 1 di 3 Asus Z54C-JS31 Motherboard Replacement, WiFi Card: passo 6, immagine 2 di 3 Asus Z54C-JS31 Motherboard Replacement, WiFi Card: passo 6, immagine 3 di 3
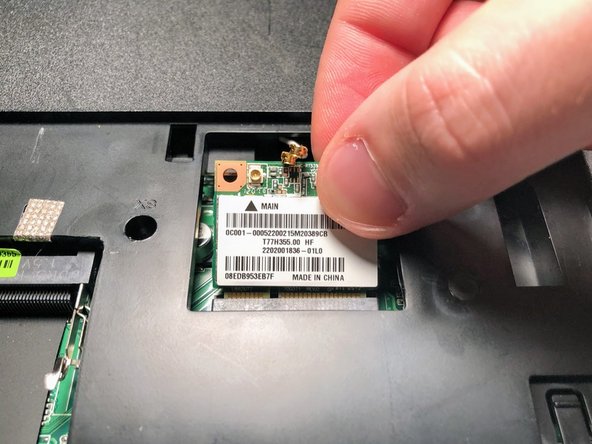
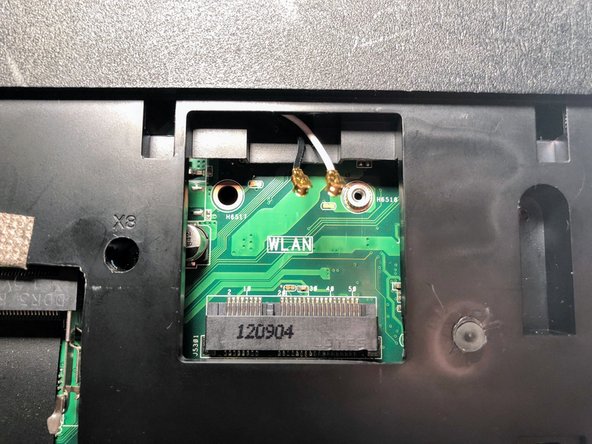
    • Disconnect both the black and white coaxial connectors from the WiFi card by pulling up on the gold colored piece.

  7. Asus Z54C-JS31 Motherboard Replacement: passo 7, immagine 1 di 3 Asus Z54C-JS31 Motherboard Replacement: passo 7, immagine 2 di 3 Asus Z54C-JS31 Motherboard Replacement: passo 7, immagine 3 di 3
    • Remove the 3mm screw from the top right corner of the WiFi card using a Phillips #0 screwdriver.

    • The WiFi card will pop up. Grasp it and pull it out of its slot.

  8. Asus Z54C-JS31 Motherboard Replacement, Keyboard: passo 8, immagine 1 di 2 Asus Z54C-JS31 Motherboard Replacement, Keyboard: passo 8, immagine 2 di 2
    • Turn the laptop to its normal position and open the display to show the keyboard.

    • Gently push back the five tabs holding the keyboard down using the plastic opening tool.

  9. Asus Z54C-JS31 Motherboard Replacement: passo 9, immagine 1 di 3 Asus Z54C-JS31 Motherboard Replacement: passo 9, immagine 2 di 3 Asus Z54C-JS31 Motherboard Replacement: passo 9, immagine 3 di 3
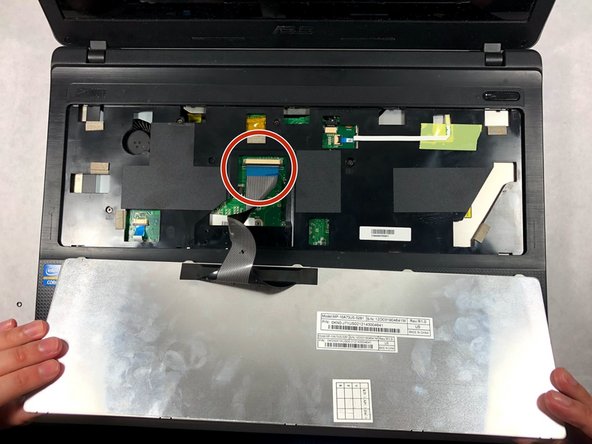
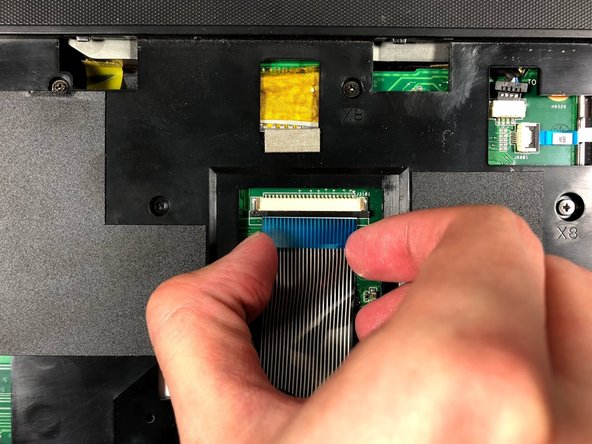
    • Once the keyboard is free, disconnect the ribbon cable from the zero insertion force (ZIF) connector by flipping up the locking flap and pulling the cable out.

  10. Asus Z54C-JS31 Motherboard Replacement, Optical Disc Drive: passo 10, immagine 1 di 3 Asus Z54C-JS31 Motherboard Replacement, Optical Disc Drive: passo 10, immagine 2 di 3 Asus Z54C-JS31 Motherboard Replacement, Optical Disc Drive: passo 10, immagine 3 di 3
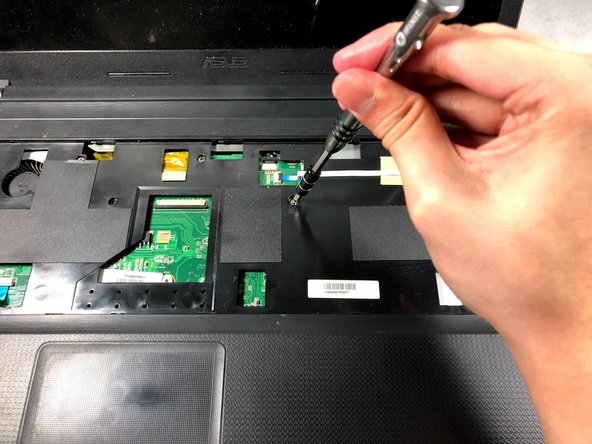
    • Remove the 3mm screw with a Phillips #000 screwdriver.

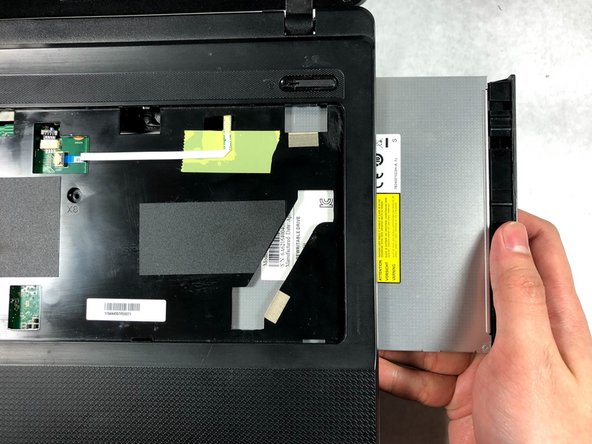
    • Slide out the optical disc drive by pulling it away from the laptop.

  11. Asus Z54C-JS31 Motherboard Replacement, Motherboard: passo 11, immagine 1 di 3 Asus Z54C-JS31 Motherboard Replacement, Motherboard: passo 11, immagine 2 di 3 Asus Z54C-JS31 Motherboard Replacement, Motherboard: passo 11, immagine 3 di 3
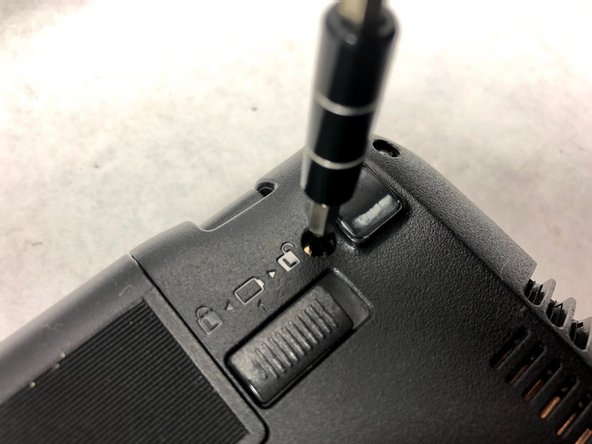
    • Turn the laptop over so that the back side is facing up.

    • Remove eight 9mm screws from the back of the laptop.

    • Remove two 6mm screws near the battery.

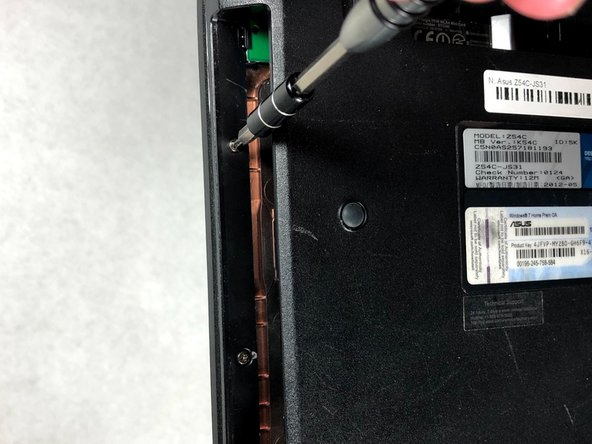
    • Remove two 3mm screws from the optical drive slot.

  12. Asus Z54C-JS31 Motherboard Replacement: passo 12, immagine 1 di 2 Asus Z54C-JS31 Motherboard Replacement: passo 12, immagine 2 di 2
    • Disconnect the two ribbons cables from the zero insertion force connectors by flipping up the small locking flap and pulling them gently out of the connectors.

  13. Asus Z54C-JS31 Motherboard Replacement: passo 13, immagine 1 di 2 Asus Z54C-JS31 Motherboard Replacement: passo 13, immagine 2 di 2
    • Use the plastic opening tool to pop off the plastic layer by sticking it in between the two parts and sliding it around the whole laptop.

    • Lift off the top plastic layer.

  14. Asus Z54C-JS31 Motherboard Replacement: passo 14, immagine 1 di 2 Asus Z54C-JS31 Motherboard Replacement: passo 14, immagine 2 di 2
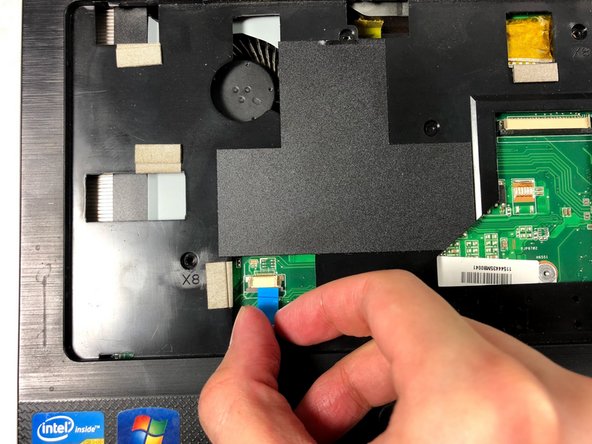
    • Disconnect the two ribbon cables from the no-fuss ribbon cable connectors attached to the motherboard by pulling the cable straight out of the connector.

    • Disconnect the ribbon cable from the zero insertion force connector by flipping up the locking flap and pulling the cable out.

  15. Asus Z54C-JS31 Motherboard Replacement: passo 15, immagine 1 di 3 Asus Z54C-JS31 Motherboard Replacement: passo 15, immagine 2 di 3 Asus Z54C-JS31 Motherboard Replacement: passo 15, immagine 3 di 3
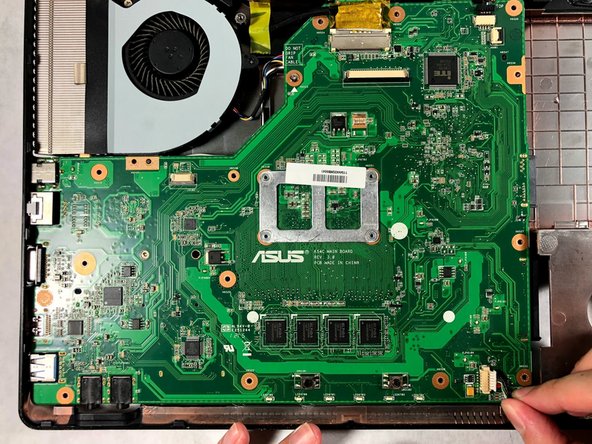
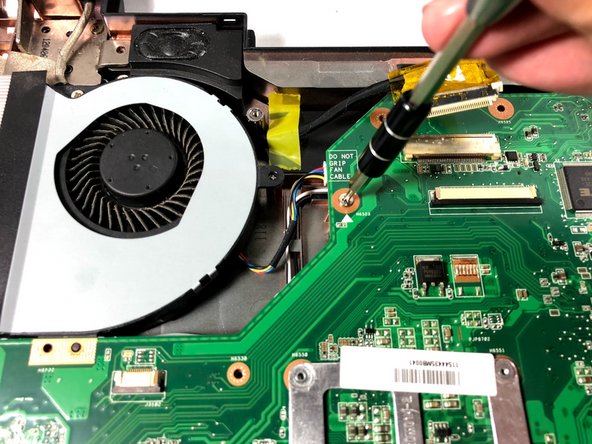
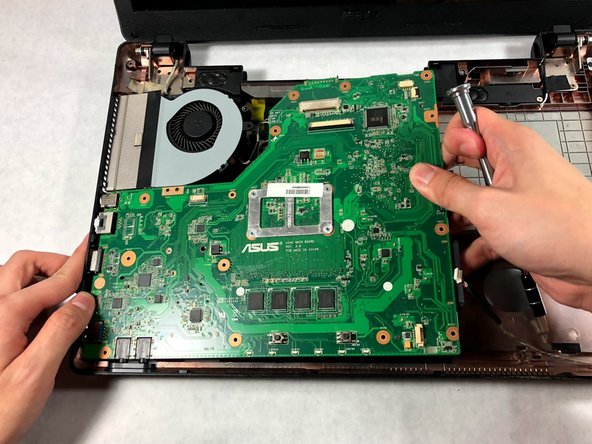
    • Remove the two 5mm screws holding the motherboard and fan in place.

    • Lift out the motherboard and fan.

Conclusione

To reassemble your device, follow these instructions in reverse order.

Mark DeSimone

Membro da: 10/19/17

801 Reputazione

8 Guide realizzate

Team

0 Commenti

Aggiungi Commento

Visualizza Statistiche:

Ultime 24 Ore: 0

Ultimi 7 Giorni: 1

Ultimi 30 Giorni: 3

Tutti i Tempi: 423