Salta al contenuto principale

Asus Z54C-JS31 Hard Drive Replacement

Cosa ti serve

  1. Asus Z54C-JS31 Hard Drive Replacement, Battery: passo 1, immagine 1 di 3 Asus Z54C-JS31 Hard Drive Replacement, Battery: passo 1, immagine 2 di 3 Asus Z54C-JS31 Hard Drive Replacement, Battery: passo 1, immagine 3 di 3
    • Turn the laptop upside down so that the underside is facing up and locate the two switches that are on each side of the battery.

    • Slide the switch on the top right corner to the right.

    • Slide and hold the switch on the top left corner to the left and carefully remove the battery.

  2. Asus Z54C-JS31 Hard Drive Replacement, HDD/RAM Cover Panel: passo 2, immagine 1 di 2 Asus Z54C-JS31 Hard Drive Replacement, HDD/RAM Cover Panel: passo 2, immagine 2 di 2
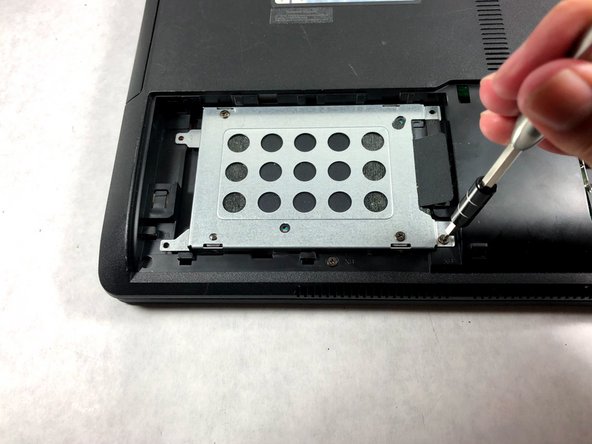
    • Use a Phillips #000 screwdriver to remove the two 9mm screws from the HDD/RAM cover panel.

  3. Asus Z54C-JS31 Hard Drive Replacement: passo 3, immagine 1 di 2 Asus Z54C-JS31 Hard Drive Replacement: passo 3, immagine 2 di 2
    • Slide the back panel off by placing a hand on each corner and pulling the panel towards you.

  4. Asus Z54C-JS31 Hard Drive Replacement, Hard Drive: passo 4, immagine 1 di 2 Asus Z54C-JS31 Hard Drive Replacement, Hard Drive: passo 4, immagine 2 di 2
    • Remove the four 9mm screws holding the hard drive in place.

  5. Asus Z54C-JS31 Hard Drive Replacement: passo 5, immagine 1 di 3 Asus Z54C-JS31 Hard Drive Replacement: passo 5, immagine 2 di 3 Asus Z54C-JS31 Hard Drive Replacement: passo 5, immagine 3 di 3
    • Slide the hard drive to the left to disconnect it.

    • Then pull on the black tab to lift the hard drive out of the laptop.

Conclusione

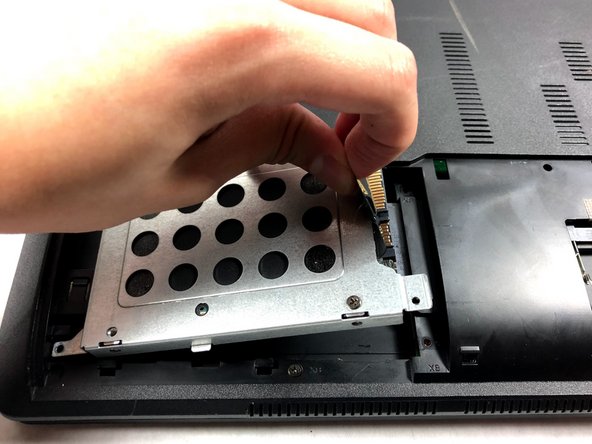
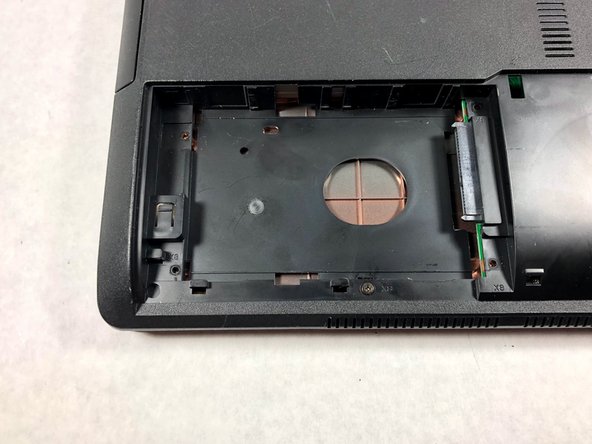
To reassemble your device, follow these instructions in reverse order.

Mark DeSimone

Membro da: 10/19/17

801 Reputazione

8 Guide realizzate

Team

0 Commenti

Aggiungi Commento

Visualizza Statistiche:

Ultime 24 Ore: 0

Ultimi 7 Giorni: 1

Ultimi 30 Giorni: 1

Tutti i Tempi: 109