Salta al contenuto principale

Asus X550ZA-SA100603E Cooling Fan Replacement

Cosa ti serve

  1. Asus X550ZA-SA100603E Cooling Fan Replacement, Keyboard: passo 1, immagine 1 di 1
    • Using the Phillips #0 screwdriver, remove the seven 14 mm screws on the bottom of the laptop.

    • Then use the Phillips #0 to remove the three 4 mm screws on the bottom of the laptop.

  2. Asus X550ZA-SA100603E Cooling Fan Replacement: passo 2, immagine 1 di 3 Asus X550ZA-SA100603E Cooling Fan Replacement: passo 2, immagine 2 di 3 Asus X550ZA-SA100603E Cooling Fan Replacement: passo 2, immagine 3 di 3
    • Insert a plastic opening tool between the keyboard and base of the laptop to pry the keyboard away from the base. Do this around the entire perimeter of the laptop.

    • This disconnects the face of the keyboard. Gently lift the keyboard up to expose the motherboard.

    • There are still ribbon cables connecting the keyboard face to the motherboard. Do not pull the keyboard away roughly.

  3. Asus X550ZA-SA100603E Cooling Fan Replacement: passo 3, immagine 1 di 3 Asus X550ZA-SA100603E Cooling Fan Replacement: passo 3, immagine 2 di 3 Asus X550ZA-SA100603E Cooling Fan Replacement: passo 3, immagine 3 di 3
    • Gently lift the keyboard to access the three ribbon cables connected to the motherboard

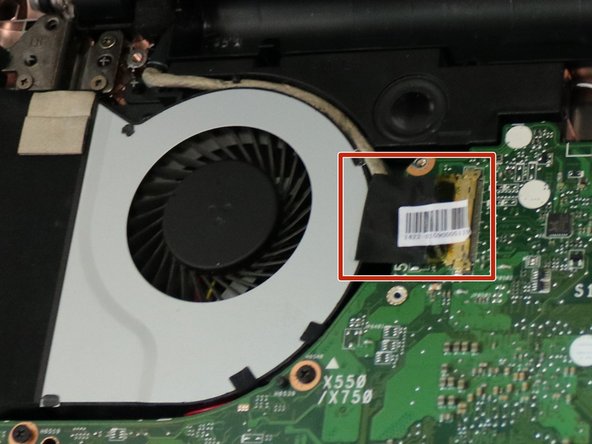
    • Using precision tweezers, flip up the white and black retaining flaps on the ZIF connectors that hold the two smaller ribbon cables in place.

    • Gently pull the ribbon cables from their sockets on the motherboard.

  4. Asus X550ZA-SA100603E Cooling Fan Replacement: passo 4, immagine 1 di 3 Asus X550ZA-SA100603E Cooling Fan Replacement: passo 4, immagine 2 di 3 Asus X550ZA-SA100603E Cooling Fan Replacement: passo 4, immagine 3 di 3
    • Push the two white clamps on the large ZIF connector towards the screen.

    • Gently remove the track pad ribbon cable from its connector.

  5. Asus X550ZA-SA100603E Cooling Fan Replacement: passo 5, immagine 1 di 1
    • Remove the keyboard.

  6. Asus X550ZA-SA100603E Cooling Fan Replacement, Battery: passo 6, immagine 1 di 2 Asus X550ZA-SA100603E Cooling Fan Replacement, Battery: passo 6, immagine 2 di 2
    • Disconnect the multi-wire battery plug from the motherboard.

  7. Asus X550ZA-SA100603E Cooling Fan Replacement: passo 7, immagine 1 di 3 Asus X550ZA-SA100603E Cooling Fan Replacement: passo 7, immagine 2 di 3 Asus X550ZA-SA100603E Cooling Fan Replacement: passo 7, immagine 3 di 3
    • Pull the two tabs holding the battery in place and lift the battery up. It should remove easily.

  8. Asus X550ZA-SA100603E Cooling Fan Replacement, Motherboard: passo 8, immagine 1 di 1
    • Use a Phillips #0 screwdriver to remove the thirteen black 4 mm screws from the face of the motherboard.

    • Use a Phillips #0 head screwdiver to remove the four silver 4 mm screws from the face of the motherboard

    • Use a Phillips #0 head screwdriver to remove the one black 4 mm screw from the indented area above the fan.

  9. Asus X550ZA-SA100603E Cooling Fan Replacement: passo 9, immagine 1 di 3 Asus X550ZA-SA100603E Cooling Fan Replacement: passo 9, immagine 2 di 3 Asus X550ZA-SA100603E Cooling Fan Replacement: passo 9, immagine 3 di 3
    • Use the precision tweezers to flip the black switch holding the film connected to the USB port.

    • Gently remove the film from it's connection to the motherboard.

  10. Asus X550ZA-SA100603E Cooling Fan Replacement: passo 10, immagine 1 di 2 Asus X550ZA-SA100603E Cooling Fan Replacement: passo 10, immagine 2 di 2
    • Gently pull the thick wire in between the fan and the motherboard. To release the wire connected to the motherboard, gently pull towards the cooling fan.

  11. Asus X550ZA-SA100603E Cooling Fan Replacement: passo 11, immagine 1 di 2 Asus X550ZA-SA100603E Cooling Fan Replacement: passo 11, immagine 2 di 2
    • Gently pull the red, black, and white wire found on the top right-hand corner of the motherboard.

  12. Asus X550ZA-SA100603E Cooling Fan Replacement: passo 12, immagine 1 di 2 Asus X550ZA-SA100603E Cooling Fan Replacement: passo 12, immagine 2 di 2
    • Lift the black and white wires out of their ports at the top of the motherboard.

  13. Asus X550ZA-SA100603E Cooling Fan Replacement: passo 13, immagine 1 di 1
    • Lift the top right corner of the motherboard to access the final wire.

    • Gently remove the wire from the port connecting it to the motherboard.

  14. Asus X550ZA-SA100603E Cooling Fan Replacement: passo 14, immagine 1 di 1
    • Remove the motherboard from the laptop.

  15. Asus X550ZA-SA100603E Cooling Fan Replacement, Cooling Fan: passo 15, immagine 1 di 2 Asus X550ZA-SA100603E Cooling Fan Replacement, Cooling Fan: passo 15, immagine 2 di 2
    • Turn the motherboard over so that the copper heat sink and fan pin connections are facing towards you.

  16. Asus X550ZA-SA100603E Cooling Fan Replacement: passo 16, immagine 1 di 1
    • Pull the red, black, and yellow wire from out of its connection port.

  17. Asus X550ZA-SA100603E Cooling Fan Replacement: passo 17, immagine 1 di 1
    • Remove the four 4mm Phillips #0 screws that are binding the copper heat sink to the motherboard.

  18. Asus X550ZA-SA100603E Cooling Fan Replacement: passo 18, immagine 1 di 1
    • Remove the fan assembly from the motherboard.

Conclusione

To reassemble your device, follow these instructions in reverse order.

Altre 4 persone hanno completato questa guida.

Un commento

Great guide. Do you have the part number for the cooling fan/heatsink assembly, and possibly where you can buy a replacement? I’ve only been able to find it on Ali Express, but they’re blocking US purchases.

Jay Marble - Replica

Aggiungi Commento

Visualizza Statistiche:

Ultime 24 Ore: 0

Ultimi 7 Giorni: 0

Ultimi 30 Giorni: 3

Tutti i Tempi: 1,831