Salta al contenuto principale

Asus X401A Processor Replacement

Cosa ti serve

  1. Asus X401A Processor Replacement, Processor: passo 1, immagine 1 di 2 Asus X401A Processor Replacement, Processor: passo 1, immagine 2 di 2
    • Turn your laptop off and unplug it from its charger prior to the repair to avoid electric shock.

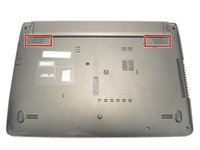
    • Turn your laptop over, and press on the latches to remove the battery.

  2. Asus X401A Processor Replacement: passo 2, immagine 1 di 3 Asus X401A Processor Replacement: passo 2, immagine 2 di 3 Asus X401A Processor Replacement: passo 2, immagine 3 di 3
    Attrezzo utilizzato in questo passaggio:
    Magnetic Project Mat
    $19.95
    Compra
    • Unscrew the ten screws with a Phillips Head #1 screwdriver.

    • Eight screws are 3mm.

    • Two screws are 4mm.

    • Place the screws on a magnetic mat.

  3. Asus X401A Processor Replacement: passo 3, immagine 1 di 3 Asus X401A Processor Replacement: passo 3, immagine 2 di 3 Asus X401A Processor Replacement: passo 3, immagine 3 di 3
    • Separate the keyboard from the back of the laptop with a plastic opening tool.

    • Do not completely separate the two pieces as there are ribbon cables that need to be disconnected.

    • When reassembling, you will hear snapping noises as the pieces connect together.

  4. Asus X401A Processor Replacement: passo 4, immagine 1 di 3 Asus X401A Processor Replacement: passo 4, immagine 2 di 3 Asus X401A Processor Replacement: passo 4, immagine 3 di 3
    • Use a spudger to lift ZIF tabs up to disconnect the black and the white ribbon cable.

  5. Asus X401A Processor Replacement: passo 5, immagine 1 di 1
    • Unscrew the ten 3mm screws with a Phillips Head #1 screwdriver,

  6. Asus X401A Processor Replacement: passo 6, immagine 1 di 1
    • Use a spudger to lift the ZIF connector up to release the ribbon cable.

  7. Asus X401A Processor Replacement: passo 7, immagine 1 di 2 Asus X401A Processor Replacement: passo 7, immagine 2 di 2
    • Lift the connection between the screen and motherboard with a plastic spudger.

    • Remove the yellow and the clear tape.

  8. Asus X401A Processor Replacement: passo 8, immagine 1 di 1
    • Disconnect the wire connecting the speakers.

  9. Asus X401A Processor Replacement: passo 9, immagine 1 di 3 Asus X401A Processor Replacement: passo 9, immagine 2 di 3 Asus X401A Processor Replacement: passo 9, immagine 3 di 3
    • Lift the motherboard from the frame with a plastic spudger.

    • Set the frame of the laptop aside, and turn the motherboard over.

  10. Asus X401A Processor Replacement: passo 10, immagine 1 di 2 Asus X401A Processor Replacement: passo 10, immagine 2 di 2
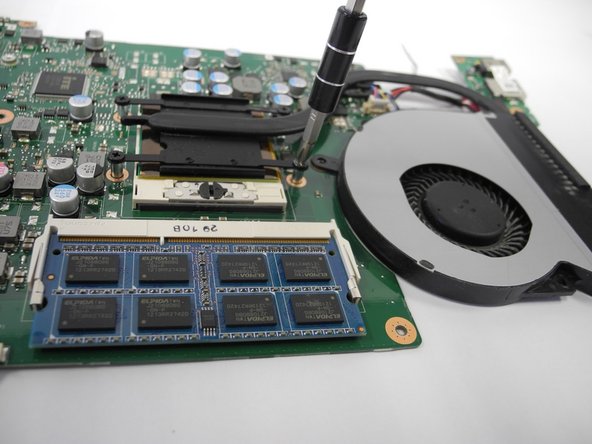
    • Unscrew the four screws with a Phillips Head #1 screwdriver to disconnect the fan from the processor.

  11. Asus X401A Processor Replacement: passo 11, immagine 1 di 2 Asus X401A Processor Replacement: passo 11, immagine 2 di 2
    • Disconnect the cable connecting the fan to the motherboard.

    • Lift the fan part from the processor.

  12. Asus X401A Processor Replacement: passo 12, immagine 1 di 3 Asus X401A Processor Replacement: passo 12, immagine 2 di 3 Asus X401A Processor Replacement: passo 12, immagine 3 di 3
    • Unscrew the screw holding the processor to the motherboard with a flathead screwdriver.

    • Lift the processor up away from the socket.

Conclusione

To reassemble your device, follow these instructions in reverse order.

Altre 2 persone hanno completato questa guida.

Tyler Stiles

Membro da: 02/07/17

152 Reputazione

1 Guida realizzata

Team

Ohio State, Team 1-4, Wilder Spring 2017 Membro di Ohio State, Team 1-4, Wilder Spring 2017

OSU-WILDER-S17S1G4

4 Membri

5 Guide realizzate

Un commento

Hi

What is the highest CPU I can put on it?

Does Asus X401A support i5-2450M?

mmaksat1988 - Replica

Aggiungi Commento

Visualizza Statistiche:

Ultime 24 Ore: 0

Ultimi 7 Giorni: 1

Ultimi 30 Giorni: 16

Tutti i Tempi: 1,763