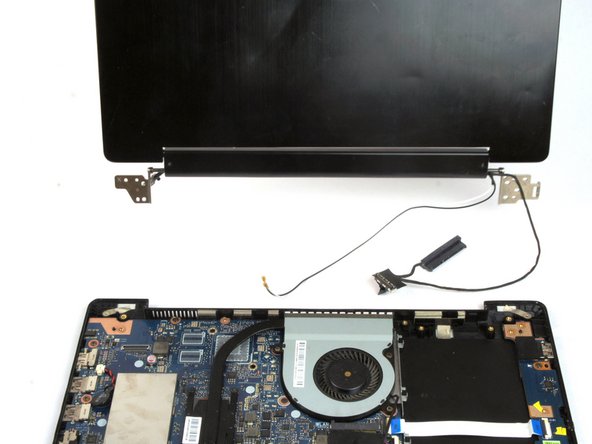
Salta al contenuto principale

Asus VivoBook Q302LA-BHI3T09 Display Replacement

Cosa ti serve

  1. Asus VivoBook Q302LA-BHI3T09 Display Replacement, Display: passo 1, immagine 1 di 2 Asus VivoBook Q302LA-BHI3T09 Display Replacement, Display: passo 1, immagine 2 di 2
    • Before doing a repair or replacement make sure the laptop is fully shut off.

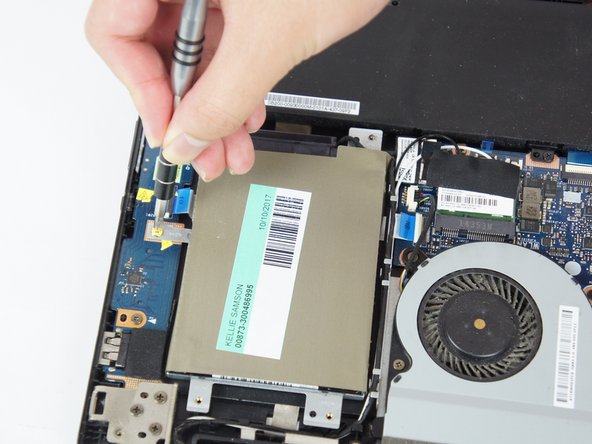
    • Using the JIS #0 Screwdriver, unscrew the ten 10 mm screws that hold the back casing in place

  2. Asus VivoBook Q302LA-BHI3T09 Display Replacement: passo 2, immagine 1 di 2 Asus VivoBook Q302LA-BHI3T09 Display Replacement: passo 2, immagine 2 di 2
    • Insert the flat edge of the opening tool in between the back casing to remove the back casing.

    • Try to use the opening tool at multiple points. Lifting the back casing abruptly could damage the laptop.

  3. Asus VivoBook Q302LA-BHI3T09 Display Replacement: passo 3, immagine 1 di 2 Asus VivoBook Q302LA-BHI3T09 Display Replacement: passo 3, immagine 2 di 2
    • Using the JIS #0 Screwdriver, remove the five 3.0 mm screws that hold down the hard drive casing.

  4. Asus VivoBook Q302LA-BHI3T09 Display Replacement: passo 4, immagine 1 di 3 Asus VivoBook Q302LA-BHI3T09 Display Replacement: passo 4, immagine 2 di 3 Asus VivoBook Q302LA-BHI3T09 Display Replacement: passo 4, immagine 3 di 3
    • Lift the hard drive up and remove the power supply cable connected to it.

    • Make sure to pull on the plastic head and not the actual wires to prevent tearing them.

  5. Asus VivoBook Q302LA-BHI3T09 Display Replacement: passo 5, immagine 1 di 2 Asus VivoBook Q302LA-BHI3T09 Display Replacement: passo 5, immagine 2 di 2
    • Disconnect the white and black wires attached to the Wi-Fi chip.

  6. Asus VivoBook Q302LA-BHI3T09 Display Replacement: passo 6, immagine 1 di 3 Asus VivoBook Q302LA-BHI3T09 Display Replacement: passo 6, immagine 2 di 3 Asus VivoBook Q302LA-BHI3T09 Display Replacement: passo 6, immagine 3 di 3
    • Remove the two adapters connecting the display to the motherboard by pulling the black plastic straps directly upwards.

  7. Asus VivoBook Q302LA-BHI3T09 Display Replacement: passo 7, immagine 1 di 3 Asus VivoBook Q302LA-BHI3T09 Display Replacement: passo 7, immagine 2 di 3 Asus VivoBook Q302LA-BHI3T09 Display Replacement: passo 7, immagine 3 di 3
    • Use the JIS #0 screwdriver to remove the five 5.0 mm screws connecting the display to the rest of the laptop.

Conclusione

To reassemble your device, follow these instructions in reverse order.

Deric Wright

Membro da: 02/14/18

636 Reputazione

3 Guide realizzate

Team

USF Tampa, Team S5-G5, Eyestone Spring 2018 Membro di USF Tampa, Team S5-G5, Eyestone Spring 2018

USFT-EYESTONE-S18S5G5

4 Membri

5 Guide realizzate

0 Commenti

Aggiungi Commento

Visualizza Statistiche:

Ultime 24 Ore: 0

Ultimi 7 Giorni: 1

Ultimi 30 Giorni: 2

Tutti i Tempi: 253