Salta al contenuto principale

Asus V6800V Display Replacement

Cosa ti serve

  1. Asus V6800V Display Replacement, Battery: passo 1, immagine 1 di 2 Asus V6800V Display Replacement, Battery: passo 1, immagine 2 di 2
    • Place the computer upside down.

    • Using your thumbs, slide both latches away from each other (towards the outside).

    • Push the battery out with your fingers.

    • The actual battery is not pictured.

  2. Asus V6800V Display Replacement, Keyboard: passo 2, immagine 1 di 1
    • Using a Phillips #0 screwdriver, remove the two screws from the case.

    • These screws should have a "K" symbol next to them.

  3. Asus V6800V Display Replacement: passo 3, immagine 1 di 3 Asus V6800V Display Replacement: passo 3, immagine 2 di 3 Asus V6800V Display Replacement: passo 3, immagine 3 di 3
    • Locate the four tabs above the F1, F10, INSERT, and between the F5 and F6 keys.

    • Starting with the tab above the F1 key, press the tabs inward using your fingernail or spudger. Continue this process for the rest of the tabs.

    • Once all four tabs have been released, the top half of the keyboard should be free.

  4. Asus V6800V Display Replacement: passo 4, immagine 1 di 2 Asus V6800V Display Replacement: passo 4, immagine 2 di 2
    • Pull the keyboard up from the top at a 45 degree angle. Place it upside down on the touchpad.

    • Pull the wide ribbon cable laterally from its socket on the motherboard to free the keyboard.

  5. Asus V6800V Display Replacement, Lower Case: passo 5, immagine 1 di 1
    • Using a Phillips #0 screwdriver, remove the screws at the bottom of the chassis to remove the top panel.

    • This will allow the lower case to be removed from the rest of the computer.

  6. Asus V6800V Display Replacement: passo 6, immagine 1 di 1
    • Remove the six screws from below the keyboard with a Phillips #0 screwdriver.

  7. Asus V6800V Display Replacement: passo 7, immagine 1 di 2 Asus V6800V Display Replacement: passo 7, immagine 2 di 2
    • Use your fingernails or a pry tool to gently separate both halves of the case. Begin at the front and work around the entire case.

    • Be cautious not to damage the cables that connect both sides of the case.

  8. Asus V6800V Display Replacement: passo 8, immagine 1 di 3 Asus V6800V Display Replacement: passo 8, immagine 2 di 3 Asus V6800V Display Replacement: passo 8, immagine 3 di 3
    • Remove the internal cables from front to back.

    • Use your fingers to gently remove the cables from their sockets.

    • The cables that connect the display to the main chassis are difficult to pull out using your fingers. A tool, such as tweezers, may be needed.

  9. Asus V6800V Display Replacement: passo 9, immagine 1 di 1
    • After separating the top and bottom halves of the case, lay them flat on the work area.

  10. Asus V6800V Display Replacement, Display: passo 10, immagine 1 di 2 Asus V6800V Display Replacement, Display: passo 10, immagine 2 di 2
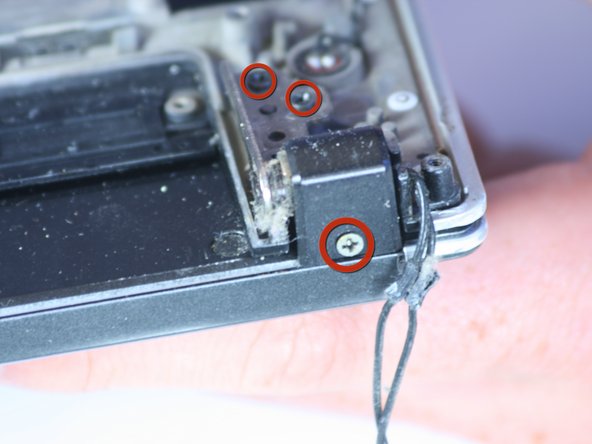
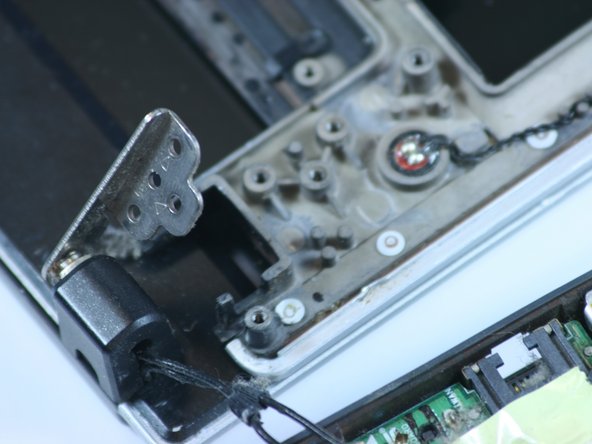
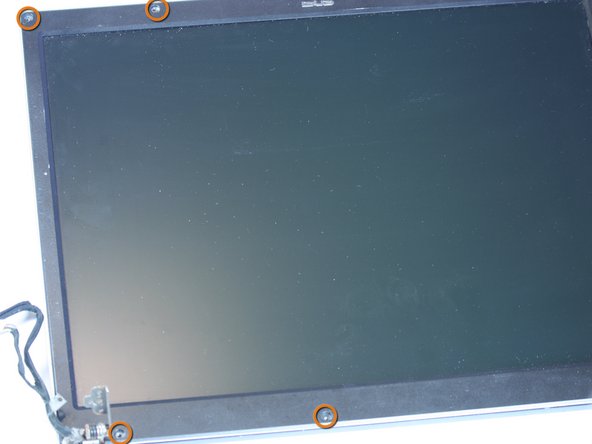
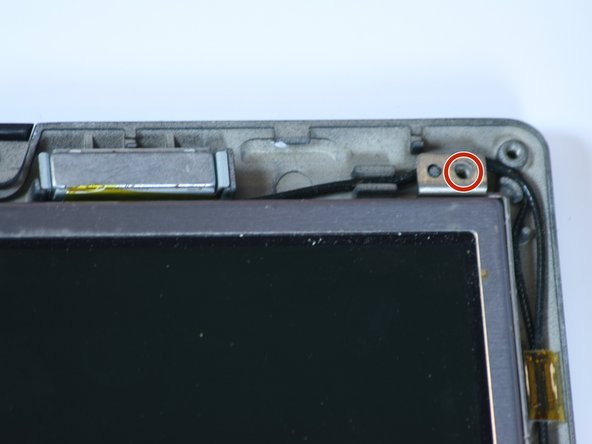
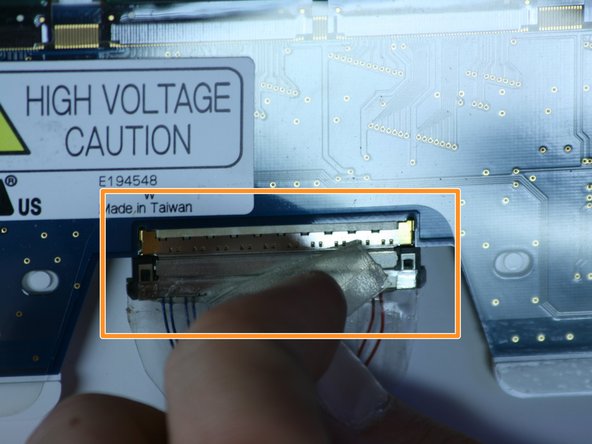
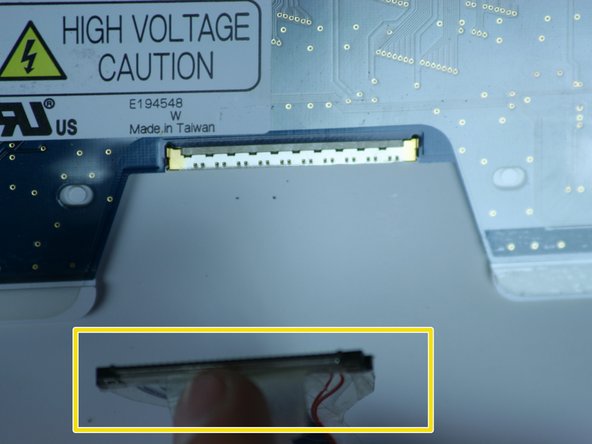
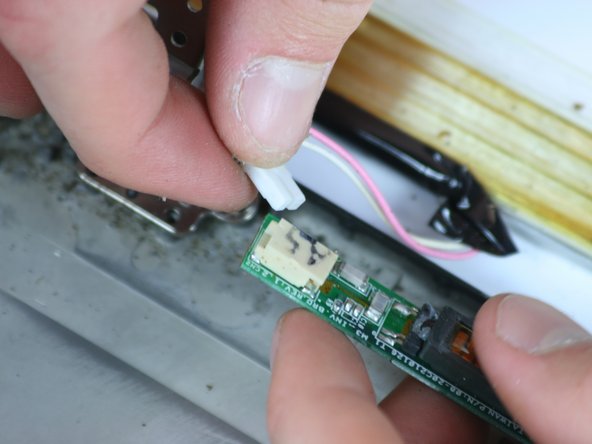
    • Remove the six screws (three on each side) holding the top panel of the chassis to the display with a Phillips #0 screwdriver.

  11. Asus V6800V Display Replacement: passo 11, immagine 1 di 2 Asus V6800V Display Replacement: passo 11, immagine 2 di 2
    • Remove the display by leaving the display flat on the table and tilting the panel up (as if opening the laptop). This will shift the hinges to allow easy removal.

    • Separate the chassis from the display. If the screws were removed properly, it should come free.

  12. Asus V6800V Display Replacement: passo 12, immagine 1 di 1
    • Remove the small enclosures around the hinges.

  13. Asus V6800V Display Replacement: passo 13, immagine 1 di 2 Asus V6800V Display Replacement: passo 13, immagine 2 di 2
    • Remove seven screws from the bezel with a Phillips #0 screwdriver.

    • The seven screws are hidden under small circular rubber covers that you will need to remove.

  14. Asus V6800V Display Replacement: passo 14, immagine 1 di 1
    • Using a fingernail or opening tool, gently pry the bezel up from the screen.

  15. Asus V6800V Display Replacement: passo 15, immagine 1 di 2 Asus V6800V Display Replacement: passo 15, immagine 2 di 2
    • Remove six screws from underneath the bezel with a Phillips #0 screwdriver. Two are located next to each hinge and one at each top corner.

    • Beware of the magnets at the top of the display. If they are moved out of position as you remove the display, gently place them back in their original position.

  16. Asus V6800V Display Replacement: passo 16, immagine 1 di 1
    • Lift the panel up from the top of the case.

    • Be careful of the display connector near the hinges.

  17. Asus V6800V Display Replacement: passo 17, immagine 1 di 3 Asus V6800V Display Replacement: passo 17, immagine 2 di 3 Asus V6800V Display Replacement: passo 17, immagine 3 di 3
    • Look behind the display. Locate the display connector.

    • Peel back the tape from over the connector.

    • Remove the connector from the display and slowly pull the cable away, peeling the tape back along the way.

  18. Asus V6800V Display Replacement: passo 18, immagine 1 di 1
    • Remove the tape holding the cable to the screen.

  19. Asus V6800V Display Replacement: passo 19, immagine 1 di 2 Asus V6800V Display Replacement: passo 19, immagine 2 di 2
    • Remove the small connector located near the right hinge.

    • Be aware of the direction the cables are removed. They need to be replaced exactly the same later.

  20. Asus V6800V Display Replacement: passo 20, immagine 1 di 1
    • The display is now completely removed and can be replaced.

Conclusione

To reassemble your device, follow these instructions in reverse order.

Un'altra persona ha completato questa guida.

Brian Tubb

Membro da: 06/24/10

272 Reputazione

2 Guide realizzate

Team

Cal Poly, Team 2-9, Johann Summer 2010 Membro di Cal Poly, Team 2-9, Johann Summer 2010

CPSU-JOHANN-R10S2G9

5 Membri

10 Guide realizzate

0 Commenti

Aggiungi Commento

Visualizza Statistiche:

Ultime 24 Ore: 0

Ultimi 7 Giorni: 1

Ultimi 30 Giorni: 5

Tutti i Tempi: 6,961