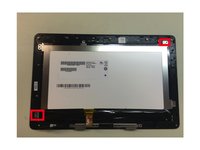
Salta al contenuto principale

Asus Transformer T100 Front Panel Digitizer Replacement

Cosa ti serve

  1. Asus Transformer T100 Front Panel Digitizer Replacement, Asus T-100 Front panel Repair: passo 1, immagine 1 di 3 Asus Transformer T100 Front Panel Digitizer Replacement, Asus T-100 Front panel Repair: passo 1, immagine 2 di 3 Asus Transformer T100 Front Panel Digitizer Replacement, Asus T-100 Front panel Repair: passo 1, immagine 3 di 3
    • In order to get the back cover off, use a tool you are familiar with to pry it open carefully.

  2. Asus Transformer T100 Front Panel Digitizer Replacement, Use the pick: passo 2, immagine 1 di 2 Asus Transformer T100 Front Panel Digitizer Replacement, Use the pick: passo 2, immagine 2 di 2
    • Insert a pick, and slowly go around the edge of the tablet to loosen the back shield

  3. Asus Transformer T100 Front Panel Digitizer Replacement, Unscrew The Screws: passo 3, immagine 1 di 1
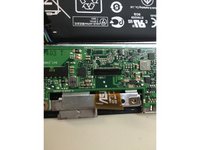
    • Use a Phillips #1 screw driver to loosen all the screws.

    • Make a system to organize the screws, since they have different sizes.

  4. Asus Transformer T100 Front Panel Digitizer Replacement, Battery connection: passo 4, immagine 1 di 2 Asus Transformer T100 Front Panel Digitizer Replacement, Battery connection: passo 4, immagine 2 di 2
    • Loosen the tape of the battery connection.

    • Be careful you don't break the wires. They can seem stuck and hard loosen up.

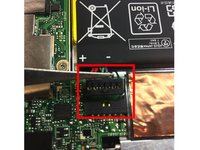
    • Separate the cable from the connecter.

  5. Asus Transformer T100 Front Panel Digitizer Replacement, Copper tape: passo 5, immagine 1 di 1
    • Next step is to peel off the copper tape. Left to Right

  6. Asus Transformer T100 Front Panel Digitizer Replacement, Beneath the copper tape: passo 6, immagine 1 di 3 Asus Transformer T100 Front Panel Digitizer Replacement, Beneath the copper tape: passo 6, immagine 2 di 3 Asus Transformer T100 Front Panel Digitizer Replacement, Beneath the copper tape: passo 6, immagine 3 di 3
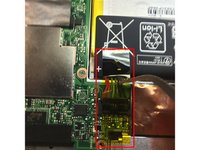
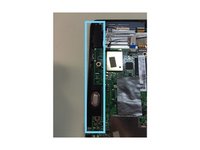
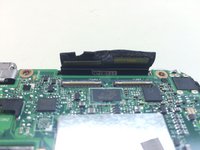
    • Under the tape is there a connection we have to take off, plus another screw.

    • As in step 9 later there is a white strip under the black sticky sponge that lifts to allow the ribbon tape to come out easily.

  7. Asus Transformer T100 Front Panel Digitizer Replacement, Taken out the speaker.: passo 7, immagine 1 di 3 Asus Transformer T100 Front Panel Digitizer Replacement, Taken out the speaker.: passo 7, immagine 2 di 3 Asus Transformer T100 Front Panel Digitizer Replacement, Taken out the speaker.: passo 7, immagine 3 di 3
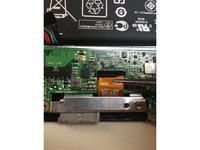
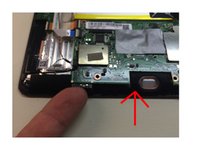
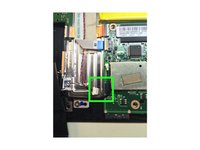
    • Next we have to take out the speaker because it has a connection on the motherboard.

    • In order to get the speaker out you have to lift up the motherboard just a little bit. You can use your finger or any other tool you feel familiar using.

  8. Asus Transformer T100 Front Panel Digitizer Replacement, Disconnect the speaker: passo 8, immagine 1 di 2 Asus Transformer T100 Front Panel Digitizer Replacement, Disconnect the speaker: passo 8, immagine 2 di 2
    • Here we have to disconnect the speaker connection.

  9. Asus Transformer T100 Front Panel Digitizer Replacement, Digitizer disconnection: passo 9, immagine 1 di 2 Asus Transformer T100 Front Panel Digitizer Replacement, Digitizer disconnection: passo 9, immagine 2 di 2
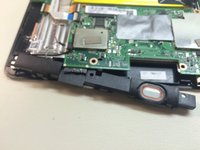
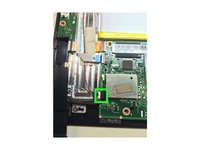
    • Next step is a little tricky. We have to disconnect the digitizer. ! Be very careful you don't ruin the closing mechanism. Simply pull back and pull slowly until the connection comes out.

  10. Asus Transformer T100 Front Panel Digitizer Replacement, Taking out the motherboard: passo 10, immagine 1 di 1
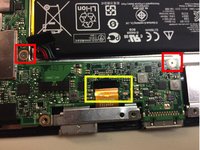
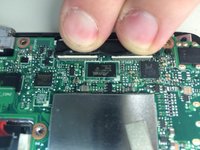
    • We are now ready to take out the motherboard. This is done by following all the steps to this point.

    • Carefully lift the board in both ends or in 2 of the 4 corners and slowly lift it off to the side.

  11. Asus Transformer T100 Front Panel Digitizer Replacement, Taken out the LCD: passo 11, immagine 1 di 3 Asus Transformer T100 Front Panel Digitizer Replacement, Taken out the LCD: passo 11, immagine 2 di 3 Asus Transformer T100 Front Panel Digitizer Replacement, Taken out the LCD: passo 11, immagine 3 di 3
    • Next step is to take out the LCD. Depending on the model # of your device screws can be placed different corners.

    • Take out the screws and lift out the LCD screen

  12. Asus Transformer T100 Front Panel Digitizer Replacement, Last step: passo 12, immagine 1 di 2 Asus Transformer T100 Front Panel Digitizer Replacement, Last step: passo 12, immagine 2 di 2
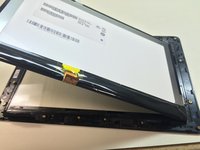
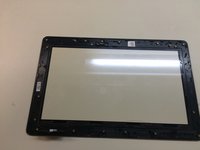
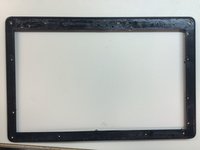
    • The last step is to separate the plastic frame from the old Digitizer glass.

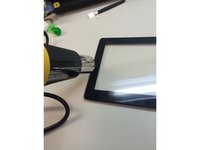
    • I recommend using a heat gun to heat up the glue and then easily separate the old digitizer.

    • You are now ready to put your new digitizer on the plastic frame and assemble the T-100.

    • BE VERY careful when applying heat to the plastic, it can easily bend so make sure you keep your heatgun/hairdryer on low heat.

Conclusione

To reassemble your device, follow these instructions in reverse order.

Altre 30 persone hanno completato questa guida.

Nick Johansen

Membro da: 10/09/15

1.991 Reputazione

2 Guide realizzate

27 Commenti

Thanks so much for the guide, it was a long process but we'll worth it.

Cody Smith - Replica

Hope it was helpful and that it was detailed enough :) thank you for looking :)

Nick Johansen -

Great guide, however I would make one small addition. In the final instructions just a little warning about keeping the heat very low, similar to a hair dryer and take your time. I discovered the hard way that the plastic bezel has quite a low melt/warp temp and I effectively ruined one of the two I was repairing. Sourcing a new digitizer with bezel or bezel alone is proving to be incredibly challenging.

adamstafford - Replica

Thank you for the heads up I will edit that as soon as possible

Nick Johansen -

Please, can you give the clearer instructions about 3 different screw sizes, where are they locations. I mixed them up...

Lazeez Karshibayev - Replica

Aggiungi Commento

Visualizza Statistiche:

Ultime 24 Ore: 5

Ultimi 7 Giorni: 16

Ultimi 30 Giorni: 118

Tutti i Tempi: 33,800