Salta al contenuto principale

Asus ROG Strix GL702VS Fan Replacement

Cosa ti serve

  1. Asus ROG Strix GL702VS Fan Replacement, Back Cover: passo 1, immagine 1 di 1
    • Flip the computer so the bottom of the laptop is facing up.

  2. Asus ROG Strix GL702VS Fan Replacement: passo 2, immagine 1 di 1
    • Remove the ten JIS #0 screws around the edge of the laptop.

    • The two bottom screws are slightly shorter

  3. Asus ROG Strix GL702VS Fan Replacement: passo 3, immagine 1 di 2 Asus ROG Strix GL702VS Fan Replacement: passo 3, immagine 2 di 2
    • Use a Jimmy to carefully free each side of the bottom casing.

  4. Asus ROG Strix GL702VS Fan Replacement: passo 4, immagine 1 di 1
    • Lift up the back casing from the computer.

    • You may hear clicking or snapping sounds. This is just the plastic clips coming loose.

  5. Asus ROG Strix GL702VS Fan Replacement, Cooling Fans: passo 5, immagine 1 di 3 Asus ROG Strix GL702VS Fan Replacement, Cooling Fans: passo 5, immagine 2 di 3 Asus ROG Strix GL702VS Fan Replacement, Cooling Fans: passo 5, immagine 3 di 3
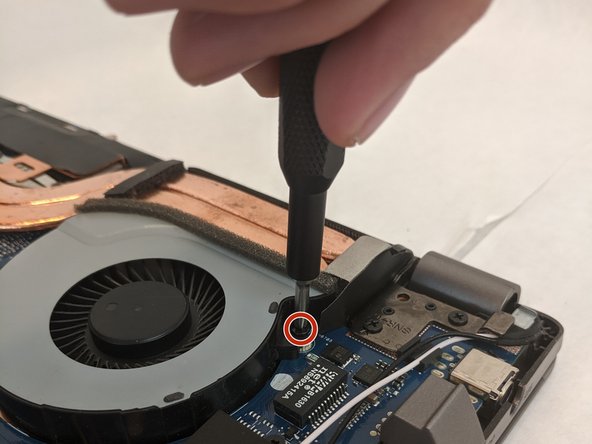
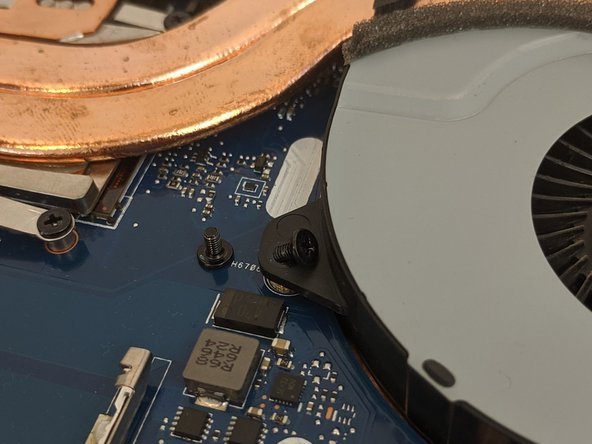
    • Remove the four 4.8mm JIS #0 screws (two on each fan).

  6. Asus ROG Strix GL702VS Fan Replacement: passo 6, immagine 1 di 3 Asus ROG Strix GL702VS Fan Replacement: passo 6, immagine 2 di 3 Asus ROG Strix GL702VS Fan Replacement: passo 6, immagine 3 di 3
    Attrezzo utilizzato in questo passaggio:
    Tweezers
    $4.99
    Compra
    • Remove the fan's connector on the motherboard using a pair of tweezers.

    • Be gentle, as the small clips and wires can be easily damaged.

  7. Asus ROG Strix GL702VS Fan Replacement: passo 7, immagine 1 di 2 Asus ROG Strix GL702VS Fan Replacement: passo 7, immagine 2 di 2
    • Gently lift each fan up and out of position.

Conclusione

To reassemble your device, follow these instructions in reverse order.


Un'altra persona ha completato questa guida.

0 Commenti

Aggiungi Commento

Visualizza Statistiche:

Ultime 24 Ore: 2

Ultimi 7 Giorni: 7

Ultimi 30 Giorni: 21

Tutti i Tempi: 2,833