Questa versione può contenere modifiche errate. Passa all'ultima istantanea verificata.
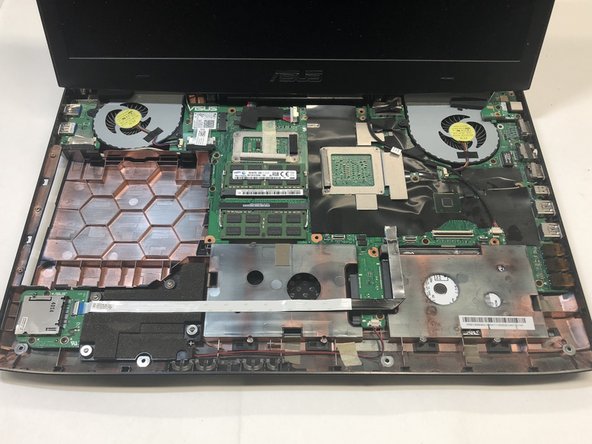
Cosa ti serve
-
Questo passaggio è privo di traduzione. Aiuta a tradurlo
-
Lift the rubber cover found on the bottom of the laptop.
-
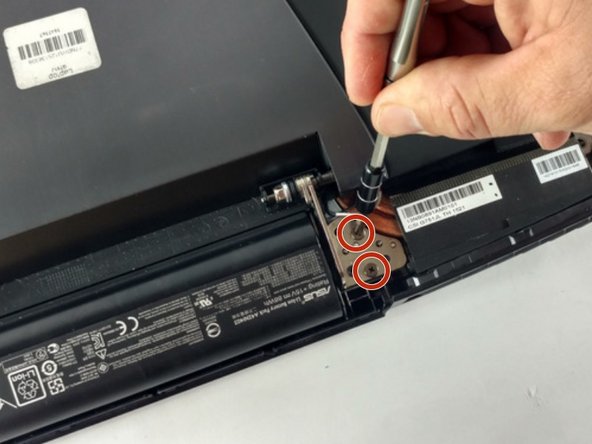
Remove the 5.2 mm screw with a Phillips 1 Screwdriver.
-
-
Questo passaggio è privo di traduzione. Aiuta a tradurlo
-
Use the nylon spudger to remove the back center panel.
-
-
Questo passaggio è privo di traduzione. Aiuta a tradurlo
-
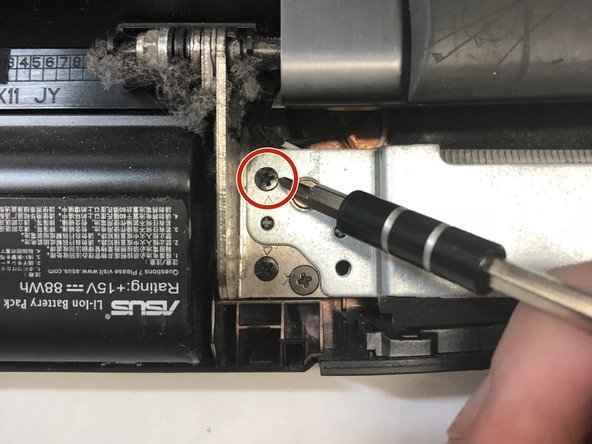
Use a Phillips 1 Screwdriver to remove the 5 mm screw that is located underneath the back panel.
-
-
Questo passaggio è privo di traduzione. Aiuta a tradurlo
-
Pull out the optical drive found on the side of the laptop.
-
-
Questo passaggio è privo di traduzione. Aiuta a tradurlo
-
Use a pair of tweezers to remove the top four rubber stoppers found on the bottom of the laptop.
-
-
-
Questo passaggio è privo di traduzione. Aiuta a tradurlo
-
Use a Phillips 1 Screwdriver to remove the top four 8.5 mm screws.
-
-
Questo passaggio è privo di traduzione. Aiuta a tradurlo
-
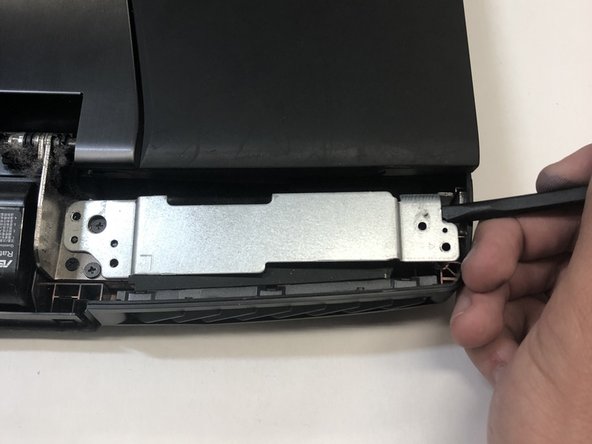
Use a nylon spudger to carefully pry the top back panel off.
-
Disconnect the four-pin connector and remove the top back panel from the computer.
-
-
Questo passaggio è privo di traduzione. Aiuta a tradurlo
-
Use a Phillips 1 Screwdriver to remove the four 6.8 mm screws underneath the back panel.
-
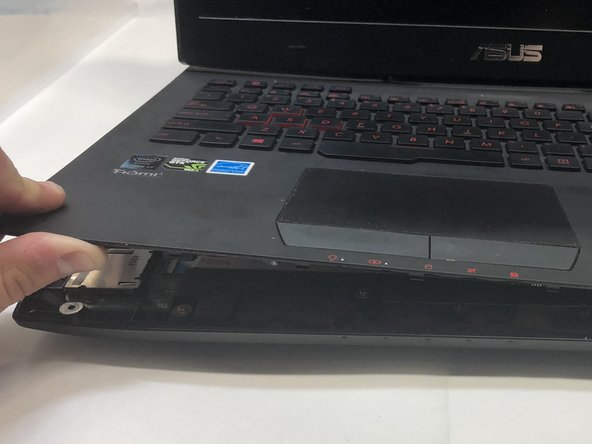
Lift away the metal housings from each side of the laptop.
-
-
Questo passaggio è privo di traduzione. Aiuta a tradurlo
-
Use a Phillips 1 Screwdriver to remove the ten 5.2 mm screws holding the main panel in place.
-
Use a Phillips 1 Screwdriver to remove the four 5.2 mm screws underneath the center panel.
-
-
Questo passaggio è privo di traduzione. Aiuta a tradurlo
-
Use a plastic opening tool to pry the keyboard from the base of the laptop.
-
-
Questo passaggio è privo di traduzione. Aiuta a tradurlo
-
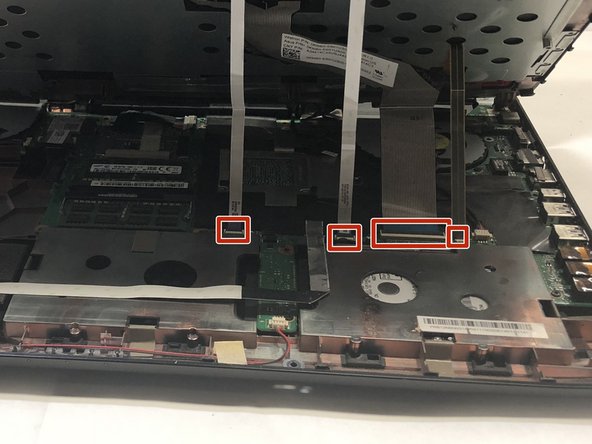
Use a pair of tweezers to undo each of the four ribbon connectors.
-
The keyboard is now completely disconnected from the laptop and you can remove it.
-
-
Questo passaggio è privo di traduzione. Aiuta a tradurlo
-
Use a pair of tweezers to carefully disconnect the pin connector.
-
-
Questo passaggio è privo di traduzione. Aiuta a tradurlo
-
Use a Phillips 1 Screwdriver to remove the final four remaining 6.8 mm screws located underneath the back panel.
-
The monitor is now free to be completely lifted off the laptop.
-


Annulla: non ho completato questa guida.
Un'altra persona ha completato questa guida.
Team

Cal Poly, Team S16-G1, Banghart Winter 2018 Membro di Cal Poly, Team S16-G1, Banghart Winter 2018
CPSU-BANGHART-W18S16G1
4 Membri
22 Guide realizzate