Salta al contenuto principale

Asus ROG G750JH-DB71 Hard Drive Replacement

Cosa ti serve

  1. Asus ROG G750JH-DB71 Hard Drive Replacement, Battery: passo 1, immagine 1 di 2 Asus ROG G750JH-DB71 Hard Drive Replacement, Battery: passo 1, immagine 2 di 2
    • Ensure the laptop is powered off and unplugged before beginning.

    • Flip the laptop over so the bottom case is facing up.

  2. Asus ROG G750JH-DB71 Hard Drive Replacement: passo 2, immagine 1 di 3 Asus ROG G750JH-DB71 Hard Drive Replacement: passo 2, immagine 2 di 3 Asus ROG G750JH-DB71 Hard Drive Replacement: passo 2, immagine 3 di 3
    • Push the switch near the front of the laptop to release the battery from the computer.

    • Pull the battery out and away from the center of the computer.

  3. Asus ROG G750JH-DB71 Hard Drive Replacement, Hard Drive: passo 3, immagine 1 di 3 Asus ROG G750JH-DB71 Hard Drive Replacement, Hard Drive: passo 3, immagine 2 di 3 Asus ROG G750JH-DB71 Hard Drive Replacement, Hard Drive: passo 3, immagine 3 di 3
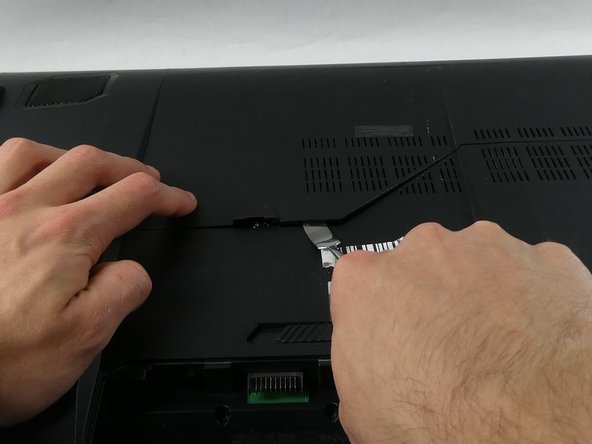
    • Use a pick or your finger to lift up the plastic cover on back of the laptop.

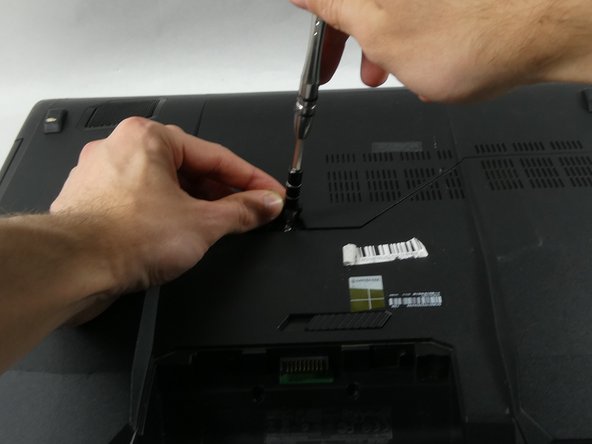
    • Under the plastic cover is a screw, unscrew it using a Phillips #00 screwdriver.

    • The screw has a c lock so it can not be unscrewed completely. Once Its loose pry on the seam using a screwdriver or the iFixit pry tool.

  4. Asus ROG G750JH-DB71 Hard Drive Replacement: passo 4, immagine 1 di 3 Asus ROG G750JH-DB71 Hard Drive Replacement: passo 4, immagine 2 di 3 Asus ROG G750JH-DB71 Hard Drive Replacement: passo 4, immagine 3 di 3
    • Remove the cover.

    • Remove the four 4.0 mm Phillips #00 screws holding in the hard drive caddy.

    • Push the caddy towards the open space in its compartment to remove it.

Conclusione

To reassemble your device, follow these instructions in reverse order.

Team

0 Commenti

Aggiungi Commento

Visualizza Statistiche:

Ultime 24 Ore: 1

Ultimi 7 Giorni: 2

Ultimi 30 Giorni: 6

Tutti i Tempi: 130