Introduzione
This guide will describe how to remove and replace the optical drive on the Asus Q551L. It is a simple procedure that involves unscrewing a few screws and sliding the optical drive out. The optical drive may need to be replaced if disks are not being read in the device, or if disks are continually getting stuck or jammed in the optical drive. The optical drive is the component of the device where disks are inserted.
Cosa ti serve
-
-
Unscrew the 10 screws around the edge of the back panel. Eight of the screws are 0.0793mm T5 , two of them are 0.0793 JIS #0.
-
-
-
-
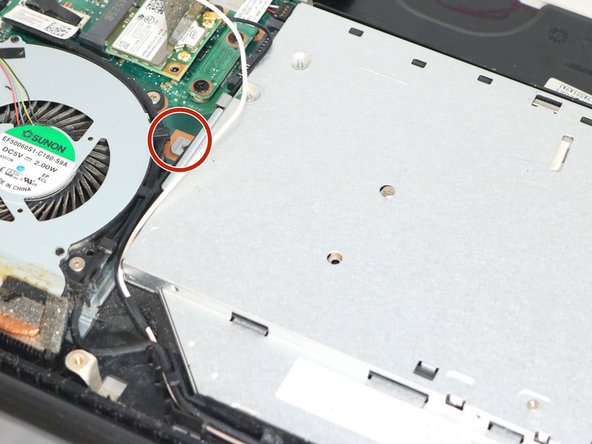
Lift up the sticker that sticks between the motherboard and the optical drive. Then, unscrew the one screw where it is marked and slide it out gently.
-


To reassemble your device, follow these instructions in reverse order.
To reassemble your device, follow these instructions in reverse order.
Team

Eastern Washington University, Team S3-G2, Rowley Spring 2018 Membro di Eastern Washington University, Team S3-G2, Rowley Spring 2018
EWU-ROWLEY-S18S3G2
3 Membri
4 Guide realizzate