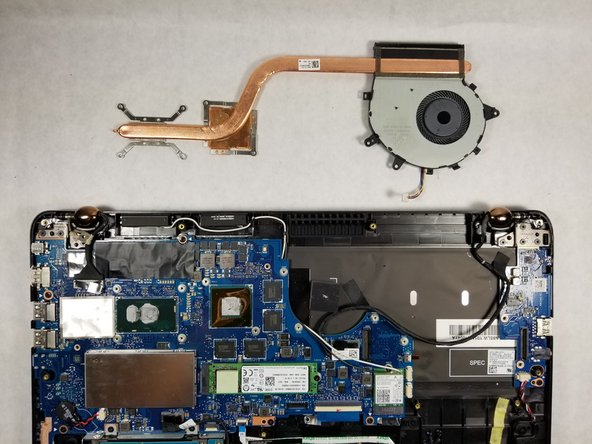
Salta al contenuto principale

Asus Q534U CPU Fan/Heat Sink Replacement

Cosa ti serve

  1. Asus Q534U CPU Fan/Heat Sink Replacement, Back Case Removal: passo 1, immagine 1 di 1
    • Make sure the device is turned off and unplugged from the charger.

    • Use a T5 screwdriver to remove all 10 screws that secure the bottom cover.

    • Pull off the back cover of the laptop.

    • A pry tool may be needed to pull off the back cover.

  2. Asus Q534U CPU Fan/Heat Sink Replacement: passo 2, immagine 1 di 2 Asus Q534U CPU Fan/Heat Sink Replacement: passo 2, immagine 2 di 2
    • Wedge an opening tool under the battery's bundled cable connector, and gently pry the connector up and to disconnect the battery.

  3. Asus Q534U CPU Fan/Heat Sink Replacement: passo 3, immagine 1 di 2 Asus Q534U CPU Fan/Heat Sink Replacement: passo 3, immagine 2 di 2
    • Lift up the black tab next to the silver ribbon cable.

    • Pull lightly on the blue tabs until the silver cable is free.

  4. Asus Q534U CPU Fan/Heat Sink Replacement: passo 4, immagine 1 di 1
    • Use a Phillips #00 screwdriver to remove the 5 marked screws.

    • Gently remove the battery.

    • Do not bend or puncture the laptop's lithium-polymer pattery.

  5. Asus Q534U CPU Fan/Heat Sink Replacement, CPU Fan/Heat Sink: passo 5, immagine 1 di 2 Asus Q534U CPU Fan/Heat Sink Replacement, CPU Fan/Heat Sink: passo 5, immagine 2 di 2
    • Using the iFixit opening tool, gently pry the CPU fan connector out of the socket.

  6. Asus Q534U CPU Fan/Heat Sink Replacement: passo 6, immagine 1 di 2 Asus Q534U CPU Fan/Heat Sink Replacement: passo 6, immagine 2 di 2
    • Move the black cable located around the CPU fan out of the holder.

    • Remove the following 9 screws:

    • Three Phillips screws

    • Six Phillips screws

    • Make sure not to mix up both types of screws.

    • Gently pull vertically on the CPU fan/ heat sink assembly until it is free.

    • Before placing a new CPU fan/heat sink assembly, the CPU and GPU surfaces must be cleaned off and thermal compound must be reapplied.

Conclusione

To reassemble your device, follow these instructions in reverse order.

Altre 4 persone hanno completato questa guida.

mmedina

Membro da: 04/07/16

749 Reputazione

2 Guide realizzate

Team

Un commento

Is it possible to replace the fan only without removing the full heatsink or is it fused together as one unit?

Bork Bois - Replica

Aggiungi Commento

Visualizza Statistiche:

Ultime 24 Ore: 2

Ultimi 7 Giorni: 5

Ultimi 30 Giorni: 17

Tutti i Tempi: 2,882