Salta al contenuto principale

Asus Q525U Wi-Fi Card Replacement

Cosa ti serve

  1. Asus Q525U Wi-Fi Card Replacement, Back Cover: passo 1, immagine 1 di 3 Asus Q525U Wi-Fi Card Replacement, Back Cover: passo 1, immagine 2 di 3 Asus Q525U Wi-Fi Card Replacement, Back Cover: passo 1, immagine 3 di 3
    • Begin by powering off the device and flipping the device over.

    • Carefully remove the two longer 9.5 mm screws on the corners with a Phillips #1 screwdriver.

    • Remove the eight 7.5 mm Phillips #1 screws on the back of the device.

  2. Asus Q525U Wi-Fi Card Replacement: passo 2, immagine 1 di 3 Asus Q525U Wi-Fi Card Replacement: passo 2, immagine 2 di 3 Asus Q525U Wi-Fi Card Replacement: passo 2, immagine 3 di 3
    • Use an opening pick to separate the back cover from the device.

    • For easiest removal, begin by prying at one of the front corners and sliding the tool under the cover in a counter-clockwise motion (to the left) toward the laptop hinge.

  3. Asus Q525U Wi-Fi Card Replacement: passo 3, immagine 1 di 3 Asus Q525U Wi-Fi Card Replacement: passo 3, immagine 2 di 3 Asus Q525U Wi-Fi Card Replacement: passo 3, immagine 3 di 3
    • Once the cover has been separated from the device, carefully lift the back cover off the device (begin by lifting from the front of the cover first).

    • The back cover should be easily removable, allowing full access to all of the internal components.

  4. Asus Q525U Wi-Fi Card Replacement, Wi-Fi Card: passo 4, immagine 1 di 2 Asus Q525U Wi-Fi Card Replacement, Wi-Fi Card: passo 4, immagine 2 di 2
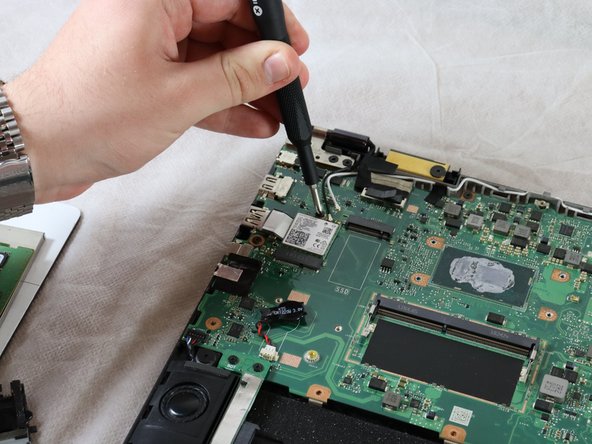
    • The Wi-Fi card is located above the CMOS coin cell battery and below one of the hinges.

    • Using a Phillips #1 screwdriver, remove one 2 mm screw, that holds the card in place.

  5. Asus Q525U Wi-Fi Card Replacement: passo 5, immagine 1 di 1
    Attrezzo utilizzato in questo passaggio:
    Tweezers
    $4.99
    Compra
    • Use a pair of pointed tweezers to disconnect the small black and white coaxial connectors from the Wi-Fi card.

  6. Asus Q525U Wi-Fi Card Replacement: passo 6, immagine 1 di 2 Asus Q525U Wi-Fi Card Replacement: passo 6, immagine 2 di 2
    • Use the pointed tweezers to pull the network card out and away from the socket.

Conclusione

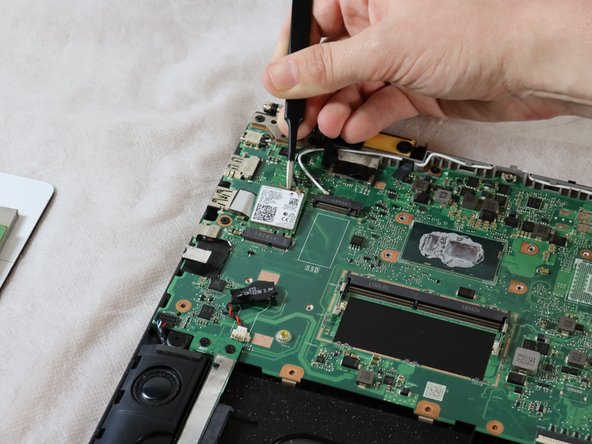
To reassemble your device, follow these instructions in reverse order.

Team

Clemson, Team 2-5, Hunter Spring 2022 Membro di Clemson, Team 2-5, Hunter Spring 2022

CLEM-HUNTER-S22S2G5

4 Membri

8 Guide realizzate

0 Commenti

Aggiungi Commento

Visualizza Statistiche:

Ultime 24 Ore: 0

Ultimi 7 Giorni: 0

Ultimi 30 Giorni: 25

Tutti i Tempi: 219