Salta al contenuto principale

Asus G75VW-BHI7N07 USB Port Replacement

Cosa ti serve

  1. Asus G75VW-BHI7N07 USB Port Replacement, USB Port: passo 1, immagine 1 di 3 Asus G75VW-BHI7N07 USB Port Replacement, USB Port: passo 1, immagine 2 di 3 Asus G75VW-BHI7N07 USB Port Replacement, USB Port: passo 1, immagine 3 di 3
    • Remove the screws around the back cover using a Phillips #1 screwdriver.

    • Take the back cover off using the opening tool.

  2. Asus G75VW-BHI7N07 USB Port Replacement: passo 2, immagine 1 di 3 Asus G75VW-BHI7N07 USB Port Replacement: passo 2, immagine 2 di 3 Asus G75VW-BHI7N07 USB Port Replacement: passo 2, immagine 3 di 3
    • Once you get rid of the back cover, spot all the screws marked ‘A’. There should be 10 in total.

    • Remove the battery using the slide release button.

    • This should expose 2 more ‘A’ marked screws.

    • Remove those using the same screwdriver.

  3. Asus G75VW-BHI7N07 USB Port Replacement: passo 3, immagine 1 di 2 Asus G75VW-BHI7N07 USB Port Replacement: passo 3, immagine 2 di 2
    • Using the opening tool, remove the disc drive cover.

    • Spot the 6 ‘B’ marked screws and remove them using the Phillips #1 screwdriver.

  4. Asus G75VW-BHI7N07 USB Port Replacement: passo 4, immagine 1 di 2 Asus G75VW-BHI7N07 USB Port Replacement: passo 4, immagine 2 di 2
    • Using the opening tool, pry open the keypad platform.

    • You will need to use your hands to get to the laptop’s internal systems by lifting the keypad platform.

  5. Asus G75VW-BHI7N07 USB Port Replacement: passo 5, immagine 1 di 3 Asus G75VW-BHI7N07 USB Port Replacement: passo 5, immagine 2 di 3 Asus G75VW-BHI7N07 USB Port Replacement: passo 5, immagine 3 di 3
    • Now that the fans are exposed, use the opening tool to unhook them at the 4 connecting points.

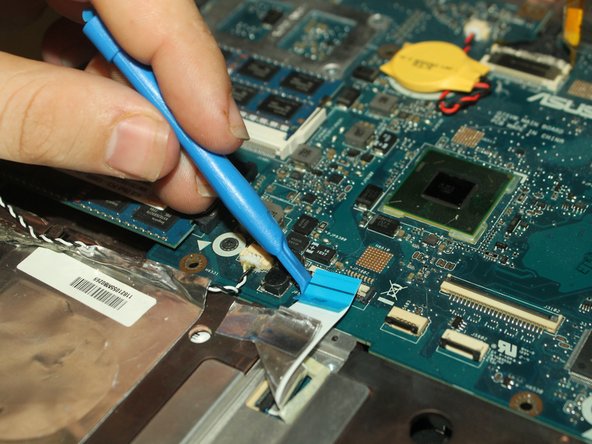
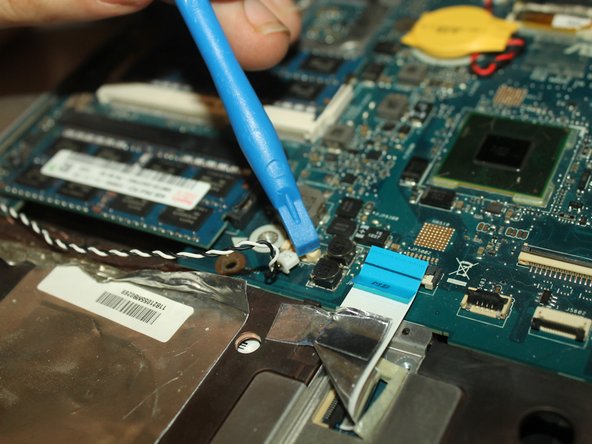
    • Detach the blue-colored electrical component using the opening tool.

    • Detach the white and black colored electrical component using the opening tool.

  6. Asus G75VW-BHI7N07 USB Port Replacement: passo 6, immagine 1 di 1
    • Using the Phillips #0 Screwdriver, remove the 5 screws around the edges of the motherboard.

    • Remove the 2 screws around the fan using the Phillips #0 Screwdriver which should be near the motherboard.

  7. Asus G75VW-BHI7N07 USB Port Replacement: passo 7, immagine 1 di 1
    • Carefully lift the motherboard up using the opening tool.

    • You should be able to see the USB port.

    • Now you will be able to desolder the faulty USB port.

    • Here is a link on desoldering Come saldare e dissaldare componenti elettrici

Conclusione

To reassemble your device, follow these instructions in reverse order.

Un'altra persona ha completato questa guida.

0 Commenti

Aggiungi Commento

Visualizza Statistiche:

Ultime 24 Ore: 1

Ultimi 7 Giorni: 1

Ultimi 30 Giorni: 5

Tutti i Tempi: 592