Salta al contenuto principale

Asus F6A-X2 RAM Replacement

Cosa ti serve

  1. Asus F6A-X2 RAM Replacement, Battery: passo 1, immagine 1 di 1
    • Remove any power cords and turn the laptop off. Attempting to replace part of the laptop while power is running through it may cause electrocution or damage to the device.

    • Flip laptop face down and rotate so the battery is facing toward you.

    • The battery is not shown in this picture.

    • To remove the battery, place one finger on each of the two black slide tabs. Push each tab toward the center of the laptop to release the lock.

    • Slide the battery toward you and lift it out of the laptop.

  2. Asus F6A-X2 RAM Replacement, Back Access Panel: passo 2, immagine 1 di 2 Asus F6A-X2 RAM Replacement, Back Access Panel: passo 2, immagine 2 di 2
    • With the laptop facing down, rotate it so the battery pack is facing away from you.

    • Remove the six 1.5 mm Phillips #1 screws on the back panel of the laptop.

  3. Asus F6A-X2 RAM Replacement: passo 3, immagine 1 di 3 Asus F6A-X2 RAM Replacement: passo 3, immagine 2 di 3 Asus F6A-X2 RAM Replacement: passo 3, immagine 3 di 3
    • Insert a finger into one of the slots on the bottom panel.

    • Gently lift the upwards, and the back panel of the laptop will come off easily.

  4. Asus F6A-X2 RAM Replacement, RAM: passo 4, immagine 1 di 2 Asus F6A-X2 RAM Replacement, RAM: passo 4, immagine 2 di 2
    • Make sure to check the RAM specifications on the device page.

    • There are two white plastic tabs holding the RAM in place. Place two fingers on each of these tabs, and pull outward.

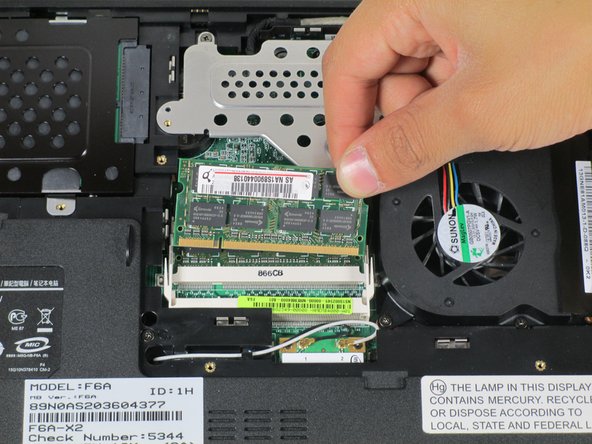
    • You will hear a pop and visibly see the RAM move upwards.

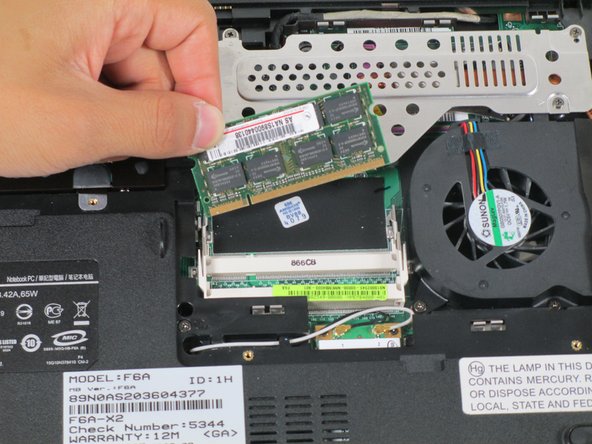
    • Slide the RAM towards the back end of the laptop (the end with the battery), and lift up to remove it.

  5. Asus F6A-X2 RAM Replacement: passo 5, immagine 1 di 2 Asus F6A-X2 RAM Replacement: passo 5, immagine 2 di 2
    • Repeat the process from the previous step to remove the bottom RAM.

Conclusione

To reassemble your device, follow these instructions in reverse order.

Un'altra persona ha completato questa guida.

Jonathan

Membro da: 04/24/14

1.174 Reputazione

11 Guide realizzate

Team

Cal Poly, Team 10-56, Amido Spring 2014 Membro di Cal Poly, Team 10-56, Amido Spring 2014

CPSU-AMIDO-S14S10G56

4 Membri

12 Guide realizzate

Un commento

Tutorel simple et très clair.

Merci

alainbadinier - Replica

Aggiungi Commento

Visualizza Statistiche:

Ultime 24 Ore: 0

Ultimi 7 Giorni: 1

Ultimi 30 Giorni: 1

Tutti i Tempi: 564