Introduzione
These step-by-step instructions will guide you on replacing the 2.5’’ HDD/SSD currently installed on your ASUS Eee PC, model 1005PXD-BLK024S. The process will be very similar (if not identical) in every laptop with a 1001PXD board inside.
Cosa ti serve
-
-
The first thing you should do when disassembling electronic devices in general is to disconnect it from any power source. Make sure the AC adapter isn't connected to the laptop before you start.
-
Turn the laptop upside down, with the battery side closest to you. Unlock the left slider by pressing it to the left. It will stay in this position.
-
Now slide the right slider to the right. This one won't lock in position, so you must slide the battery towards you while pressing this slider to the right to remove it.
-
-
-
Turn the laptop upside up and open the lid. You should see 4 small pins located next to the top of the keyboard.
-
Use an opening pick to press the pins away from the keyboard. A small flat head screwdriver should also do the trick. It's easier to start with the middle clips.
-
In order to maintain the clips from locking the keyboard again, it's advised to do this with the keyboard in a vertical position or to use another opening pick to lift the keyboard after pressing the first clip.
-
-
-
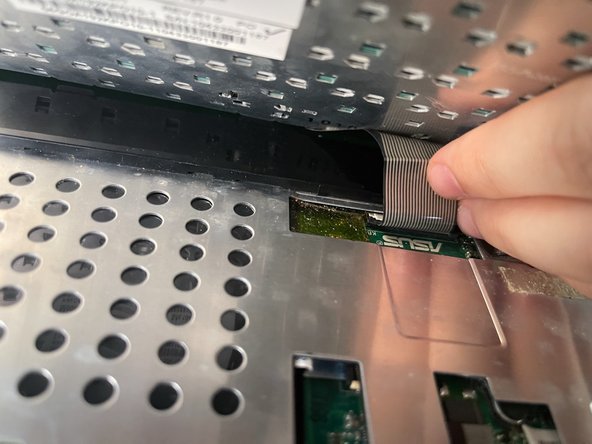
Slightly lift the top of the keyboard from the laptop.
-
Reach around the keyboard and remove the ribbon cable from the motherboard. To do so, just gently pull it from the connector.
-
You can then remove the keyboard by sliding it up.
-
-
-
-
Close the lid and turn your computer upside down again.
-
Remove the 4 Phillips screws located one in each corner.
-
-
-
Turn the laptop upside up and disconnect the little ribbon cable from the motherboard. To do so, lift the black tab of the connector and pull the ribbon cable by pulling it from its blue tab towards you.
-
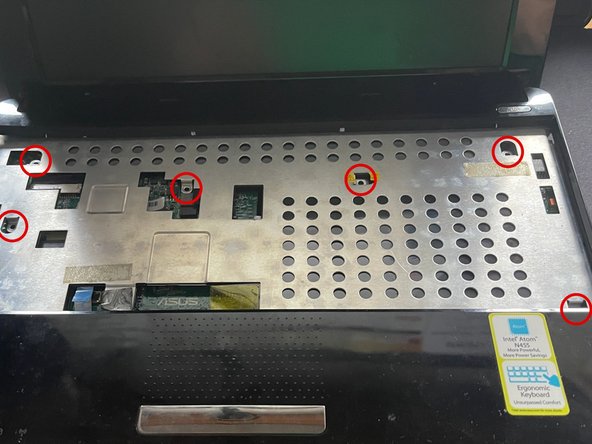
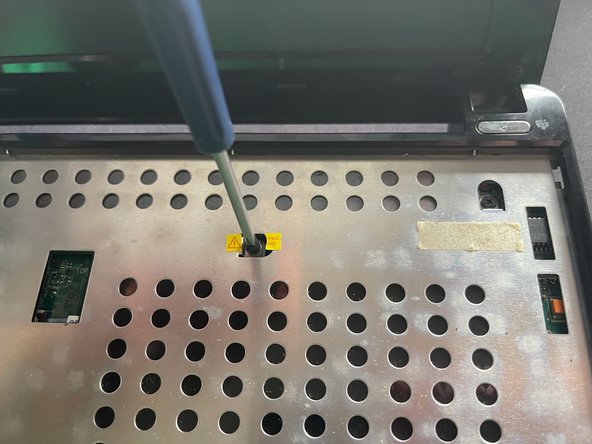
Then, remove the 6 Phillips screws from the metal shield. Completing this step may void your computer's warranty, depending on where you are, so consult your country/state's legislation before proceeding.
-
-
-
Using something like a guitar pick, go all around the frame to separate it from the bottom.
-
Be extra careful not to separate the plastic frame from the metal shield (as I did in one corner), as this will most likely break the plastic tabs holding the two together. This isn't the worst thing it can happen though, so don't worry too much if you break a couple of them.
-
After separating the top from the bottom, put it aside.
-
-
-
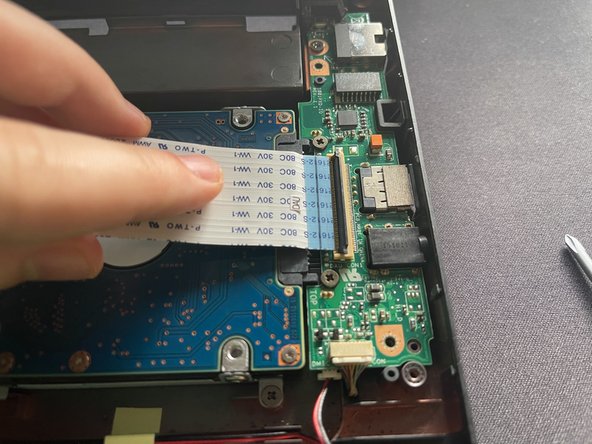
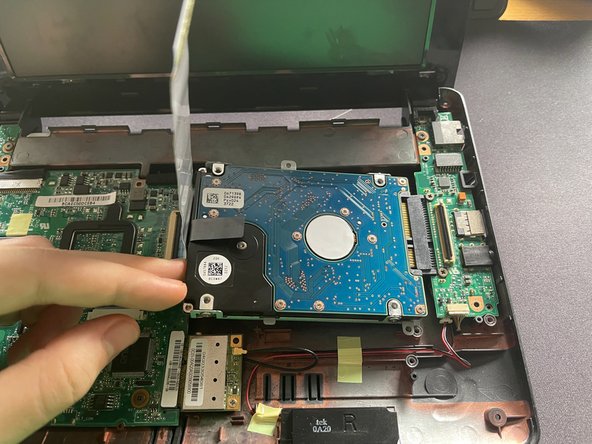
There's this ribbon cable on top of the storage drive connecting the motherboard to a smaller daughter board with the SATA connector and the right-side ports, which you must disconnect.
-
To accomplish this, just lift the black tab on the daughter board's connector and pull the ribbon cable to the left.
-
Doing so, will let you lift the ribbon cable, allowing you to remove the 2.5'' drive bay further down the line.
-
-
-
Unscrew the one left Phillips screw that is holding the drive bay.
-
Then, while lifting the ribbon cable, slightly lift the left side of the drive bay, just enough to allow you to slide the drive bay to the left, disconnecting the drive from the daughter board.
-
-
-
With the drive bay out of the computer chassis, unscrew the 4 Phillips screws holding the HDD/SSD to the drive bay.
-
Remove the drive from its bay and install a replacement one instead.
-


To reassemble your device, follow these instructions in reverse order.
To reassemble your device, follow these instructions in reverse order.
Annulla: non ho completato questa guida.
Un'altra persona ha completato questa guida.
