Questa versione può contenere modifiche errate. Passa all'ultima istantanea verificata.
Cosa ti serve
-
Questo passaggio è privo di traduzione. Aiuta a tradurlo
-
Remove three of the rubber feet on the bottom cover with a plastic or metal spudger.
-
-
Questo passaggio è privo di traduzione. Aiuta a tradurlo
-
Remove the five screws from beneath the rubber feet using a Phillips #0 screwdriver.
-
-
Questo passaggio è privo di traduzione. Aiuta a tradurlo
-
Remove the nine bottom cover screws using a T5 screwdriver. Set apart the 6mm screw in the rear middle of the bottom cover from the the other eight 3mm screws, as it is longer than them.
-
Set apart the 6mm screw in the rear middle of the bottom cover from the the other eight 3mm screws, as it is longer than them
-
-
Questo passaggio è privo di traduzione. Aiuta a tradurlo
-
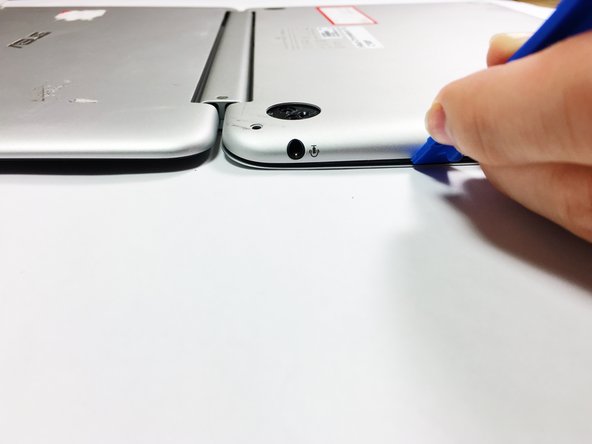
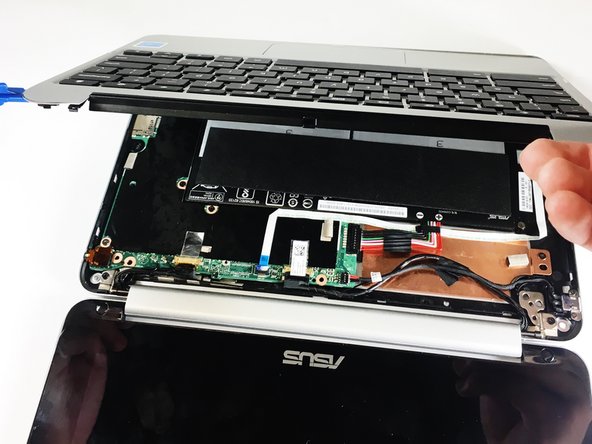
Pry the palm rest assembly apart from the bottom cover using a spudger. This step may require extra power. Once the palm rest has been separated from the bottom cover, pull it away from the screen, rather than away from yourself.
-
-
Questo passaggio è privo di traduzione. Aiuta a tradurlo
-
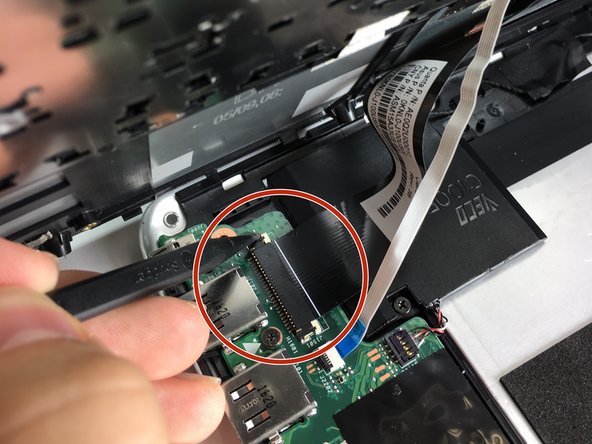
Disconnect the touchpad cable and the keyboard cable on the palm rest assembly from the motherboard using the pointed end of a plastic spudger.
-
-
-
Questo passaggio è privo di traduzione. Aiuta a tradurlo
-
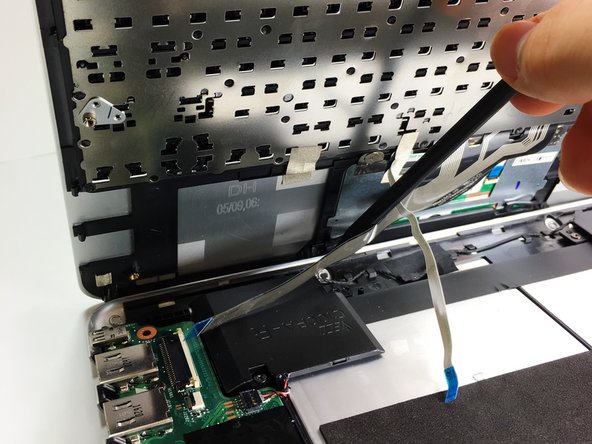
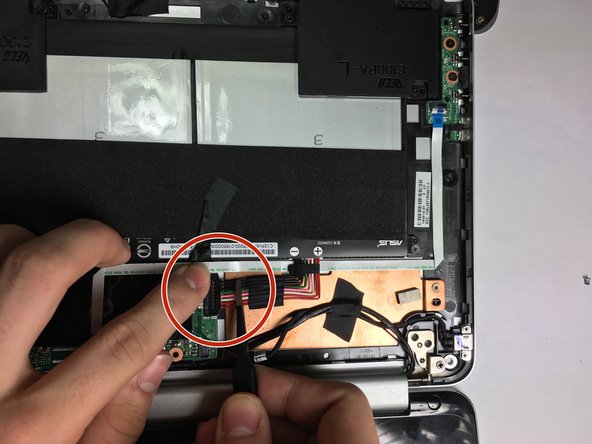
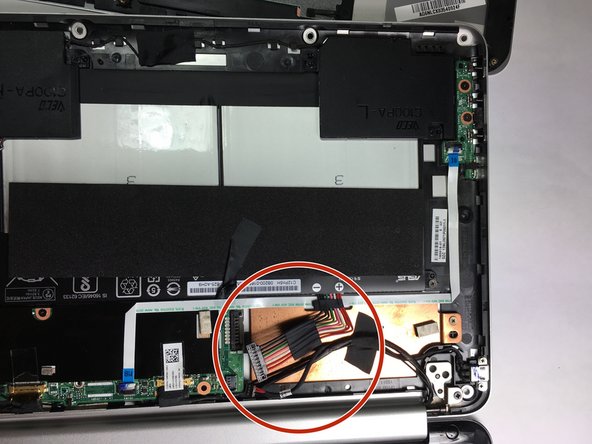
Disconnect the DC jack cable and the battery cable from the motherboard using tweezers, the pointed end of a plastic spudger, or by simply pulling the cables apart from the motherboard with your fingers.
-
-
Questo passaggio è privo di traduzione. Aiuta a tradurlo
-
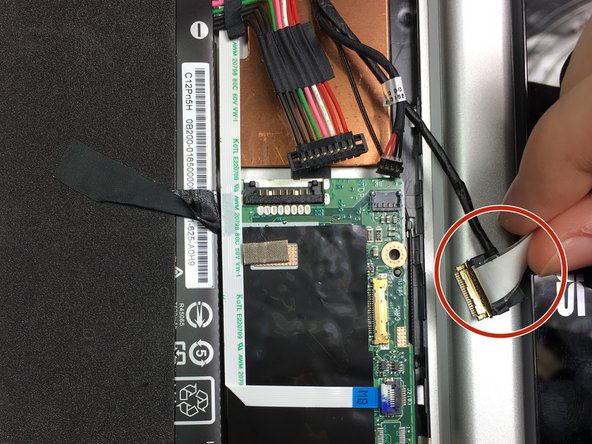
Disconnect the LCD cable from the motherboard using the pointed end of a plastic spudger.
-
-
Questo passaggio è privo di traduzione. Aiuta a tradurlo
-
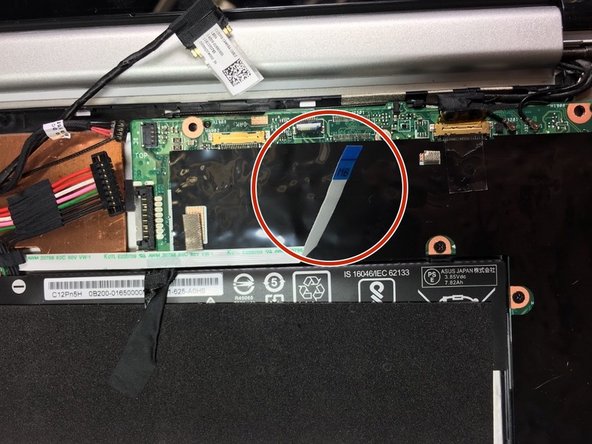
Disconnect the motherboard to powerboard cable from the motherboard using the pointed end of a plastic spudger.
-
-
Questo passaggio è privo di traduzione. Aiuta a tradurlo
-
Disconnect the digitizer board cable from the motherboard using the pointed end of a plastic spudger.
-
-
Questo passaggio è privo di traduzione. Aiuta a tradurlo
-
Disconnect the two WiFi antenna cables from the motherboard using the pointed end of a plastic spudger or simply by pulling the cables apart from the motherboard with your fingers.
-
-
Questo passaggio è privo di traduzione. Aiuta a tradurlo
-
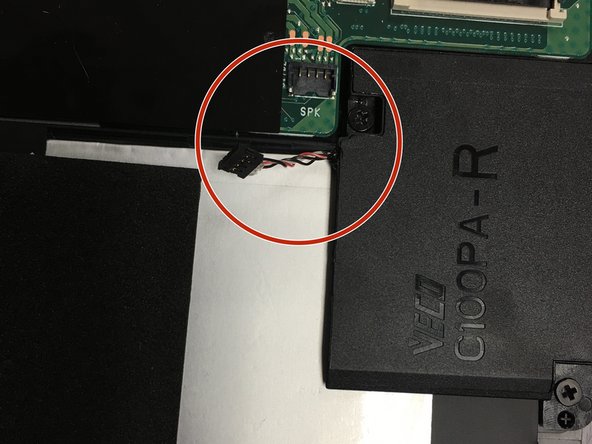
Disconnect the speaker cable from the motherboard using the pointed end of a plastic spudger.
-
-
Questo passaggio è privo di traduzione. Aiuta a tradurlo
-
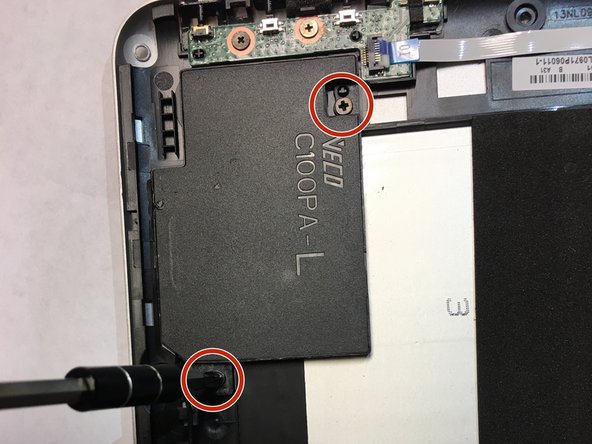
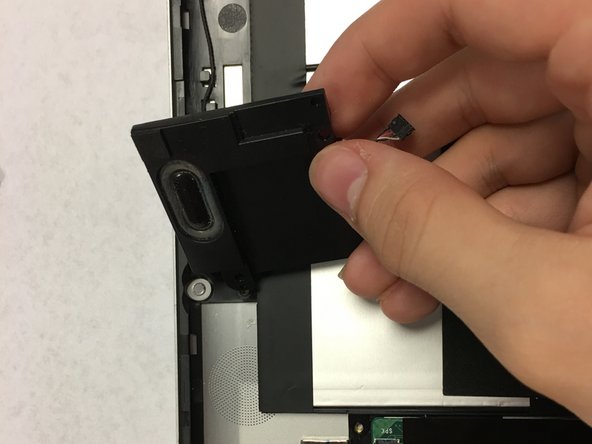
Remove the four 4.2mm speaker screws, then remove the two speakers using a philips head screwdriver.
-
-
Questo passaggio è privo di traduzione. Aiuta a tradurlo
-
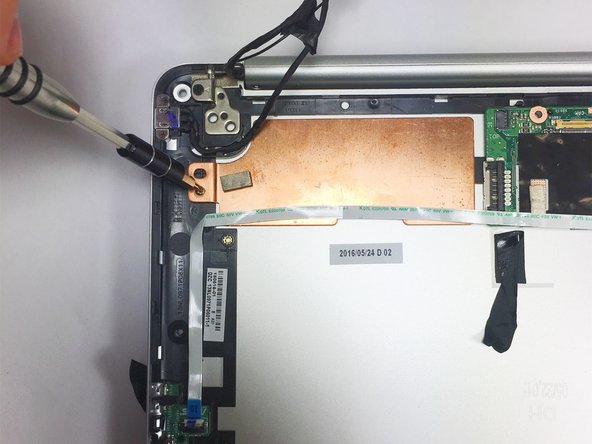
Remove the five 2.7mm motherboard screws with a T5 screwdriver.
-


Annulla: non ho completato questa guida.
Altre 3 persone hanno completato questa guida.

Team

Baylor, Team S5-G2, Williams Spring 2018 Membro di Baylor, Team S5-G2, Williams Spring 2018
BU-WILLIAMS-S18S5G2
3 Membri
8 Guide realizzate