Questa versione può contenere modifiche errate. Passa all'ultima istantanea verificata.
Cosa ti serve
-
Questo passaggio è privo di traduzione. Aiuta a tradurlo
-
Remove the eight 8.0mm Phillips #0 screws on the bottom of the laptop.
-
Remove the three 6.0mm Phillips #0 screws.
-
-
Questo passaggio è privo di traduzione. Aiuta a tradurlo
-
Open the laptop.
-
Using an iFixit opening tool, pry along the edges of the keyboard.
-
Lift the keyboard and slide it gently towards you.
-
-
Questo passaggio è privo di traduzione. Aiuta a tradurlo
-
Disconnect the two ZIF connectors by prying up the locking bar with a spudger and removing the ribbon cable.
-
-
-
Questo passaggio è privo di traduzione. Aiuta a tradurlo
-
Flip over the keyboard assembly to reveal the trackpad beneath.
-
-
Questo passaggio è privo di traduzione. Aiuta a tradurlo
-
Peel up the two pieces of foil tape holding down the trackpad.
-
-
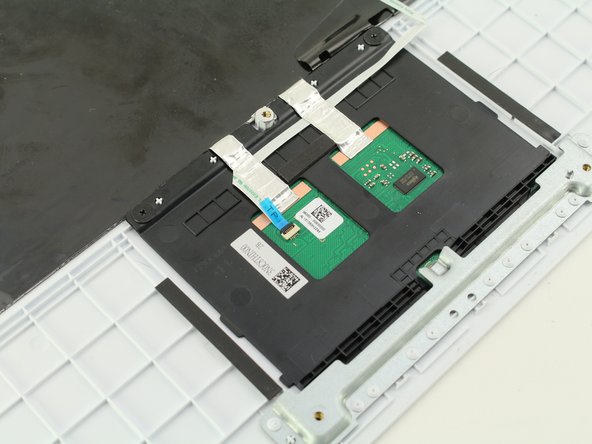
Questo passaggio è privo di traduzione. Aiuta a tradurlo
-
Use a spudger to release the locking bar of the ZIF connector near the center of the trackpad.
-
Slide the cable ribbon from the connector.
-
-
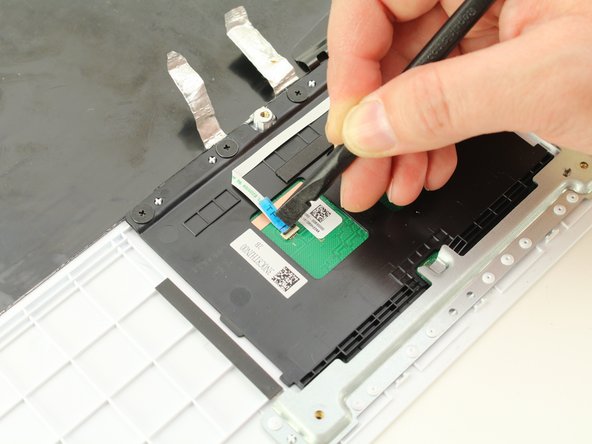
Questo passaggio è privo di traduzione. Aiuta a tradurlo
-
Peel back the ribbon cable, which is adhered to the trackpad.
-
-
Questo passaggio è privo di traduzione. Aiuta a tradurlo
-
Remove the four 2.5mm Phillips #0 screws along the top edge of the trackpad.
-
-
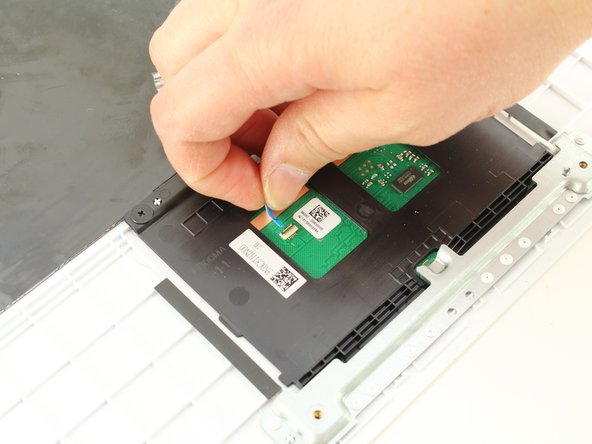
Questo passaggio è privo di traduzione. Aiuta a tradurlo
-
Pry the trackpad from the top edge with a finger or spudger.
-
Lift the trackpad up and away from the keyboard assembly.
-