Salta al contenuto principale

Asus Chromebook C300MA-BBCLN12 Keyboard Replacement

Cosa ti serve

  1. Asus Chromebook C300MA-BBCLN12 Keyboard Replacement, Keyboard: passo 1, immagine 1 di 3 Asus Chromebook C300MA-BBCLN12 Keyboard Replacement, Keyboard: passo 1, immagine 2 di 3 Asus Chromebook C300MA-BBCLN12 Keyboard Replacement, Keyboard: passo 1, immagine 3 di 3
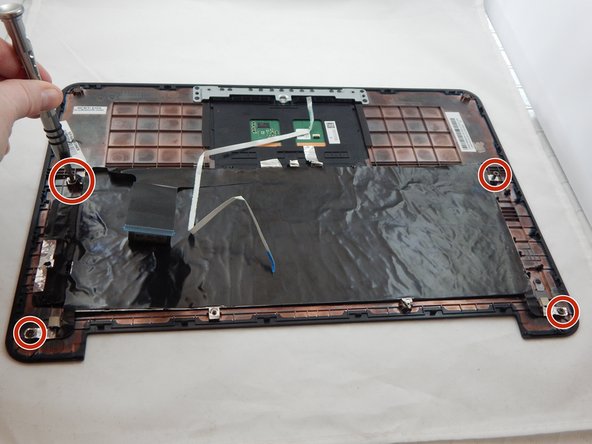
    • Remove the eight 9.0mm PH00 Phillips screws along the perimeter of the bottom housing.

    • Remove the three 6.0mm PH00 Phillips screws from the center of the bottom housing.

  2. Asus Chromebook C300MA-BBCLN12 Keyboard Replacement: passo 2, immagine 1 di 3 Asus Chromebook C300MA-BBCLN12 Keyboard Replacement: passo 2, immagine 2 di 3 Asus Chromebook C300MA-BBCLN12 Keyboard Replacement: passo 2, immagine 3 di 3
    • Separate the palm rest assembly from the bottom housing using the plastic opening tool.

    • It is recommended that you start from a corner and run the tip of the plastic opening tool along the edge of the housing.

    • Lift the palm rest assembly slowly to prevent damaging the two cables connecting it to the motherboard.

  3. Asus Chromebook C300MA-BBCLN12 Keyboard Replacement: passo 3, immagine 1 di 3 Asus Chromebook C300MA-BBCLN12 Keyboard Replacement: passo 3, immagine 2 di 3 Asus Chromebook C300MA-BBCLN12 Keyboard Replacement: passo 3, immagine 3 di 3
    Attrezzo utilizzato in questo passaggio:
    Tweezers
    $4.99
    Compra
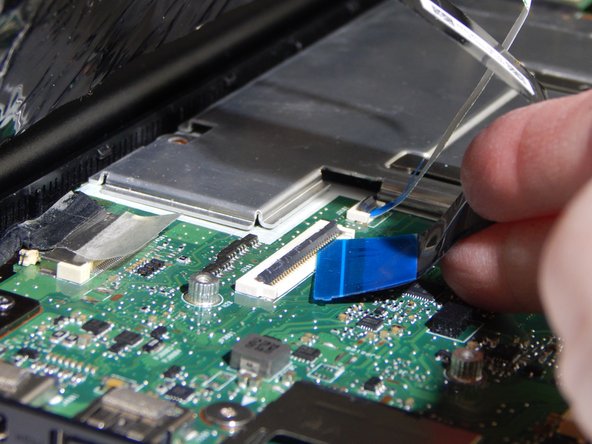
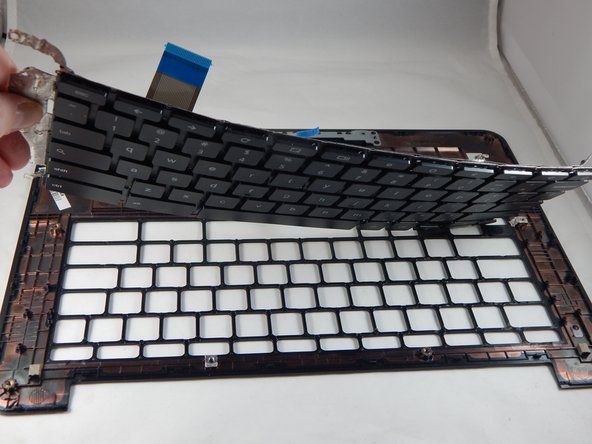
    • Flip back the hinges on the connectors that secure the wide black cable and the narrow white cable using the tweezers.

    • Disconnect the wide black cable from the motherboard by pulling the blue cable tab straight out of the connector.

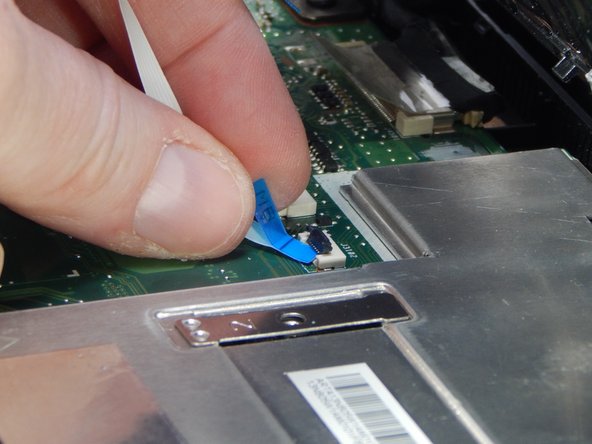
    • Disconnect the white ribbon cable from the motherboard by pulling the blue cable tab straight out of the connector.

  4. Asus Chromebook C300MA-BBCLN12 Keyboard Replacement: passo 4, immagine 1 di 3 Asus Chromebook C300MA-BBCLN12 Keyboard Replacement: passo 4, immagine 2 di 3 Asus Chromebook C300MA-BBCLN12 Keyboard Replacement: passo 4, immagine 3 di 3
    • Flip back the hinge on the connector that secures the white ribbon cable to the underside of the palm rest assembly using the tweezers.

    • Disconnect the white ribbon cable from the palm rest assembly by pulling the cable straight out of the connector.

  5. Asus Chromebook C300MA-BBCLN12 Keyboard Replacement: passo 5, immagine 1 di 3 Asus Chromebook C300MA-BBCLN12 Keyboard Replacement: passo 5, immagine 2 di 3 Asus Chromebook C300MA-BBCLN12 Keyboard Replacement: passo 5, immagine 3 di 3
    • Remove the palm rest assembly from the bottom housing and lay it on a flat surface with the keyboard facing downward.

    • Remove the four 5.0mm PH00 Phillips screws securing the keyboard to the palm rest assembly.

    • Separate the keyboard from the palm rest assembly.

Conclusione

To reassemble your device, follow these instructions in reverse order.

0 Commenti

Aggiungi Commento

Visualizza Statistiche:

Ultime 24 Ore: 0

Ultimi 7 Giorni: 4

Ultimi 30 Giorni: 9

Tutti i Tempi: 394