Introduzione
If your Asus Chromebook C202 model C202SA is experiencing USB connection or charge issues due to a faulty power adapter port, then it's time to swap out the Input/Output (I/O) board. The I/O board regulates external connectors like USB connectors and the input for charging.
Make sure that such a failure is not due to loose connections, software errors, or damaged cables prior to attempting this repair. If multiple USB devices and sources of power do not work, replacing the I/O board is a necessary step.
This repair takes some minimal disassembly, including dealing with internal components and using small tools in the form of screwdrivers. There is no soldering, but be gentle with brittle ribbon cables. Before starting, power off the device completely and take out the battery to prevent electrical harm.
Cosa ti serve
-
-
Remove Phillips #1 screws from the bottom of the Chromebook using a Phillips #1 screwdriver.
-
Ten 8 mm screws
-
Two of the screws are hidden by rubber caps along the rubber rest of the device. Use tweezers to get them out.
-
-
Attrezzo utilizzato in questo passaggio:iFixit Opening Tool$1.99
-
Place the plastic opening tool into the edges between the front of the Chromebook and the back of it with the upper scoop of the opening tool facing upward.
-
Push down on the plastic opening tool to unhinge the top portion of the Chromebook from its lower portion. Opening the Chromebook all the way where the display touches the ground helps in opening up the top edge.
-
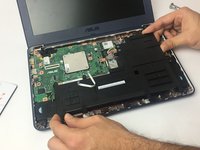
Use your hand to gently lift the top portion of the Chromebook from the bottom portion of it to avoid damaging the ribbon cables.
-
-
-
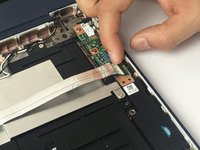
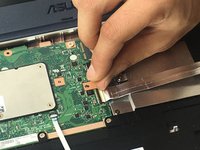
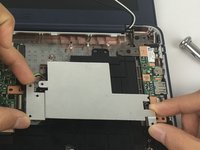
Pull the latch out on both the Input/Output board as well as the motherboard.
-
Gently remove the ribbon cable connecting the I/O board to the motherboard.
-
-
-
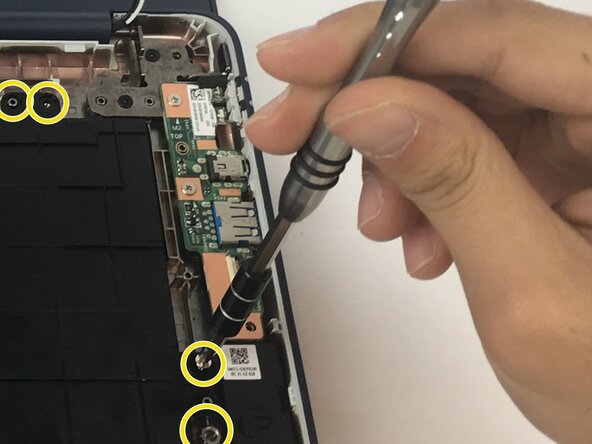
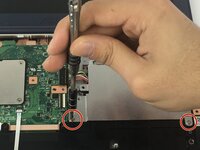
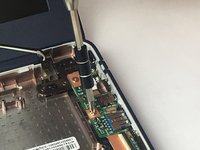
Remove 2 4 mm Phillips #1 screws connecting the I/O board to the Chromebook.
-
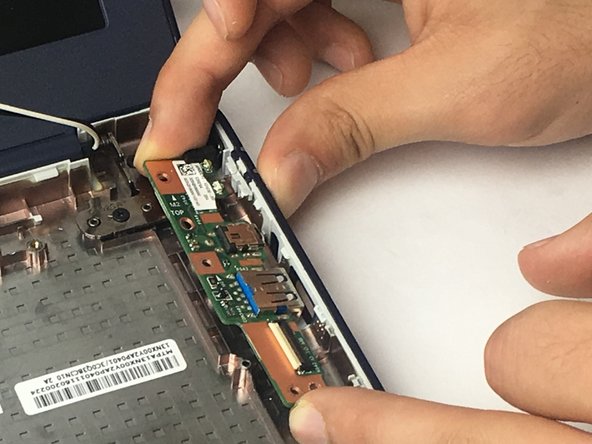
Lift the I/O board from the Chromebook.
-


To reassemble your device, follow these instructions in reverse order.
To reassemble your device, follow these instructions in reverse order.
Annulla: non ho completato questa guida.
Altre 3 persone hanno completato questa guida.
Team

USF Tampa, Team 3-1, Passmore Fall 2016 Membro di USF Tampa, Team 3-1, Passmore Fall 2016
USFT-PASSMORE-F16S3G1
4 Membri
16 Guide realizzate
Un commento
Thanks for all your ASUS guides — saved me a packet when my son breaks his!