Salta al contenuto principale

Asus A53U-ES21 Hard Drive Replacement

Cosa ti serve

  1. Asus A53U-ES21 Hard Drive Replacement, Battery: passo 1, immagine 1 di 2 Asus A53U-ES21 Hard Drive Replacement, Battery: passo 1, immagine 2 di 2
    • Make sure the laptop is off.

    • Flip the laptop upside down so that the battery is facing you.

  2. Asus A53U-ES21 Hard Drive Replacement: passo 2, immagine 1 di 2 Asus A53U-ES21 Hard Drive Replacement: passo 2, immagine 2 di 2
    • Move the two sliders towards the outer edge of the laptop.

    • Pull the battery out with your left hand while holding the right slider.

  3. Asus A53U-ES21 Hard Drive Replacement, Hard Drive: passo 3, immagine 1 di 2 Asus A53U-ES21 Hard Drive Replacement, Hard Drive: passo 3, immagine 2 di 2
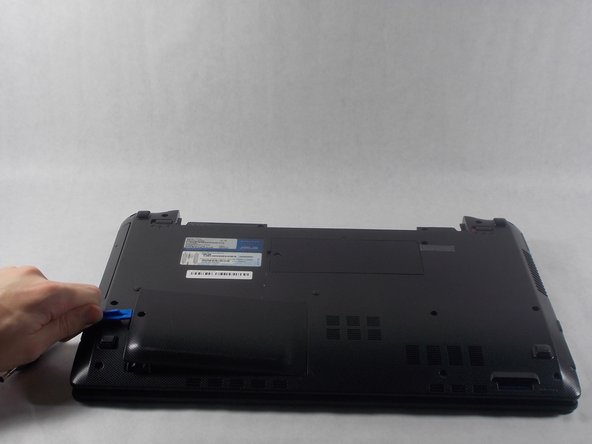
    • Remove the 5mm screw using a Phillips #1 screwdriver.

    • Use the iFixit opening tools to remove the hard drive panel.

  4. Asus A53U-ES21 Hard Drive Replacement: passo 4, immagine 1 di 2 Asus A53U-ES21 Hard Drive Replacement: passo 4, immagine 2 di 2
    • Pull upwards on the black ribbon on the end of the hard drive.

    • Pull the hard drive out from its socket and remove it from the device.

Conclusione

To reassemble your device, follow these instructions in reverse order.

Un'altra persona ha completato questa guida.

Chase Poirier

Membro da: 10/23/18

544 Reputazione

5 Guide realizzate

Team

0 Commenti

Aggiungi Commento

Visualizza Statistiche:

Ultime 24 Ore: 3

Ultimi 7 Giorni: 7

Ultimi 30 Giorni: 16

Tutti i Tempi: 490