Questa versione può contenere modifiche errate. Passa all'ultima istantanea verificata.
Cosa ti serve
-
Questo passaggio è privo di traduzione. Aiuta a tradurlo
-
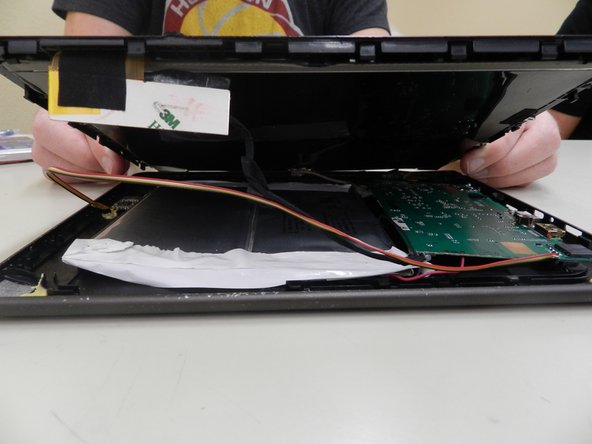
Pry open the tablet by having the tablet face upward. To pry open, start over in the left corner (by the buttons) working clockwise until the tablet is open.
-
-
Questo passaggio è privo di traduzione. Aiuta a tradurlo
-
Once the screen is separated from the back panel, you will see two cables connecting the screen to the interior of the tablet (one silver, one black)
-
Remove the black tape that is holding the end of the black cable to the white tab.
-
Gently pull the cable away from the tab with tweezers disconnecting the plug from the outlet.
-
-
-
Questo passaggio è privo di traduzione. Aiuta a tradurlo
-
Remove the silver cable by removing the tape that connects the cable and screen. Gently detach the gold cable from the outlet.
-
-
Questo passaggio è privo di traduzione. Aiuta a tradurlo
-
Now the interior of the tablet is fully accessible.
-
Heat the soldering gun until it is fully heated. Place the tip of the soldering gun over the solder that seals the red and black battery cables to the motherboard. Once the solder is heated the cables can be removed.
-


Annulla: non ho completato questa guida.
Altre 3 persone hanno completato questa guida.
Team

Sam Houston State, Team 13-5, Blackburne Winter 2015 Membro di Sam Houston State, Team 13-5, Blackburne Winter 2015
SHSU-BLACKBURNE-W15S13G5
3 Membri
8 Guide realizzate