Salta al contenuto principale

Questa guida ha delle modifiche più recenti. Passa all'ultima versione non verificata.

Aquaris M5 Front Camera Replacement

Cosa ti serve

  1. Aquaris M5 Front Camera Replacement, Back Cover: passo 1, immagine 1 di 2 Aquaris M5 Front Camera Replacement, Back Cover: passo 1, immagine 2 di 2
    • Insert the tip of an iFixit opening tool between the back cover and the mid frame of the phone.

    • Between the 2 SIM card slots is a good place to start.

    • Slide the opening tool to the bottom of the phone, to snap out the plastic clips, connecting the back cover and mid frame.

  2. Aquaris M5 Front Camera Replacement: passo 2, immagine 1 di 2 Aquaris M5 Front Camera Replacement: passo 2, immagine 2 di 2
    • Slide the opening tool back to the top of the phone, to disconnect all the clips on the edge.

    • Slide around the corner and along the top edge, to also disconnect these clips.

  3. Aquaris M5 Front Camera Replacement: passo 3, immagine 1 di 3 Aquaris M5 Front Camera Replacement: passo 3, immagine 2 di 3 Aquaris M5 Front Camera Replacement: passo 3, immagine 3 di 3
    • Be careful not to bend the back cover too hard to prevent some of the clips breaking.

    • Grab the back cover by the loosened edge.

    • Gently bend and twist the flexible back cover a bit to disconnect the remaining clips.

    • Take off the back cover.

  4. Aquaris M5 Front Camera Replacement, Battery: passo 4, immagine 1 di 1
    • Damaging the liquid indicator sticker, on the middle most screw, will void the warranty of the phone.

    • Unscrew the ten black 4mm Phillips #00 Screws from the mainboard shield.

    • Unscrew the golden 3.4mm Phillips #00 screw on the middle-right side of the mainboard shield.

  5. Aquaris M5 Front Camera Replacement: passo 5, immagine 1 di 3 Aquaris M5 Front Camera Replacement: passo 5, immagine 2 di 3 Aquaris M5 Front Camera Replacement: passo 5, immagine 3 di 3
    • Insert the flat side of a spudger between the mainboard shield and the frame of the phone.

    • Twist the spudger to lift up the mainboard shield.

    • Remove the mainboard shield from the phone.

  6. Aquaris M5 Front Camera Replacement: passo 6, immagine 1 di 2 Aquaris M5 Front Camera Replacement: passo 6, immagine 2 di 2
    • Use a spudger to disconnect the battery's flex cable from the mainboard.

    • Pull of the sticker on the bottom side of the battery.

    • Grab the sticker and lift it up to take the battery out of the phone.

  7. Aquaris M5 Front Camera Replacement, Front Camera: passo 7, immagine 1 di 3 Aquaris M5 Front Camera Replacement, Front Camera: passo 7, immagine 2 di 3 Aquaris M5 Front Camera Replacement, Front Camera: passo 7, immagine 3 di 3
    • FPC Connectors can break easily, be very careful.

    • Use an opening tool or your finger nail to open the FPC connector.

    • Disconnect the FPC connector cable.

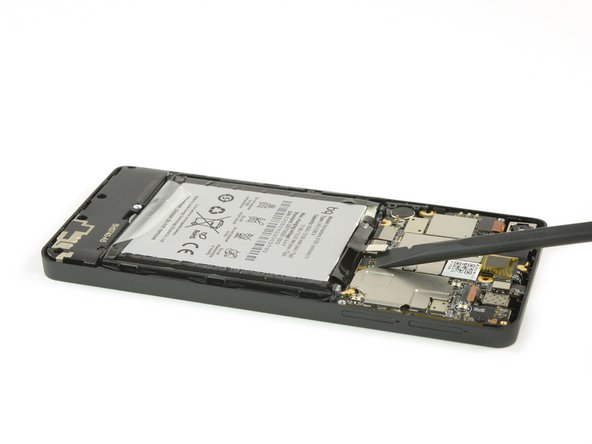
    • Use the tip of a spudger to leverage the camera out of its housing.

    • Remove the front camera.

Conclusione

To reassemble your device, follow these instructions in reverse order.

Theo Mat

Membro da: 11/12/17

12.782 Reputazione

14 Guide realizzate

0 Commenti

Aggiungi Commento

Visualizza Statistiche:

Ultime 24 Ore: 0

Ultimi 7 Giorni: 1

Ultimi 30 Giorni: 1

Tutti i Tempi: 223