Questa versione può contenere modifiche errate. Passa all'ultima istantanea verificata.
Cosa ti serve
-
Questo passaggio è privo di traduzione. Aiuta a tradurlo
-
Warm up the glue by using the hair dryer on the grille for 5-10 minutes.
-
-
Questo passaggio è privo di traduzione. Aiuta a tradurlo
-
Take one spudger and fit it under the grille.
-
Use your first spudger to pry up and make room to insert a second one.
-
Sever the glue connections between the grille and the device by moving one spudger around, cutting through the glue.
-
Use the other spudger to raise the grille, allowing you to see where you're working.
-
-
Questo passaggio è privo di traduzione. Aiuta a tradurlo
-
Pull the grille off the Apple iPod Hi-Fi with your hands.
-
-
-
Questo passaggio è privo di traduzione. Aiuta a tradurlo
-
Remove all eight 3.3mm JIS #1 screws holding the front panel in place by placing the screwdriver in the head of the screw and rotating counterclockwise.
-
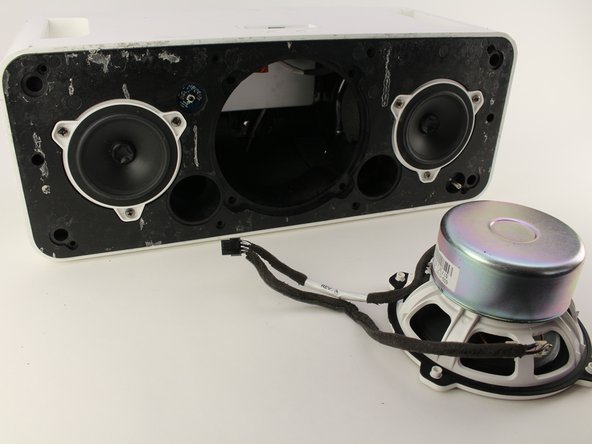
Remove the four 3.3mm JIS #1 screws holding the large speaker in place by placing the screwdriver in the head of the screw and rotating counterclockwise.
-
-
Questo passaggio è privo di traduzione. Aiuta a tradurlo
-
Pry out the large speaker with a metal spudger around the edge.
-
Remove the speaker slowly from its socket with your hands.
-
-
Questo passaggio è privo di traduzione. Aiuta a tradurlo
-
Press down on the tab and pull out with your hands to remove the cable connecting the large speaker from the rest of the unit.
-
Pull the large speaker completely out and set aside.
-
-
Questo passaggio è privo di traduzione. Aiuta a tradurlo
-
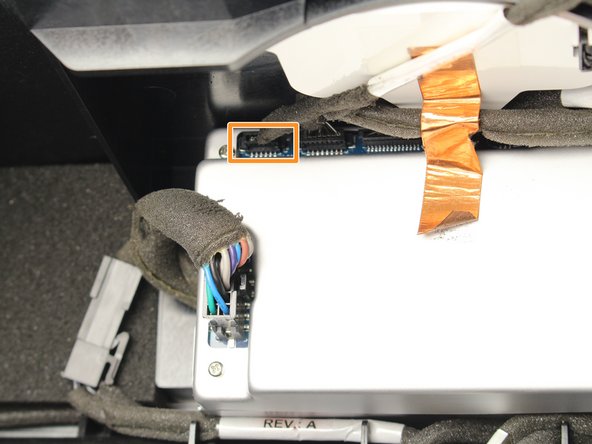
Remove the sensor connection by pulling it straight out with your hand.
-
-
Questo passaggio è privo di traduzione. Aiuta a tradurlo
-
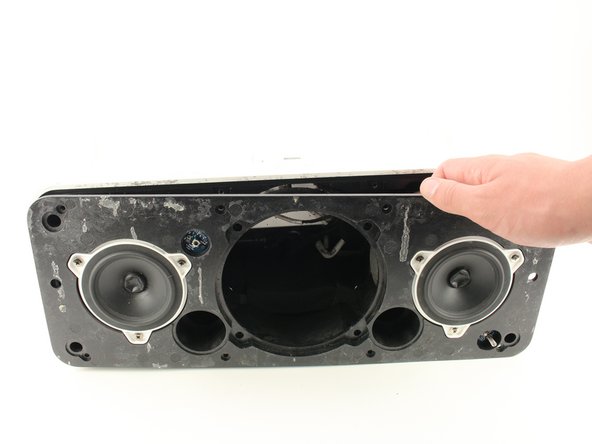
Pull the entire front assembly off by prying it up with the spudger and lifting the assembly off with your hands towards the top of the Hi-Fi.
-
-
Questo passaggio è privo di traduzione. Aiuta a tradurlo
-
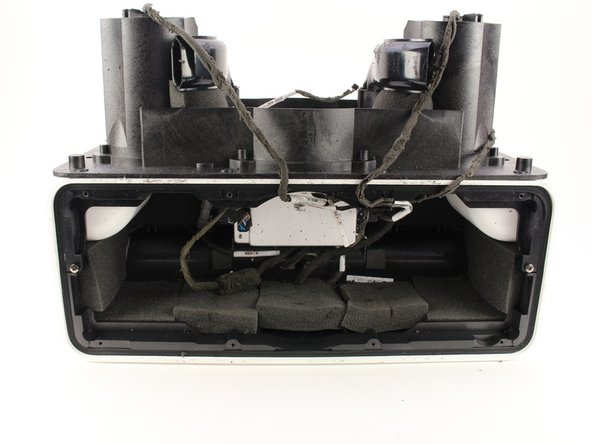
Remove the clips for the remaining two speakers by repeating step 6.
-
Remove the last connection that connects the speakers to the power box.
-
Remove the front panel completely.
-


Annulla: non ho completato questa guida.
Altre 7 persone hanno completato questa guida.
Team

Cal Poly, Team S16-G1, Livingston Spring 2018 Membro di Cal Poly, Team S16-G1, Livingston Spring 2018
CPSU-LIVINGSTON-S18S16G1
5 Membri
16 Guide realizzate
4 Commenti
Hi, I would like to know where to purchase replacement speakers for the Apple HiFi. TIA
Hi whehe can i find a replacement bass speaker ??
Yo necesito la fuente de poder de ese equipo, por favor si alguien lo tiene me escribe a: rolando.chungag@gmail.com