Salta al contenuto principale

Apple Watch Screen Replacement

Cosa ti serve

Panoramica Video

  1. Apple Watch Screen Replacement, iOpener Heating: passo 1, immagine 1 di 2 Apple Watch Screen Replacement, iOpener Heating: passo 1, immagine 2 di 2
    • We recommend that you clean your microwave before proceeding, as any nasty gunk on the bottom may end up stuck to the iOpener.

    • Place the iOpener in the center of the microwave.

    • For carousel microwaves: Make sure the plate spins freely. If your iOpener gets stuck, it may overheat and burn.

  2. Apple Watch Screen Replacement: passo 2, immagine 1 di 1
    • Heat the iOpener for thirty seconds.

    • Throughout the repair procedure, as the iOpener cools, reheat it in the microwave for an additional thirty seconds at a time.

    • Be careful not to overheat the iOpener during the repair. Overheating may cause the iOpener to burst. Do not attempt to heat over 100ËšC (212ËšF).

    • Never touch the iOpener if it appears swollen.

    • If the iOpener is still too hot in the middle to touch, continue using it while waiting for it to cool down some more before reheating. A properly heated iOpener should stay warm for up to 10 minutes.

  3. Apple Watch Screen Replacement: passo 3, immagine 1 di 1
    • Remove the iOpener from the microwave, holding it by one of the two flat ends to avoid the hot center.

    • The iOpener will be very hot, so be careful when handling it. Use an oven mitt if necessary.

  4. Apple Watch Screen Replacement, Alternate iOpener heating method: passo 4, immagine 1 di 2 Apple Watch Screen Replacement, Alternate iOpener heating method: passo 4, immagine 2 di 2
    • If you don't have a microwave, follow this step to heat your iOpener in boiling water.

    • Fill a pot or pan with enough water to fully submerge an iOpener.

    • Heat the water to a boil. Turn off the heat.

    • Place an iOpener into the hot water for 2-3 minutes. Make sure the iOpener is fully submerged in the water.

    • Use tongs to extract the heated iOpener from the hot water.

    • Thoroughly dry the iOpener with a towel.

    • The iOpener will be very hot, so be careful to hold it only by the end tabs.

    • Your iOpener is ready for use! If you need to reheat the iOpener, heat the water to a boil, turn off the heat, and place the iOpener in the water for 2-3 minutes.

  5. Apple Watch Screen Replacement, Power off the Apple Watch: passo 5, immagine 1 di 2 Apple Watch Screen Replacement, Power off the Apple Watch: passo 5, immagine 2 di 2
  6. Apple Watch Screen Replacement, Apply heat: passo 6, immagine 1 di 1
    • Prepare an iOpener (or grab a hair dryer or heat gun) and heat the face of the watch until it's slightly too hot to touch.

    • Leave the iOpener on the watch for at least a minute to fully heat the screen and soften the adhesive holding it to the case.

    • You may need to reheat the iOpener, or move it around on the screen as sections cool, to heat the screen enough to pry it off.

  7. Apple Watch Screen Replacement, Observe all warnings: passo 7, immagine 1 di 2 Apple Watch Screen Replacement, Observe all warnings: passo 7, immagine 2 di 2
    Attrezzo utilizzato in questo passaggio:
    Safety Glasses
    $3.19
    Compra
    • Because the gap between the screen and watch body is so thin, a sharp blade is required to separate the two. Read the following warnings carefully before proceeding.

    • Protect your fingers by keeping them completely clear of the knife. If in doubt, protect your free hand with a heavy glove, such as a leather shop glove or gardening glove.

    • Be careful not to apply too much pressure, as this might cause the knife to slip and cut you, or damage the watch.

    • Wear eye protection. The knife or glass may break, sending pieces flying.

  8. Apple Watch Screen Replacement, Pry up the screen: passo 8, immagine 1 di 3 Apple Watch Screen Replacement, Pry up the screen: passo 8, immagine 2 di 3 Apple Watch Screen Replacement, Pry up the screen: passo 8, immagine 3 di 3
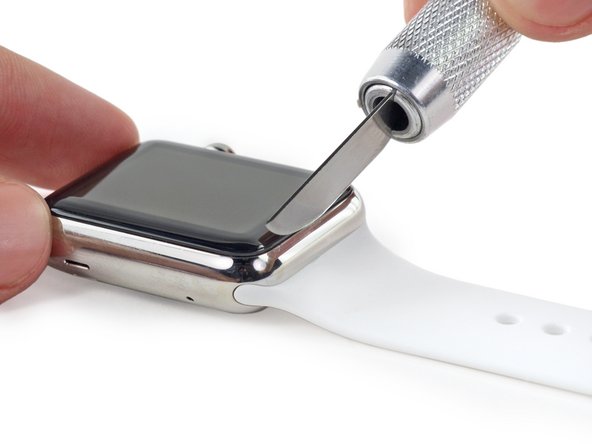
    • Using a curved blade minimizes the chance of scratching the case or cracking the glass. Only pry with the curved section of the blade, and not the tip or flat section.

    • Place the curved section of the blade in the gap between the glass and case on the lower edge of the watch face, and press firmly straight down into the gap.

    • Be very careful to maintain complete control over the knife—once the gap opens, if you're pressing too hard on the knife it may slip in and cut the battery.

    • This should wedge the gap open and cause the glass to lift slightly up from the case.

    • When the glass has lifted, gently rotate the knife down, opening the gap more by pushing the glass up.

  9. Apple Watch Screen Replacement: passo 9, immagine 1 di 3 Apple Watch Screen Replacement: passo 9, immagine 2 di 3 Apple Watch Screen Replacement: passo 9, immagine 3 di 3
    • Once you've opened the gap enough, insert the tip of an opening pick under the glass.

    • Slide the pick along the bottom edge to separate adhesive holding the screen to the case.

    • Be careful not to insert the opening pick too far. Only about 1/8" ( about 3 mm) is necessary, any deeper and you may damage cables.

  10. Apple Watch Screen Replacement: passo 10, immagine 1 di 3 Apple Watch Screen Replacement: passo 10, immagine 2 di 3 Apple Watch Screen Replacement: passo 10, immagine 3 di 3
    • Roll the opening pick up the side of the button side of the watch, gently pushing in to separate the adhesive and widening the gap as you go.

    • Remember not to push the pick in too far—it's easier to avoid this by rolling the pick, rather than dragging a tip along.

  11. Apple Watch Screen Replacement: passo 11, immagine 1 di 3 Apple Watch Screen Replacement: passo 11, immagine 2 di 3 Apple Watch Screen Replacement: passo 11, immagine 3 di 3
    • Work the pick around the top right corner, and roll it along the top edge of the screen.

  12. Apple Watch Screen Replacement: passo 12, immagine 1 di 3 Apple Watch Screen Replacement: passo 12, immagine 2 di 3 Apple Watch Screen Replacement: passo 12, immagine 3 di 3
    • Continue working the pick around the perimeter of the screen, rolling down along the left side to cut the last of the adhesive.

    • Leave the pick in place to keep the adhesive from resealing the screen in place.

  13. Apple Watch Screen Replacement: passo 13, immagine 1 di 3 Apple Watch Screen Replacement: passo 13, immagine 2 di 3 Apple Watch Screen Replacement: passo 13, immagine 3 di 3
    • While holding the first pick in place, use a second to check that all of the adhesive is separated around the entire perimeter of the screen.

  14. Apple Watch Screen Replacement: passo 14, immagine 1 di 3 Apple Watch Screen Replacement: passo 14, immagine 2 di 3 Apple Watch Screen Replacement: passo 14, immagine 3 di 3
    • There are two cables connecting the screen to the inside of the watch, near the top left corner. Be careful when prying or you may damage these cables.

    • Pry slightly up on the right side of the screen, to free it from any remaining adhesive.

    • Pry up on the left to free it as well—but do not attempt to remove the screen as it is still held in place by two cables.

  15. Apple Watch Screen Replacement: passo 15, immagine 1 di 3 Apple Watch Screen Replacement: passo 15, immagine 2 di 3 Apple Watch Screen Replacement: passo 15, immagine 3 di 3
    • If you can see the top layer of your Force Touch sensor among the display adhesive, it means the two layers of the sensor separated and you're going to need to replace or repair it.

    • iFixit screen and battery repair kits come with a replacement Force Touch sensor, so if you got one of those, don't fret.

    • The top layer of the sensor may be adhered to the back of the screen—if so, push it back down and separate it.

  16. Apple Watch Screen Replacement: passo 16, immagine 1 di 3 Apple Watch Screen Replacement: passo 16, immagine 2 di 3 Apple Watch Screen Replacement: passo 16, immagine 3 di 3
    • Lift the screen up and shift it to the left, minding the display data and digitizer cables.

  17. Apple Watch Screen Replacement: passo 17, immagine 1 di 1
    • Place the watch on an elevated surface, at least 1/2" or 1 cm tall—a small box or the edge of a book will work great. This will allow the screen to hang down vertically and give better access to the battery.

    • Be careful not to bump the screen or strain the cables while you work.

  18. Apple Watch Screen Replacement: passo 18, immagine 1 di 3 Apple Watch Screen Replacement: passo 18, immagine 2 di 3 Apple Watch Screen Replacement: passo 18, immagine 3 di 3
    • Use scissors to cut one of your opening picks to about the width of the battery. Try not to leave any sharp corners.

    • Insert the modified pick between the right side of the battery and the case.

    • Use constant, steady pressure to slowly pry the battery up, separating it from the adhesive securing it to the system board.

    • Be careful not to deform or puncture the battery.

    • On the larger (42 mm) models, it's possible to accidentally pry at the system board underneath the battery. Insert the pick only far enough to get underneath the battery, not the system board.

    • If needed, apply a little high concentration isopropyl alcohol (90% or greater) around and under the battery to help weaken the adhesive.

    • Do not attempt to remove the battery as it is still connected.

  19. Apple Watch Screen Replacement: passo 19, immagine 1 di 2 Apple Watch Screen Replacement: passo 19, immagine 2 di 2
    • Rotate the battery counterclockwise to expose its connector.

  20. Apple Watch Screen Replacement: passo 20, immagine 1 di 3 Apple Watch Screen Replacement: passo 20, immagine 2 di 3 Apple Watch Screen Replacement: passo 20, immagine 3 di 3
    • Hold the battery up and out of the way, to expose the battery cable connector.

    • Use a plastic opening tool, prying against the bottom of the case to separate the battery cable connector from the watch's battery cable.

    • Remove the battery from the watch.

    • If the battery is visibly dented or deformed, it should be replaced. For best results, replace with a new battery whenever it is removed.

  21. Apple Watch Screen Replacement, Screen: passo 21, immagine 1 di 3 Apple Watch Screen Replacement, Screen: passo 21, immagine 2 di 3 Apple Watch Screen Replacement, Screen: passo 21, immagine 3 di 3
    • Fold the screen up and over to the right, to expose the cables underneath.

  22. Apple Watch Screen Replacement: passo 22, immagine 1 di 3 Apple Watch Screen Replacement: passo 22, immagine 2 di 3 Apple Watch Screen Replacement: passo 22, immagine 3 di 3
    • The display and digitizer cable connectors are secured beneath a small metal bracket that is adhered to the speaker.

    • Use a plastic opening tool to flip the bracket toward the display and up from the speaker.

    • If you simply pry toward the watch band you may tear the cables.

  23. Apple Watch Screen Replacement: passo 23, immagine 1 di 3 Apple Watch Screen Replacement: passo 23, immagine 2 di 3 Apple Watch Screen Replacement: passo 23, immagine 3 di 3
    • The bracket that contains the display and digitizer cable connections is made up of an upper and lower piece. The connectors are secured to the lower, and the upper must be removed to disconnect them.

    • Use fine-tipped tweezers to grasp the lower half of the bracket.

    • There is a small metal tab that protrudes downward from the upper metal bracket.

    • Insert a small (1 mm) flathead screwdriver between the tab and the lower bracket, and rotate the screwdriver to spread the gap.

    • This will release two tabs that hold the upper bracket to the lower, and should free the upper bracket.

  24. Apple Watch Screen Replacement: passo 24, immagine 1 di 3 Apple Watch Screen Replacement: passo 24, immagine 2 di 3 Apple Watch Screen Replacement: passo 24, immagine 3 di 3
    • The upper half of the display connector bracket is held at the upper end by a metal tab that fits into a slot in the lower bracket.

    • Grab the upper bracket with your tweezers and slide it toward the top of the watch to disengage this tab and free the bracket.

  25. Apple Watch Screen Replacement: passo 25, immagine 1 di 2 Apple Watch Screen Replacement: passo 25, immagine 2 di 2
    • Disconnect the display data and digitizer cables.

    • Be careful not to touch any of the contacts directly, as your finger oils may impede connectivity.

    • Remove the display.

Conclusione

To reassemble your device, follow our Sostituzione adesivo Apple Watch guide.

Altre 375 persone hanno completato questa guida.

Team

iFixit Membro di iFixit

Staff

135 Membri

16.732 Guide realizzate

69 Commenti

Does anyone know if I can replace my glass display for the saphier one??

dracospitfire - Replica

Yes, they are cross compatible. Look under features at Apple Watch (42 mm, Original & Series 1) Screen

Arthur Larin -

First of all WHERE CAN WE BUY A OEM GENUINE AUTHENTIC APPLE GLASS REPLACEMENT?

My question is if Apple doesnt sell oem genuine ones who will?

gleeglee217 - Replica

How much do the respective Sapphire and Gorilla Glass displays weigh by themselves?

Mac 128 - Replica

There are replacement touch screen/digitizer available on eBay. But the question is how do you separate the OLED display from your damaged touch screen to just replace the glass?

dotbear040306 - Replica

Aggiungi Commento

Visualizza Statistiche:

Ultime 24 Ore: 168

Ultimi 7 Giorni: 1,124

Ultimi 30 Giorni: 5,207

Tutti i Tempi: 1,452,381