Introduzione
The first Time Capsules were not mechanically ventilated (the fan only kicks in if the hard drive heats up, which never happens), the original capacitors degrade and eventually fail (they bulge).
Proceeding slowly, you have to open the power supply board (you will put the scotches back on when you have finished handling them), then unsolder the old ones (always change both even if only one is dead), solder on the new ones and reassemble.
Handling is simple if you know how to use a precision soldering iron and screwdriver and can provide years of service. For my Time Capsule, the 500 GB hard drive has been replaced by a 3 TB which works perfectly.
Cosa ti serve
-
-
Using the fingers or a blunt, plastic tool, peel away the rubber base.
-
Be careful as in some older Time Capsules, it may be that the rubber base is torn. Please perform the step slowly and with care.
-
-
-
Remove the 7 marked screws in order to remove the aluminum bottom and free the power supply board.
-
Once the bottom is removed, disconnect the fan cord from the motherboard.
-
-
-
The power supply board is not held in by any screws (removed in the previous step).
-
Disconnect the SATA power connector from the drive, the connector from the motherboard, and the power plug.
-
Gently pull out the power supply board.
-
-
-
-
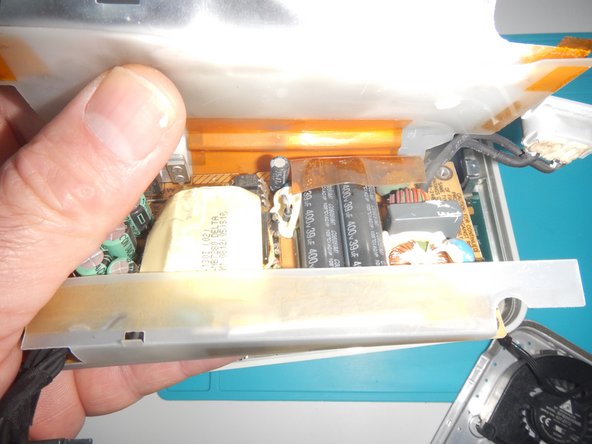
Once the card is out and the capacitors are visible, you have to look for those which are bulging.
-
The second photo is not of good quality, but it is the one on the left which is bulging.
-
In any case, you must replace the capacitors by pair. Here, it is the two big ones which will be changed.
-
-
-
The two new capacitors are in place.
-
To avoid the above problem, you have to put the small silicone tube removed from the old capacitor back, and don't hesitate to put a bit of nail polish to hold it together.
-




To reassemble your device, follow the instructions in reverse order.
To reassemble your device, follow the instructions in reverse order.
Annulla: non ho completato questa guida.
Altre 3 persone hanno completato questa guida.
Un ringraziamento speciale a questi traduttori:
100%


Questi traduttori ci stanno aiutando ad aggiustare il mondo! Vuoi partecipare?
Inizia a tradurre ›