Salta al contenuto principale

Amazon Fire HD 7 (4th Generation) Motherboard Replacement

Cosa ti serve

  1. Amazon Fire HD 7 (4th Generation) Motherboard Replacement, Motherboard: passo 1, immagine 1 di 3 Amazon Fire HD 7 (4th Generation) Motherboard Replacement, Motherboard: passo 1, immagine 2 di 3 Amazon Fire HD 7 (4th Generation) Motherboard Replacement, Motherboard: passo 1, immagine 3 di 3
    • Insert the plastic opening tool behind the rear case to free the clips holding the case together.

    • Work your way around the device to free all the clips.

  2. Amazon Fire HD 7 (4th Generation) Motherboard Replacement: passo 2, immagine 1 di 1
    • Once all clips have been released, remove the back case to reveal the inside of the device.

  3. Amazon Fire HD 7 (4th Generation) Motherboard Replacement: passo 3, immagine 1 di 3 Amazon Fire HD 7 (4th Generation) Motherboard Replacement: passo 3, immagine 2 di 3 Amazon Fire HD 7 (4th Generation) Motherboard Replacement: passo 3, immagine 3 di 3
    • Remove the nine silver screws located around the motherboard with the T5 Torx screwdriver.

  4. Amazon Fire HD 7 (4th Generation) Motherboard Replacement: passo 4, immagine 1 di 3 Amazon Fire HD 7 (4th Generation) Motherboard Replacement: passo 4, immagine 2 di 3 Amazon Fire HD 7 (4th Generation) Motherboard Replacement: passo 4, immagine 3 di 3
    • Remove the six black screws located around the battery and the speaker with the T5 Torx screwdriver.

    • Make your way around the battery and speaker to remove all of them.

  5. Amazon Fire HD 7 (4th Generation) Motherboard Replacement: passo 5, immagine 1 di 3 Amazon Fire HD 7 (4th Generation) Motherboard Replacement: passo 5, immagine 2 di 3 Amazon Fire HD 7 (4th Generation) Motherboard Replacement: passo 5, immagine 3 di 3
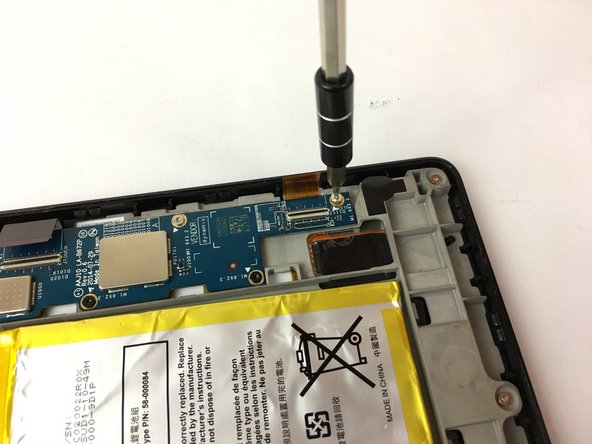
    • Carefully unplug the three wire connections by placing a plastic spudger under the connections and lifting up.

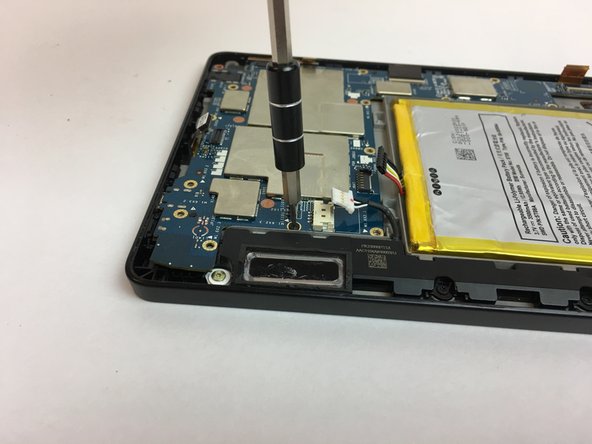
    • Disconnect the battery and speaker connections by placing the round handle spudger under the wires and lifting up and out.

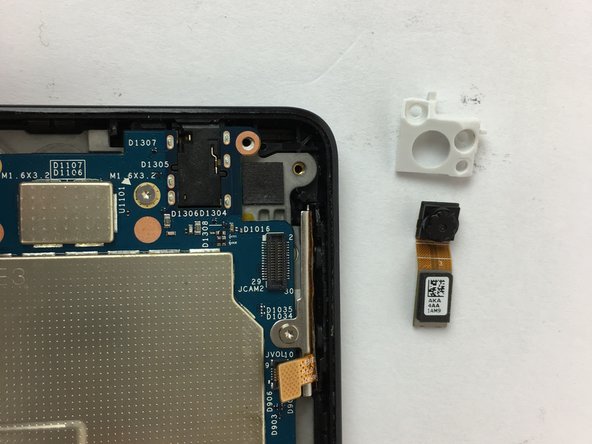
    • Disconnect the display connections from the motherboard by using the plastic spudger to lift the clamp holding the ribbon cable. Then, using the tweezers, grab the ribbon wire and pull away from the motherboard.

  6. Amazon Fire HD 7 (4th Generation) Motherboard Replacement: passo 6, immagine 1 di 2 Amazon Fire HD 7 (4th Generation) Motherboard Replacement: passo 6, immagine 2 di 2
    • Remove the two screws holding the rear camera in place using the T5 Torx screwdriver.

    • Once freed from the screws, gently lift and remove the rear camera.

    • The camera lens is sensitive. Be careful when removing and handling the rear camera.

  7. Amazon Fire HD 7 (4th Generation) Motherboard Replacement: passo 7, immagine 1 di 2 Amazon Fire HD 7 (4th Generation) Motherboard Replacement: passo 7, immagine 2 di 2
    • Now the motherboard is free to be removed.

    • Lift the motherboard up to remove it as shown in the picture.

Conclusione

To reassemble your device, follow these instructions in reverse order.

Un'altra persona ha completato questa guida.

Team

USF Tampa, Team 4-4, Passmore Fall 2016 Membro di USF Tampa, Team 4-4, Passmore Fall 2016

USFT-PASSMORE-F16S4G4

4 Membri

10 Guide realizzate

Un commento

I need to replace the stereo jack. Do I have to replace the mother board or is there a replacement jack?

Darin Guidry - Replica

Aggiungi Commento

Visualizza Statistiche:

Ultime 24 Ore: 1

Ultimi 7 Giorni: 1

Ultimi 30 Giorni: 11

Tutti i Tempi: 3,992