Introduzione
If the battery of your Alienware 15 R2 dies quickly, or fails to charge, you may consider replacing it. This will show you how to do so. When working with computers, always make sure to unplug your computer and ground yourself before reaching inner components so you don’t accidentally release an electrical charge into the sensitive technology. The discharge could potentially damage your computer’s internals.
Cosa ti serve
-
-
Place laptop upside down with the hinge facing you, then remove the two 9mm Phillips #0 screws located in the bottom left and right of the of the rear panel.
-
Remove the rear panel by using the iFixit opening tool to separate it from the back of the laptop.
-
-
-
Use the iFixit opening tool to disconnect the battery cable. Put the iFixit tool underneath the cable and then pull it to remove.
Also be sure to disconnect the black and white cable next to the small m.2.
Hard Drive also needs to be removed at the 4 screws.
-
-
-
-
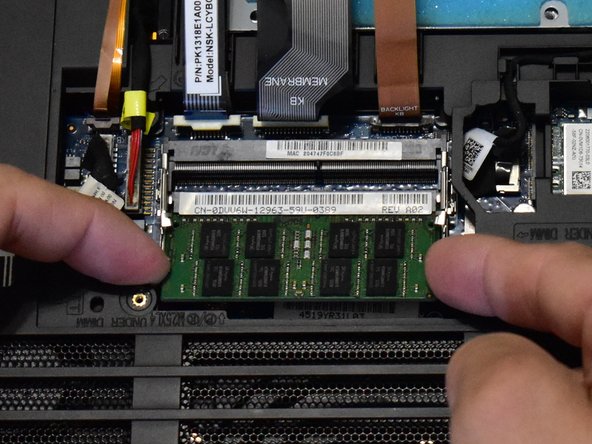
Using a Phillips #0 remove the small 1X 3mm screw behind where the RAM used to be.
The four cables in the middle; two brown and two grey. They need to be disconnected in order for them not to tear when separating the bottom shell of the computer at the later stage.
-
-
-
Remove all screws from the back casing. (4X 18mm, 4X 10mm, 4X 6mm)
-
Press your finger in the hole next to the hard drive to lift the key board.
There’s a cable still connected between the display and the top case in between these two steps. Be sure to disconnect it before pulling the two apart completely.
There is another screw with P label next to it should be removed
-


To reassemble your device, follow these instructions in reverse order.
To reassemble your device, follow these instructions in reverse order.
Annulla: non ho completato questa guida.
Altre 2 persone hanno completato questa guida.
Team

Western Carolina University, Team S1-G2, Virtue Fall 2019 Membro di Western Carolina University, Team S1-G2, Virtue Fall 2019
WCU-VIRTUE-F19S1G2
4 Membri
7 Guide realizzate
Un commento
Honestly made an account to comment on this repair guide, this is extremely incomplete. I’d go as far as saying you’re likely to damage the product by relying solely on this guide, I would turn to a breakdown on YouTube instead. I’m not sure if this is listed under the correct product.