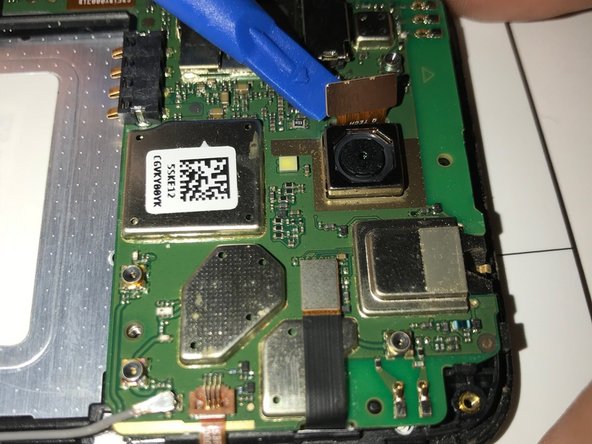
Salta al contenuto principale

Alcatel OneTouch Elevate Rear Camera Replacement

Cosa ti serve

  1. Alcatel OneTouch Elevate Rear Camera Replacement, Battery: passo 1, immagine 1 di 3 Alcatel OneTouch Elevate Rear Camera Replacement, Battery: passo 1, immagine 2 di 3 Alcatel OneTouch Elevate Rear Camera Replacement, Battery: passo 1, immagine 3 di 3
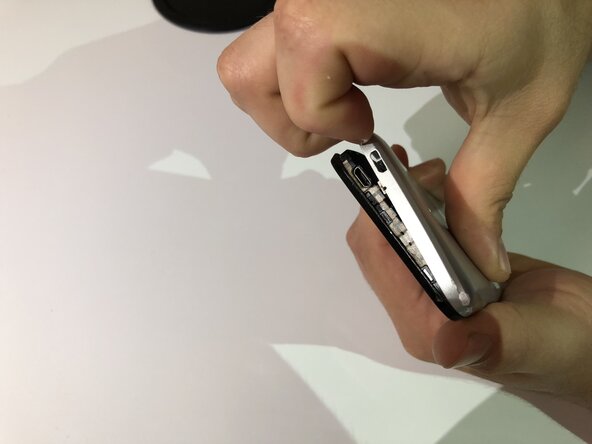
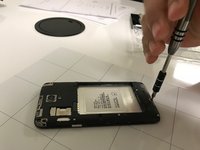
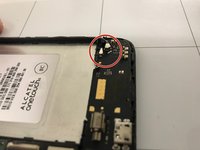
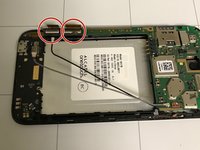
    • Locate the small indent on the lower left corner.

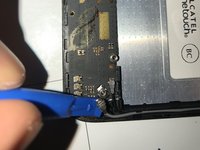
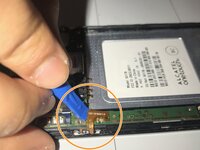
    • Use your fingers or a small plastic opening tool to lift the back cover off.

  2. Alcatel OneTouch Elevate Rear Camera Replacement: passo 2, immagine 1 di 3 Alcatel OneTouch Elevate Rear Camera Replacement: passo 2, immagine 2 di 3 Alcatel OneTouch Elevate Rear Camera Replacement: passo 2, immagine 3 di 3
    • Locate the indent between the battery and your phone.

    • Use your finger or a small plastic opening tool to lift the battery free.

  3. Alcatel OneTouch Elevate Rear Camera Replacement, Motherboard: passo 3, immagine 1 di 3 Alcatel OneTouch Elevate Rear Camera Replacement, Motherboard: passo 3, immagine 2 di 3 Alcatel OneTouch Elevate Rear Camera Replacement, Motherboard: passo 3, immagine 3 di 3
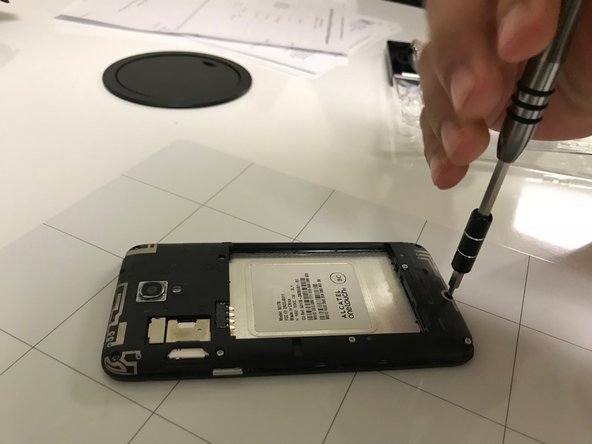
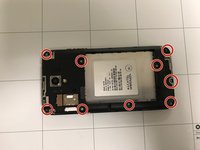
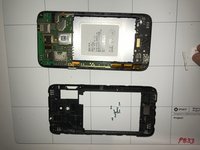
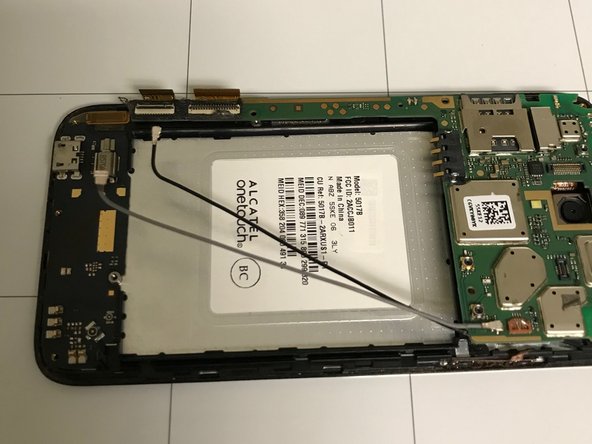
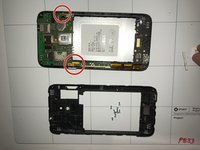
    • Using the Phillips #0 screwdriver, remove the nine screws from the phone.

  4. Alcatel OneTouch Elevate Rear Camera Replacement: passo 4, immagine 1 di 1
    • Place an iFixit opening tool between the screen and the back cover and pry it open.

  5. Alcatel OneTouch Elevate Rear Camera Replacement: passo 5, immagine 1 di 2 Alcatel OneTouch Elevate Rear Camera Replacement: passo 5, immagine 2 di 2
    • Disconnect the camera from the mother board with your prying tool.

  6. Alcatel OneTouch Elevate Rear Camera Replacement: passo 6, immagine 1 di 3 Alcatel OneTouch Elevate Rear Camera Replacement: passo 6, immagine 2 di 3 Alcatel OneTouch Elevate Rear Camera Replacement: passo 6, immagine 3 di 3
    • Remove both of the cables located on the bottom left corner of the phone.

  7. Alcatel OneTouch Elevate Rear Camera Replacement: passo 7, immagine 1 di 2 Alcatel OneTouch Elevate Rear Camera Replacement: passo 7, immagine 2 di 2
    • Remove the volume and power button using your prying tool.

    • Go underneath the bronze plate with your prying tool and carefully pry it off.

  8. Alcatel OneTouch Elevate Rear Camera Replacement: passo 8, immagine 1 di 1
    • Remove this piece that is to the right of the camera with your prying tool.

  9. Alcatel OneTouch Elevate Rear Camera Replacement: passo 9, immagine 1 di 2 Alcatel OneTouch Elevate Rear Camera Replacement: passo 9, immagine 2 di 2
    Attrezzo utilizzato in questo passaggio:
    Tweezers
    $4.99
    • Remove these two pieces by using your tweezers.

    • Carefully pull them off. There will be a black flap where you can place your tweezers to pull.

  10. Alcatel OneTouch Elevate Rear Camera Replacement: passo 10, immagine 1 di 1
    • Using the prying tool, go in-between the phone.

    • Carefully pry it off.

  11. Alcatel OneTouch Elevate Rear Camera Replacement, Back of Camera: passo 11, immagine 1 di 1
    • Find the camera.

  12. Alcatel OneTouch Elevate Rear Camera Replacement: passo 12, immagine 1 di 1
    • Gently place the opening tool head as close as possible to the edge.

  13. Alcatel OneTouch Elevate Rear Camera Replacement: passo 13, immagine 1 di 1
    • Flip the camera up carefully and slowly.

  14. Alcatel OneTouch Elevate Rear Camera Replacement: passo 14, immagine 1 di 1
    • Take the old camera out and replace it with the replacement.

    • Gently press on the camera and wait for it to stick back to the phone.

Conclusione

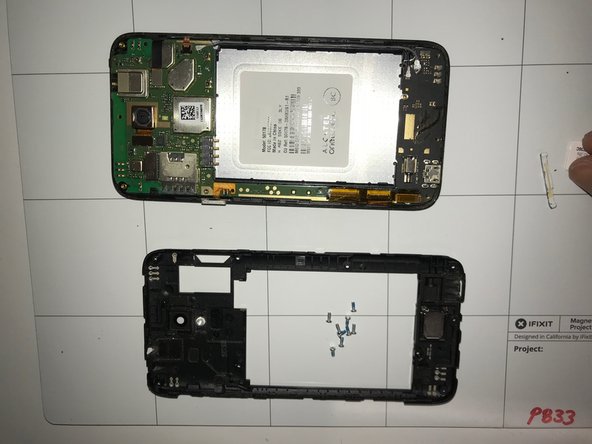
To reassemble your device, follow these instructions in reverse order.

0Commenti sulla guida

Aggiungi Commento

Visualizza Statistiche:

Ultime 24 Ore: 0

Ultimi 7 Giorni: 1

Ultimi 30 Giorni: 8

Tutti i Tempi: 241