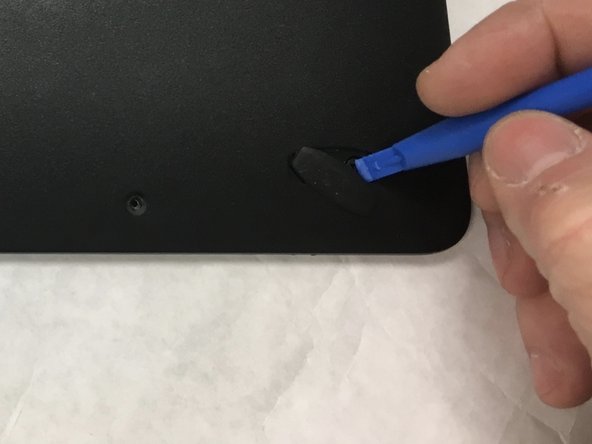
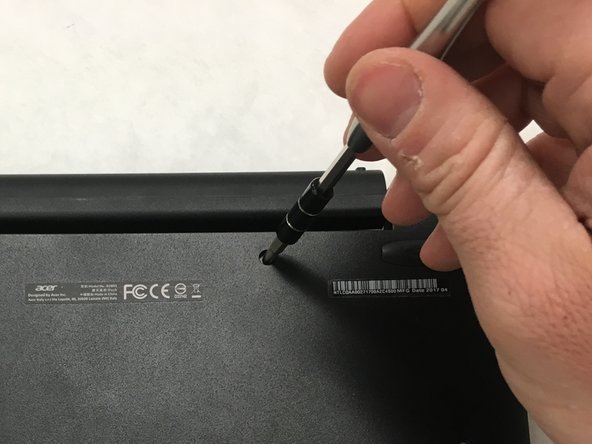
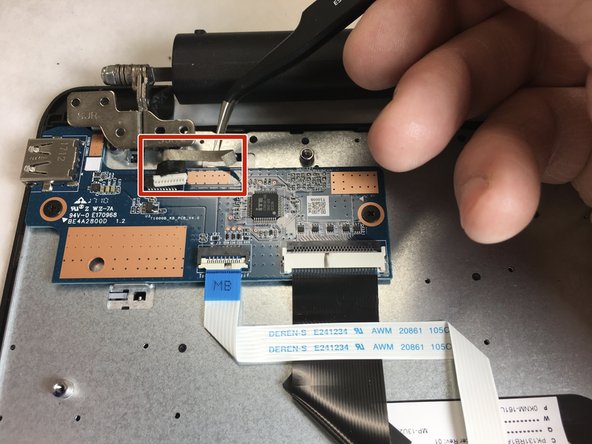
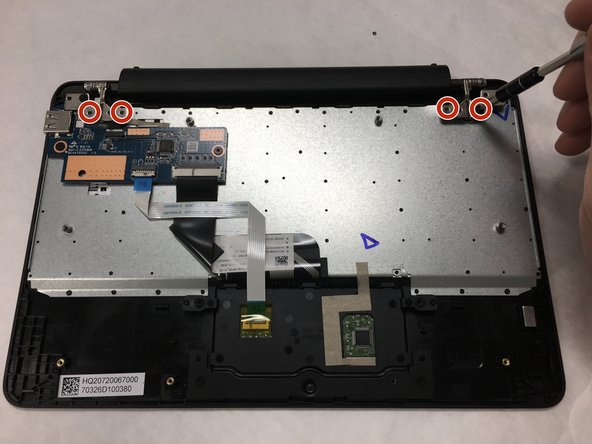
Salta al contenuto principale

Acer One 10 S1003-114M Screen Hinge Replacement

Cosa ti serve

  1. Acer One 10 S1003-114M Screen Hinge Replacement, Screen Hinge: passo 1, immagine 1 di 1
    • Open the screen.

  2. Acer One 10 S1003-114M Screen Hinge Replacement: passo 2, immagine 1 di 1
    • Remove the screen portion from the keyboard.

  3. Acer One 10 S1003-114M Screen Hinge Replacement: passo 3, immagine 1 di 2 Acer One 10 S1003-114M Screen Hinge Replacement: passo 3, immagine 2 di 2
    • Turn over the keyboard and use the plastic opening tool to remove the two adhesive backed rubber pads furthest from the hinge.

  4. Acer One 10 S1003-114M Screen Hinge Replacement: passo 4, immagine 1 di 3 Acer One 10 S1003-114M Screen Hinge Replacement: passo 4, immagine 2 di 3 Acer One 10 S1003-114M Screen Hinge Replacement: passo 4, immagine 3 di 3
    • Remove the ten total screws from the back cover with a Phillips #1 screwdriver.

    • 8 screws 4.25mm in length with 4.00mm diameter heads.

    • 2 screws 6.00mm in length with 4.00mm diameter heads.

  5. Acer One 10 S1003-114M Screen Hinge Replacement: passo 5, immagine 1 di 1
    • Use the plastic opening tool to separate the front and back halves of the keyboard.

  6. Acer One 10 S1003-114M Screen Hinge Replacement: passo 6, immagine 1 di 1
    • Lift away the loosened back cover.

  7. Acer One 10 S1003-114M Screen Hinge Replacement: passo 7, immagine 1 di 2 Acer One 10 S1003-114M Screen Hinge Replacement: passo 7, immagine 2 di 2
    • Use a pair of tweezers to remove the electrical connector for the hinge. Pull gently while wiggling the connector back and forth.

    • Remove the adhesive tape holding the wire down.

  8. Acer One 10 S1003-114M Screen Hinge Replacement: passo 8, immagine 1 di 2 Acer One 10 S1003-114M Screen Hinge Replacement: passo 8, immagine 2 di 2
    • To free the hinge, remove the 4 mount screws with a Phillips #0 screwdriver.

  9. Acer One 10 S1003-114M Screen Hinge Replacement: passo 9, immagine 1 di 2 Acer One 10 S1003-114M Screen Hinge Replacement: passo 9, immagine 2 di 2
    • Remove the disconnected hinge from the keyboard.

Conclusione

To reassemble your device, follow these instructions in reverse order.

Altre 6 persone hanno completato questa guida.

Team

IUPUI, Team S2-G6, Harley Spring 2019 Membro di IUPUI, Team S2-G6, Harley Spring 2019

IUPUI-HARLEY-S19S2G6

4 Membri

2 Guide realizzate

5 Commenti

Where can I buy the hinges of acer one 10 D16H1?

ladysam020889 - Replica

Do you know where I can find hinges of acer one s1003?

Al Monslisa - Replica

The hinge is so stiff it broke off the keyboard tabs. I need to loosen the hinge and replace the keyboard base, or hopefully just the positioning tabs (if they can be reglued).

PGI Cruiser - Replica

Tutoriel bien expliqué, merci pour tout, vous m’avez bien aidé à changer la charnière moi-même.

Francis Meylemans - Replica

Where can i buy new hinge for acer one s1003 , plss suggest me

Arvind - Replica

Aggiungi Commento

Visualizza Statistiche:

Ultime 24 Ore: 0

Ultimi 7 Giorni: 8

Ultimi 30 Giorni: 37

Tutti i Tempi: 6,224