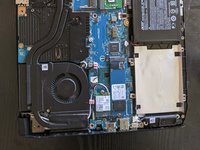
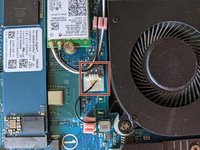
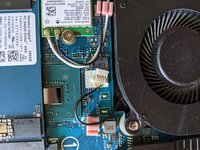
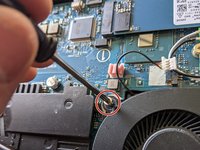
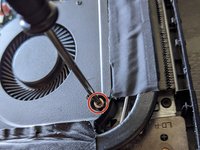
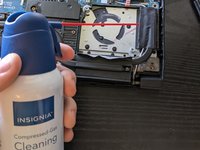
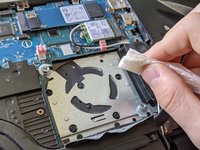
Salta al contenuto principale

Acer Nitro 5 AN515-55-53AG Internal Fan Replacement

Cosa ti serve

  1. Acer Nitro 5 AN515-55-53AG Internal Fan Replacement, Fan: passo 1, immagine 1 di 1
    • Prior to beginning, be sure to turn off the device and unplug it from the power source.

    • Set the device on a flat surface with the vents facing upwards.

  2. Acer Nitro 5 AN515-55-53AG Internal Fan Replacement: passo 2, immagine 1 di 2 Acer Nitro 5 AN515-55-53AG Internal Fan Replacement: passo 2, immagine 2 di 2
    • Use your Phillips #0 screwdriver to remove the eleven screws holding down the laptop's bottom cover.

  3. Acer Nitro 5 AN515-55-53AG Internal Fan Replacement: passo 3, immagine 1 di 3 Acer Nitro 5 AN515-55-53AG Internal Fan Replacement: passo 3, immagine 2 di 3 Acer Nitro 5 AN515-55-53AG Internal Fan Replacement: passo 3, immagine 3 di 3
    Attrezzo utilizzato in questo passaggio:
    Plastic Cards
    $2.99
    Compra
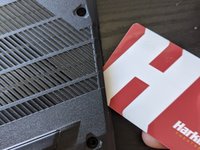
    • Remove the laptop's bottom cover using an opening tool or plastic card.

    • Do not use a metal tool during this process. Doing so would risk damaging both the cover and the electrical components.

    • Be gentle during removal. Do not force the cover off, or it may break.

  4. Acer Nitro 5 AN515-55-53AG Internal Fan Replacement: passo 4, immagine 1 di 2 Acer Nitro 5 AN515-55-53AG Internal Fan Replacement: passo 4, immagine 2 di 2
    • Detach the fan's wire connector from the motherboard.

  5. Acer Nitro 5 AN515-55-53AG Internal Fan Replacement: passo 5, immagine 1 di 1
    • Peel up the two strips of black tape holding the fan.

    • Do not peel the tape all the way off. Leave the tape attached to the heatsink.

  6. Acer Nitro 5 AN515-55-53AG Internal Fan Replacement: passo 6, immagine 1 di 3 Acer Nitro 5 AN515-55-53AG Internal Fan Replacement: passo 6, immagine 2 di 3 Acer Nitro 5 AN515-55-53AG Internal Fan Replacement: passo 6, immagine 3 di 3
    • Remove the two screws holding the fan in place using a Phillips #0 screwdriver.

    • Remove the old fan by pulling it directly up.

  7. Acer Nitro 5 AN515-55-53AG Internal Fan Replacement: passo 7, immagine 1 di 2 Acer Nitro 5 AN515-55-53AG Internal Fan Replacement: passo 7, immagine 2 di 2
    • While the fan is out, clean the space with a cloth or a can of compressed air. Clean the fan vents and plate of any dust.

Conclusione

To reassemble your device, follow these instructions in reverse order.

Altre 2 persone hanno completato questa guida.

Un commento

на an515-55-534c система охлаждения так же разбирается ? или это он и есть ?

Антон Хабаров - Replica

Aggiungi Commento

Visualizza Statistiche:

Ultime 24 Ore: 10

Ultimi 7 Giorni: 56

Ultimi 30 Giorni: 174

Tutti i Tempi: 5,049