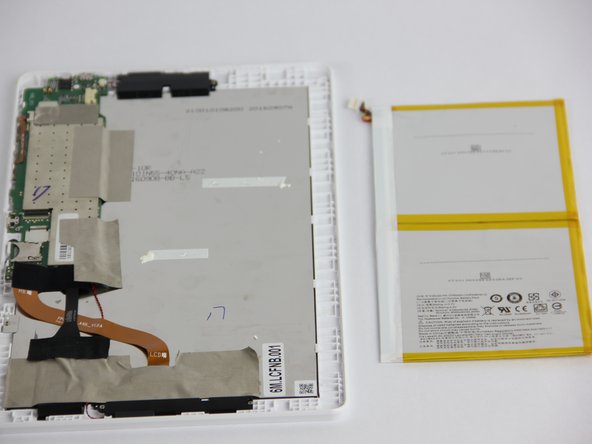
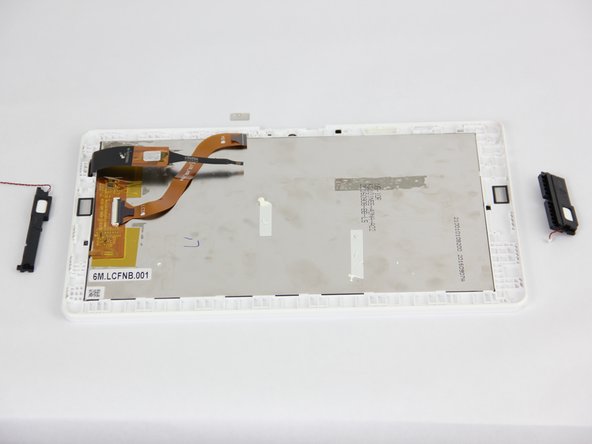
Salta al contenuto principale

Acer Iconia One 10 B3-A30 Repair Screen Replacement

Cosa ti serve

  1. Acer Iconia One 10 B3-A30 Repair Screen Replacement, Battery: passo 1, immagine 1 di 2 Acer Iconia One 10 B3-A30 Repair Screen Replacement, Battery: passo 1, immagine 2 di 2
    • Make sure the device is powered off.

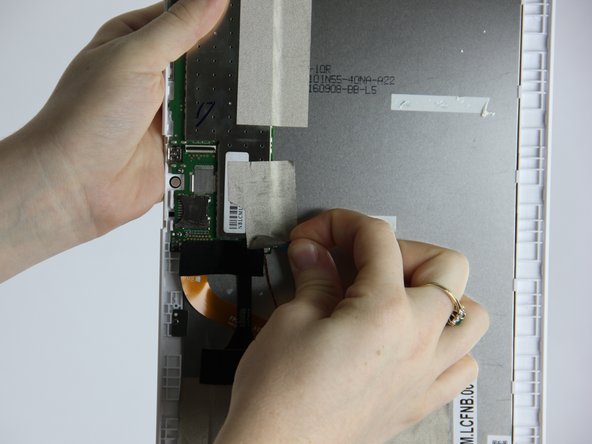
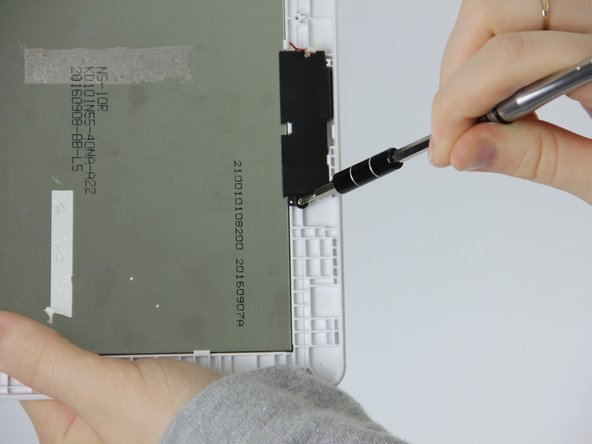
    • Open media port cover at the top of the tablet.

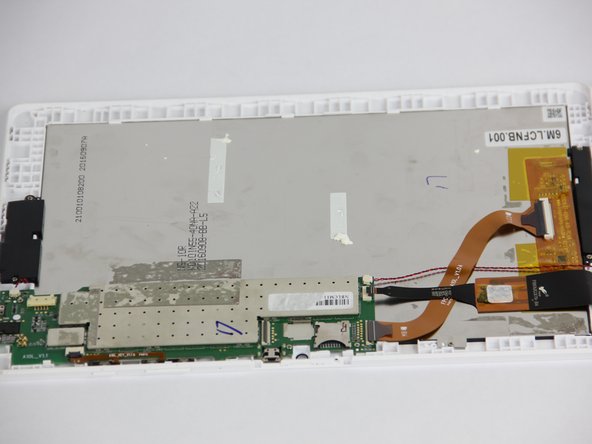
    • Use the Phillips #00 screwdriver to remove the 1 mm screw.

  2. Acer Iconia One 10 B3-A30 Repair Screen Replacement: passo 2, immagine 1 di 3 Acer Iconia One 10 B3-A30 Repair Screen Replacement: passo 2, immagine 2 di 3 Acer Iconia One 10 B3-A30 Repair Screen Replacement: passo 2, immagine 3 di 3
    • Using the metal spudger, carefully pry open the back cover.

  3. Acer Iconia One 10 B3-A30 Repair Screen Replacement: passo 3, immagine 1 di 1
    • Remove small section of grey tape.

  4. Acer Iconia One 10 B3-A30 Repair Screen Replacement: passo 4, immagine 1 di 2 Acer Iconia One 10 B3-A30 Repair Screen Replacement: passo 4, immagine 2 di 2
    • Unplug the connection cord from the motherboard.

  5. Acer Iconia One 10 B3-A30 Repair Screen Replacement: passo 5, immagine 1 di 3 Acer Iconia One 10 B3-A30 Repair Screen Replacement: passo 5, immagine 2 di 3 Acer Iconia One 10 B3-A30 Repair Screen Replacement: passo 5, immagine 3 di 3
    • Try to remove the battery by pulling on the blue tabs.

    • If unsuccessful, use the black plastic spudger to gently break the glue bonds underneath and pull up to remove the battery.

    • Be very cautious not to puncture or bend the battery.

  6. Acer Iconia One 10 B3-A30 Repair Screen Replacement, Motherboard: passo 6, immagine 1 di 3 Acer Iconia One 10 B3-A30 Repair Screen Replacement, Motherboard: passo 6, immagine 2 di 3 Acer Iconia One 10 B3-A30 Repair Screen Replacement, Motherboard: passo 6, immagine 3 di 3
    • Remove all of the tape surrounding the motherboard.

  7. Acer Iconia One 10 B3-A30 Repair Screen Replacement: passo 7, immagine 1 di 2 Acer Iconia One 10 B3-A30 Repair Screen Replacement: passo 7, immagine 2 di 2
    • Starting with the 2 large connections use the plastic opening tool to gently pry on the connections and pop them out.

    • Now, disconnect the two smaller black and red cords from the motherboard.

  8. Acer Iconia One 10 B3-A30 Repair Screen Replacement: passo 8, immagine 1 di 1
    • Scrape away the small square sticker to reveal one small screw. Use the Phillips #00 screwdriver to remove the screw.

    • Using the same screwdriver remove the other three screws on the motherboard.

  9. Acer Iconia One 10 B3-A30 Repair Screen Replacement: passo 9, immagine 1 di 2 Acer Iconia One 10 B3-A30 Repair Screen Replacement: passo 9, immagine 2 di 2
    • Using the small plastic tool, carefully pry the motherboard out of the device.

  10. Acer Iconia One 10 B3-A30 Repair Screen Replacement, Screen: passo 10, immagine 1 di 3 Acer Iconia One 10 B3-A30 Repair Screen Replacement, Screen: passo 10, immagine 2 di 3 Acer Iconia One 10 B3-A30 Repair Screen Replacement, Screen: passo 10, immagine 3 di 3
    • Using a plastic spudger pry the square connection away from the screen.

  11. Acer Iconia One 10 B3-A30 Repair Screen Replacement: passo 11, immagine 1 di 1
    • Using the Philips #00 head unscrew the screw holding in the small plate.

  12. Acer Iconia One 10 B3-A30 Repair Screen Replacement: passo 12, immagine 1 di 3 Acer Iconia One 10 B3-A30 Repair Screen Replacement: passo 12, immagine 2 di 3 Acer Iconia One 10 B3-A30 Repair Screen Replacement: passo 12, immagine 3 di 3
    • Using the Philips #00 unscrew the remaining 4 screws along the two speakers.

  13. Acer Iconia One 10 B3-A30 Repair Screen Replacement: passo 13, immagine 1 di 2 Acer Iconia One 10 B3-A30 Repair Screen Replacement: passo 13, immagine 2 di 2
    • Using the plastic spudger gently pry the screen along the plastic clips.

    • Once at least 1/2 of the screen is unclipped slide it out of the frame using hands.

Conclusione

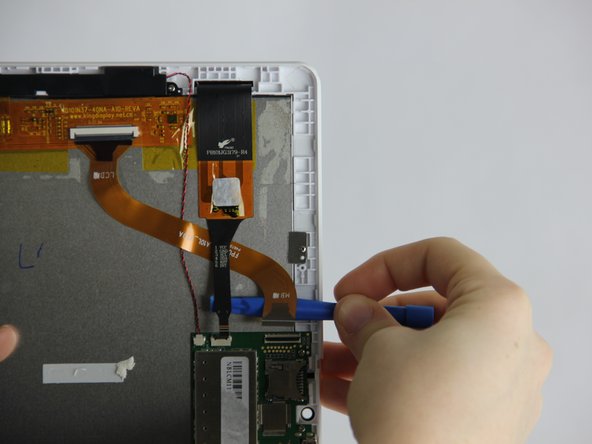
To reassemble your device, follow these instructions in reverse order.

Altre 14 persone hanno completato questa guida.

Team

USF Tampa, Team S1-G5, Nance Fall 2017 Membro di USF Tampa, Team S1-G5, Nance Fall 2017

USFT-NANCE-F17S1G5

4 Membri

5 Guide realizzate

11 Commenti

nice job people!

Johnathon Ferland - Replica

It worked! I’m very happy

marmaesker - Replica

nice job

Linh Pham

Linh Pham - Replica

This helped out a lot, thanks

feje75 - Replica

Fantastic set of instructions. Very much appreciated. Cheers very much!!

Chris Wilson - Replica

Aggiungi Commento

Visualizza Statistiche:

Ultime 24 Ore: 0

Ultimi 7 Giorni: 4

Ultimi 30 Giorni: 18

Tutti i Tempi: 12,802