Salta al contenuto principale

Acer E5-571-54FL Optical Drive Replacement

Cosa ti serve

  1. Acer E5-571-54FL Optical Drive Replacement, Battery: passo 1, immagine 1 di 1
    • Power down the laptop prior to beginning.

    • Turn the laptop over with the battery closest to your body.

  2. Acer E5-571-54FL Optical Drive Replacement: passo 2, immagine 1 di 2 Acer E5-571-54FL Optical Drive Replacement: passo 2, immagine 2 di 2
    • Insert the pointed end of a spudger into the battery release.

    • Slide the release gently all the way to the left.

    • You should hear a sound after the slide is all the way left. This lets you know the battery has disengaged.

  3. Acer E5-571-54FL Optical Drive Replacement: passo 3, immagine 1 di 2 Acer E5-571-54FL Optical Drive Replacement: passo 3, immagine 2 di 2
    • Place your hands on each end of the battery.

    • Pull the battery towards your body to remove it.

  4. Acer E5-571-54FL Optical Drive Replacement, Optical Drive: passo 4, immagine 1 di 1
    • Remove the single screw that holds the optical drive in place using the Phillips #0 screwdriver.

  5. Acer E5-571-54FL Optical Drive Replacement: passo 5, immagine 1 di 3 Acer E5-571-54FL Optical Drive Replacement: passo 5, immagine 2 di 3 Acer E5-571-54FL Optical Drive Replacement: passo 5, immagine 3 di 3
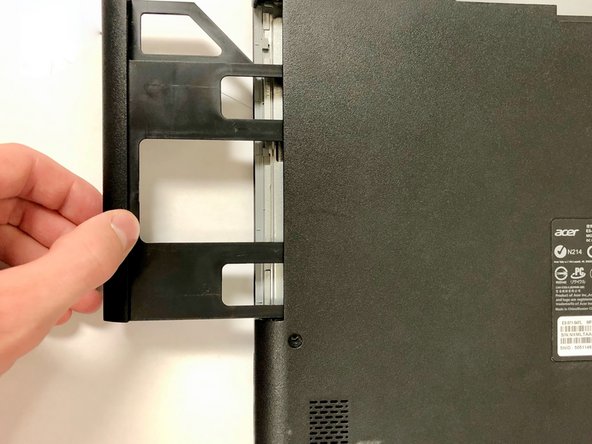
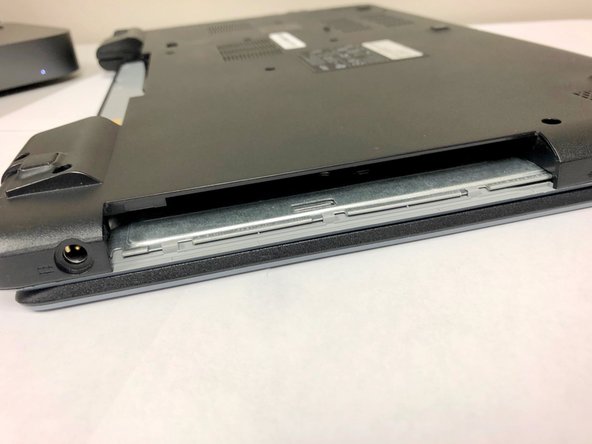
    • Slide out the old optical drive and remove it from the device.

Conclusione

To reassemble your device, follow these instructions in reverse order.

0 Commenti

Aggiungi Commento

Visualizza Statistiche:

Ultime 24 Ore: 1

Ultimi 7 Giorni: 4

Ultimi 30 Giorni: 13

Tutti i Tempi: 439