Introduzione
If the motherboard in your Acer Chromebook CP5-471-C0EX laptop (also known as Acer Chromebook 14) is faulty or damaged, it will most likely result in the laptop freezing, restarting, and showing frequent errors or the “blue screen of death.” You will likely have to replace the motherboard. Use this guide to remove and replace the motherboard.
A functional motherboard allows the computer's components to interact.
Make sure to power down your device and disconnect from any power sources before you begin.
Cosa ti serve
-
-
Carefully detach the ribbon cable connecting the battery and the motherboard.
-
-
-
Disconnect the wide black ribbon cable from the motherboard using an iFixit opening tool.
-
Disconnect the blue-tipped ribbon from the motherboard.
-
-
-
-
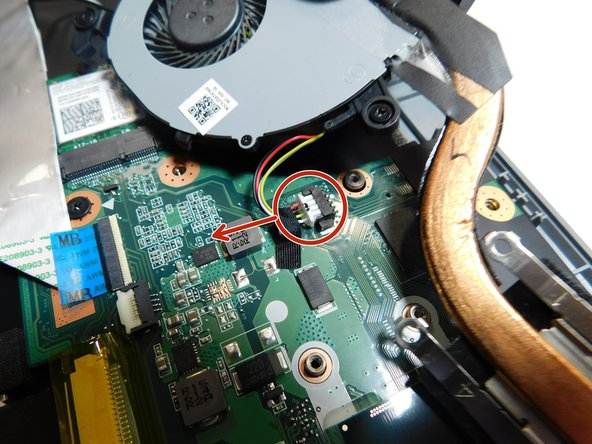
Gently pull the black and white cables up to disconnect them from the Wi-Fi card.
-
-
-
Gently pull the black and white cables up to disconnect them from the Wi-Fi card.
-
-
-
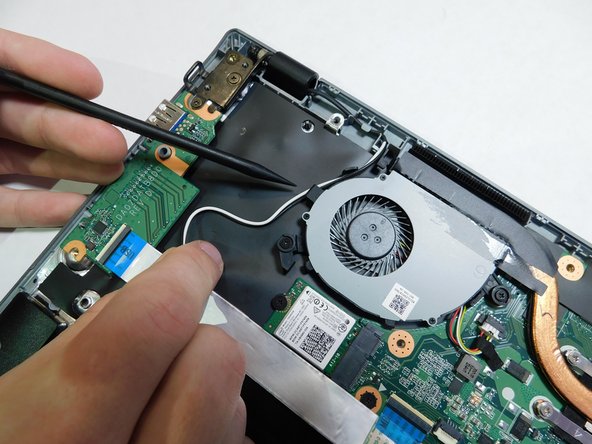
Push on the sides of the connector to gently disconnect the speaker cable from the motherboard.
-


To reassemble your device, follow these instructions in reverse order.
To reassemble your device, follow these instructions in reverse order.
Annulla: non ho completato questa guida.
Un'altra persona ha completato questa guida.

Team

Gateway, Team 1-1, Saknee Spring 2022 Membro di Gateway, Team 1-1, Saknee Spring 2022
GCC-SAKNEE-S22S1G1
4 Membri
5 Guide realizzate